HP PageWide XL 4700 Assembly Instructions 3
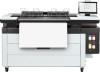
HP PageWide XL 4700 Manual
 |
View all HP PageWide XL 4700 manuals
Add to My Manuals
Save this manual to your list of manuals |
HP PageWide XL 4700 manual content summary:
- HP PageWide XL 4700 | Assembly Instructions 3 - Page 1
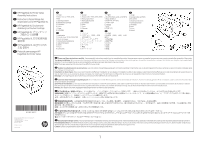
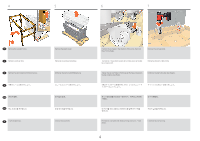
EN HP PageWide XL Printer Series Assembly Instructions FR Instructions d'assemblage des imprimantes série HP PageWide XL DE HP PageWide XL Druckerserie Anleitung zur Druckermontage JA HP PageWide XL ZHCN HP PageWide XL KO HP PageWide XL ID Petunjuk pemasangan HP PageWide XL Printer Series * - HP PageWide XL 4700 | Assembly Instructions 3 - Page 2
EN The size of the crate is: 2.30 m (90.6 in) x 1.07 m (42.1 in) x 1.61 m (63.4 in). The space required for assembly is 1.2m (4 feet) at the front and 5m (17 feet) at the side. FR La taille de l'emballage est : 2.30 m (90.6 in) x 1.07 m (42.1 in) x 1.61 m (63.4 in). L'espace requis pour l'assemblage - HP PageWide XL 4700 | Assembly Instructions 3 - Page 3
-la. Nehmen Sie die Kartons herunter, wie in der Abbildung dargestellt. Nur MFP: Entfernen Sie den Kalibrierungsblechkasten und bewahren Sie ihn auf. MFP MFP MFP Keluarkan boks yang ditunjukkan. Hanya MFP: Buka kemasan lembar kalibrasi dan simpan. Remove 24 screws (6 per side). Retirez - HP PageWide XL 4700 | Assembly Instructions 3 - Page 4
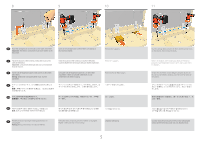
4 5 6 7 EN Remove the wooden frame. FR Retirez le cadre en bois. DE Nehmen Sie den hölzernen Rahmen heraus. JA ZHCN KO ID Lepas bingkai kayu. Remove the plastic cover. Retirez le couvercle en plastique. Entfernen Sie die Kunststoffabdeckung Lepas penutup plastik. Position the 4 wheels in - HP PageWide XL 4700 | Assembly Instructions 3 - Page 5
have 160 Nm to lift the printer. Screw in the carriage bolts to lift the lifter. Lift slightly on each side and repeat. Remove the supports. FR Placez les boulons à tête ronde au niveau des trous sur les côtés de l'élévateur. Important : Le tournevis électrique doit avoir un montant de force de - HP PageWide XL 4700 | Assembly Instructions 3 - Page 6
12 13 14 15 EN Remove the screws that attach the lifter to the printer, and remove the lifter. Repeat this process on the other side of the printer. Move the printer away from side that you will lower it, until the wheels touch the arrow marks on the opposite side. Position the 4 wheels in - HP PageWide XL 4700 | Assembly Instructions 3 - Page 7
16 17 18 19 EN Remove the 5 bolts marked with a black circle on the side you are going to use to lower the printer; use a hammer if required to release them. Note: If you do not have a forklift; use long ramps (not provided with the printer), and go straight to step 23. FR Retirez les 5 boulons - HP PageWide XL 4700 | Assembly Instructions 3 - Page 8
20 21 22 EN Lower the forklift. Caution: The printer can slide down; 2 people are required in this step. Important: Confirm that the ramp's lower surface is touching the ground as shown in the image. FR Abaissez le chariot élévateur. Attention : L'imprimante peut glisser vers le bas ; deux - HP PageWide XL 4700 | Assembly Instructions 3 - Page 9
23 EN Remove the security locks FR Retirez les verrous de sécurité DE Entfernen der Sicherheitss- chlösser JA ZHCN KO ID Lepaskan kunci pengaman 20' x1 EN Important: Do not press the paper output button before removing all the security locks. FR Important : N'appuyez pas sur le bouton de - HP PageWide XL 4700 | Assembly Instructions 3 - Page 10
26 27 28 29 EN If an extra drawer is not required; replace the cover and screws, starting with the center screw. FR Si le tiroir supplémentaire n'est pas nécessaire, replacez le couvercle et les vis, en commençant par la vis du centre. DE Wenn ein zusätzlicher Einschub nicht erforderlich ist, - HP PageWide XL 4700 | Assembly Instructions 3 - Page 11
des Tintenrestbehälters. Schließen Sie die Abdeckung der Papierzufuhr. HP PageWide XL 8200 6 2 仅限 HP PageWide XL 8200 6 取出 2 HP PageWide XL 8200 6 2 Hanya printer HP PageWide XL 8200: Lepaskan pita perekat oranye dari ke 6 keping penyambung. Lepaskan - HP PageWide XL 4700 | Assembly Instructions 3 - Page 12
34 35 36 37 EN Open the top cover. FR Ouvrez le capot supérieur. DE Öffnen Sie die obere Abdeckung. JA ZHCN KO ID Buka penutup atas. Remove 2 T15 screws and slide the top cover out. Move the lever to activate the brake. Remove the print bar lock bars by rotating, and pulling up. - HP PageWide XL 4700 | Assembly Instructions 3 - Page 13
Sie die Abdeckung wieder auf und schließen Sie die obere Abdeckung. JA MFP uniquement : Tirez sur le verrou de transport autant que possible et retirez 3900 uniquement : Retirez la mousse de la porte du chargeur. Nur MFP: Ziehen Sie die Transportsperre so weit wie möglich heraus und entfernen Sie - HP PageWide XL 4700 | Assembly Instructions 3 - Page 14
-ci a été acheté comme accessoire. Reportez-vous aux instructions incluses dans la boîte du chargeur supérieur DE MFP uniquement : Installation de la table de chargement du scanner DE Nur MFP-Drucker: Installieren Sie den Ladetisch-Scanner JA MFP ZHCN 仅限于 MFP KO MFP ID Hanya printer MFP - HP PageWide XL 4700 | Assembly Instructions 3 - Page 15
42 43 44 45 EN Place the two end pieces on the loading table. Place six screws with washers on the loading table. Place the loading table onto the scanner. FR Placez les éléments allant à l'extrémité de la table de chargement. Placez six vis avec les rondelles correspondantes sur le magasin - HP PageWide XL 4700 | Assembly Instructions 3 - Page 16
46 EN Open the scanner cover and remove the foam. Gently wipe the glass plate and the surrounding area with a lint-free cloth dampened with water. FR Ouvrez le capot du scanner et retirez la mousse. Essuyez délicatement la plaque en verre et son pourtour avec un chiffon non pelucheux imprégné d'eau. - HP PageWide XL 4700 | Assembly Instructions 3 - Page 17
49 EN Place the basket into the printer slots in the horizontal position, then close it by turning until hearing it clip into place. EN Connect the cable FR Connexion du câble DE Anschließen des Kabels JA ZHCN KO ID Menghubungkan kabel USB 5' x1 FR Placez la corbeille à caractères en position - HP PageWide XL 4700 | Assembly Instructions 3 - Page 18
Setzen Sie die neue Beinabdeckung ein und befestigen Sie sie mit zwei Schrauben und Unterlegscheiben. JA HP PageWide XL 3920、4200、4700 2 ZHCN 除 HP PageWide XL 3920、4200、4700 2 EN Note: Start up is guided by the front panel. Wait until prompted by the printer before performing each action. FR - HP PageWide XL 4700 | Assembly Instructions 3 - Page 19
Connectivity FR Connectivité DE Konnektivität JA 接続 ZHCN KO 연결 ID Konektivitas 15' x1 54 55 EN To connect the printer to Internet follow the on screen instructions. Note: The printer may reboot if a firmware update is found and installed. FR Pour connecter l'imprimante à Internet, suivez les - HP PageWide XL 4700 | Assembly Instructions 3 - Page 20
on accessory box FR Accessoires : Reportez-vous aux instructions incluses dans la boîte de l'accessoire DE Zubeh .hp.com/go/pagewide-install and completing the End of Installation Registration survey. Registering the printer has a positive impact on the services provided including unit support - HP PageWide XL 4700 | Assembly Instructions 3 - Page 21
21 - HP PageWide XL 4700 | Assembly Instructions 3 - Page 22
22 - HP PageWide XL 4700 | Assembly Instructions 3 - Page 23
23 - HP PageWide XL 4700 | Assembly Instructions 3 - Page 24
contenus dans ce document peuvent être modifiés sans préavis. Les seules garanties offertes en ce qui concerne les produits et les services de HP sont celles expressément énoncées dans les déclarations de garantie. Aucune information du présent document ne saurait être considérée comme
-
 1
1 -
 2
2 -
 3
3 -
 4
4 -
 5
5 -
 6
6 -
 7
7 -
8
-
9
-
10
-
11
-
12
-
13
-
14
-
15
-
16
-
17
-
18
-
19
-
20
-
21
-
22
-
23
-
24
 |
 |
1
© Copyright 2021 HP Development Company, L.P.
Large Format Division
Camí de Can Graells 1-21 · 08174
Sant Cugat del Vallès
Barcelona · Spain
All rights reserved
Printed in XXX
HP PageWide XL Printer Series
Assembly Instructions
Instructions d’assemblage des
imprimantes série HP PageWide XL
HP PageWide XL Druckerserie
Anleitung zur Druckermontage
HP PageWide XL プリンタ シリ
ーズ組み立て説明書
HP PageWide XL 打印机系列组
装说明
HP PageWide XL 프린터 시리즈
조립 설명서
Petunjuk pemasangan HP
PageWide XL Printer Series
EN
Please read these instructions carefully.
These assembly instructions explain how to assemble the printer. Because spare screws are supplied, some screws may remain unused after assembly of the printer.
Two phase installation:
We recommend performing installation in one phase, but if doing so in two phases (one in the partner site and the second in the customer site). In this case, skip the steps marked with
asterisks (*), and complete the set up and complete the reshipping process (described in service manual).
Note:
The images appearing in this document may differ from your printer.
FR
Veuillez lire attentivement ces instructions.
Ces instructions d’assemblage expliquent comment assembler l’imprimante. Des vis de rechange étant fournies, certaines vis pourront rester inutilisées après
l’assemblage de l’imprimante.
Installation en deux étapes:
Nous vous recommandons d’effectuer l’installation en une étape; si l’installation se fait en deux étapes, la première doit être effectuée sur le site du partenaire et la seconde sur le
site du client. Dans ce cas, ignorez les étapes marquées d’un astérisque (*) et terminez la configuration le processus de réexpédition (décrit dans le manuel d’entretien).
Remarque :
Les images figurant dans le présent document peuvent être différentes de votre imprimante.
DE
Lesen Sie diese Anleitungen sorgfältig durch.
Dieses Dokument enthält Anleitungen für den Zusammenbau des Druckers. Zum Lieferumfang gehören Ersatzschrauben, sodass nach dem Zusammenbau
einige Schrauben übrig bleiben.
Zwei-Phasen-Installation:
Es wird das Durchführen der Installation in einer Phase empfohlen, aber dabei in zwei Phasen (eine am Standort des Partners und die zweite am Standort des Kunden). In diesem
Fall überspringen Sie die mit einem Sternchen (*) gekennzeichneten Schritte und schließen Sie die Einrichtung und das Rücksendeverfahren (wie im Service-Handbuch) ab.
Hinweis:
Die in diesem Dokument angezeigten Abbildungen können von Ihrem Drucker abweichen.
JA
以下の指示をよくお読みください。
以下の手順では、プリンタを組み立てる方法について説明します。 予備のネジが含まれているため、ネジは何本か余る場合があります。
2段階の設定:
1段階でインストールすることを推奨しますが、2段階で行う必要がある場合(1段階はパートナーのサイトで、もう1段階は顧客のサイト)、 アスタリスク(*)が付いた手順を省略し、
セットアップを完了して、再梱包(サービス マニュアルに記載)を行います。
メモ
:本書に記載されている画像は、お使いのプリンタのものと異なる場合があります。
ZHCN
请仔细阅读这些说明。
这些组装说明对如何组装打印机进行了介绍。 由于提供了备用螺丝,在组装完打印机后,可能会剩余一些未用的螺丝。
两阶段安装:
我们建议一次性完成安装,但如果进行两个阶段安装(第一阶段在合作伙伴地点完成,第二阶段在客户地点完成)。 在这种情况下,请跳过标有星号 (*) 的步骤,完成设置后将打印机
重新打包(参见维修手册)。
注意:
本文档中显示的图像可能与您的打印机上显示的图像有所不同。
KO
이 설명서를 주의깊게 읽으십시오.
이 조립 지침에서는 프린터 조립 방법을 설명합니다. 나사는 여유 있게 제공되므로 프린터 조립이 끝난 뒤 남을 수 있습니다.
2단계 설치:
HP는 설치 작업을 한번에 마칠 것을 권장하지만 협력사 현장 및 고객 현장에서 두 번에 걸쳐 설치할 경우 서비스 설명서에 설명된 바와 같이 별표(*)로 표시된 단계를 건너뛰고 설치를 완료한 다음
재운송하십시오.
참고:
이 문서에 표시된 이미지는 사용 중인 프린터와 다를 수 있습니다.
ID
Baca petunjuk ini dengan cermat.
Petunjuk pemasangan ini menjelaskan tentang cara memasang printer. Karena tersedianya sekrup cadangan, maka tidak semua sekrup akan digunakan pada pemasangan printer ini.
Pemasangan dua fasa:
Kami merekomendasikan pemasangan dengan satu fasa, kecuali jika dilakukan dengan
dua fasa (satu di lokasi mitra) dan satu lagi
di lokasi pelanggan. Dalam kasus ini, abaikan langkah-langkah yang
ditandai dengan asterik (*), lalu lakukan pengaturan dan proses pengiriman ulang (yang dijelaskan dalam panduan pengguna servis).
Catatan:
Gambar yang ditampilkan dalam dokumen ini mungkin berbeda dengan printer Anda.
DE
FR
EN
EN
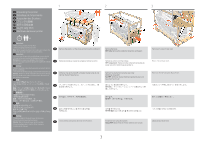
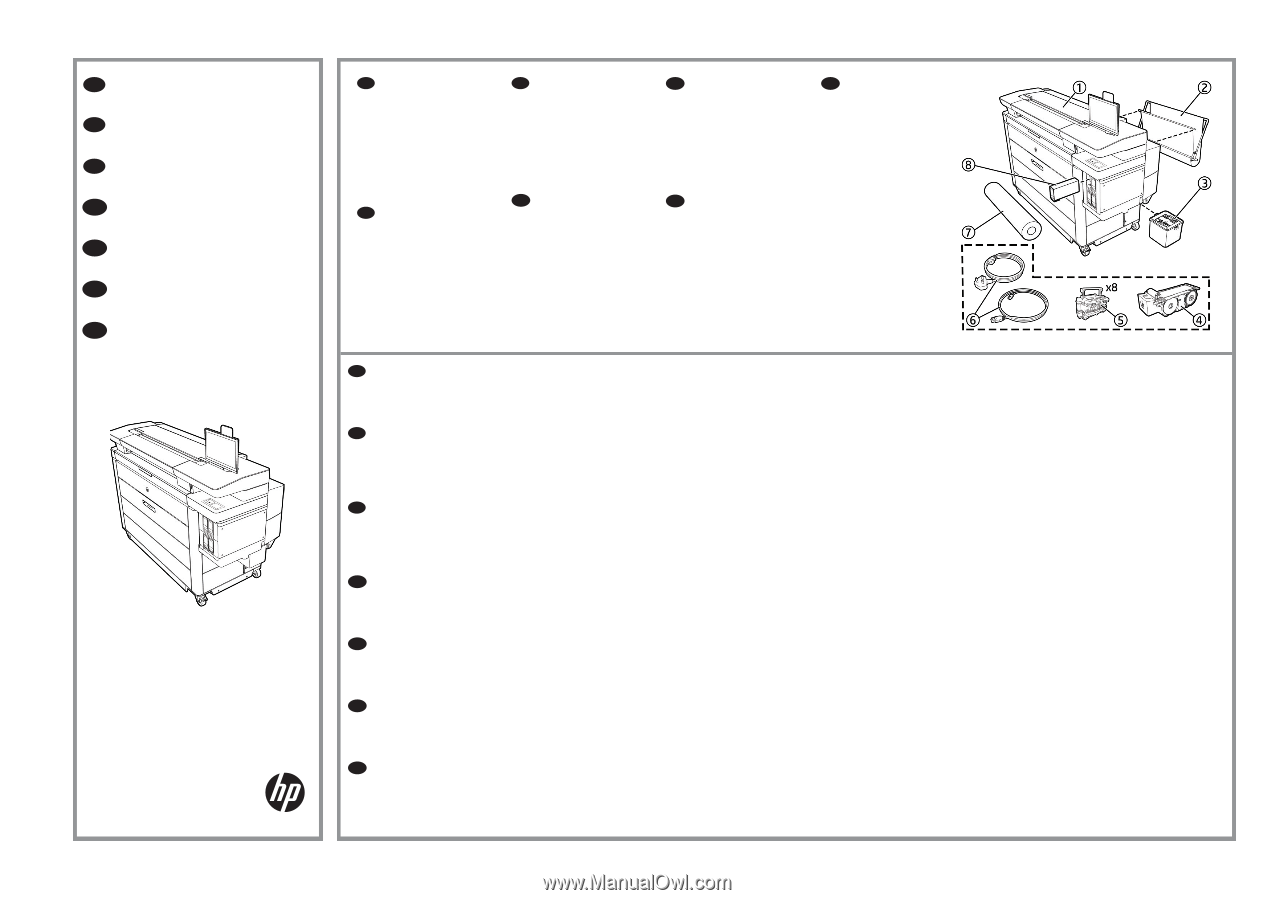
1. Printer
2. Basket (except 3920, 4200,
4700)
3. Cleaning container
4. Maintenance cartridge
5. Printheads
6. Cables
7. Paper
8. Cartridges
FR
1. Imprimante
2. Corbeille (sauf 3920, 4200, 4700)
3. Bac de nettoyage
4. Cartouche de maintenance
5. Têtes d’impression
6. Câbles
7. Papier
8. Cartouches
DE
1. Drucker
2. Ablage (außer 3920, 4200, 4700)
3. Reinigungsbehälter
4. Wartungskartusche
5. Druckköpfe
6. Kabel
7. Papier
8. Patronen
JA
1. プリンタ
2. バスケット (3920、4200
、4700を除く)
3. クリーニング コンテナ
4. メンテナンス カートリッジ
5. プリントヘッド
6. ケーブル
7. 用紙
8. カートリッジ
KO
1. 프린터
2. 바스켓 (3920, 4200, 4700 제외)
3. 청소 컨테이너
4. 유지보수 카트리지
5. 프린트 헤드
6. 케이블
7. 용지
8. 카트리지
ZHCN
1. 打印机
2. 收纸架 (3920、4200、4700
除外)
3. 清洁容器
4. 维护墨盒
5. 打印头
6. 电缆
7. 纸张
8. 墨盒
ID
1. Printer
2. Keranjang (kecuali 3920,
4200, 4700)
3. Wadah pembersihan
4. Kartrid perawatan
5. Printhead
6. Kabel
7. Kertas
8. Kartrid
*6CC85-90017*
6CC85-900??
ZHCN
KO
ID
JA