HP Pro Mini 260 G9 Desktop PC Maintenance and Service Guide - Page 34
Remove the Phillips screw, Pull the module out of the socket
 |
View all HP Pro Mini 260 G9 Desktop PC manuals
Add to My Manuals
Save this manual to your list of manuals |
Page 34 highlights
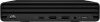
1. Locate the WLAN module (2) on the system board. 2. If installed, remove the plastic piece that covers the antenna connectors (1). 3. Disconnect the antenna cables from the module (2). 4. Remove the Phillips screw (3) that secures the module to the computer. 5. Pull the module out of the socket (4). NOTE: Computer appearance might vary. WLAN module 27
-
 1
1 -
2
-
3
-
4
-
5
-
6
-
7
-
8
-
9
-
10
-
11
-
12
-
13
-
14
-
15
-
16
-
17
-
18
-
19
-
20
-
21
-
22
-
23
-
24
-
25
-
26
-
27
-
28
-
 29
29 -
 30
30 -
 31
31 -
 32
32 -
 33
33 -
 34
34 -
 35
35 -
 36
36 -
 37
37 -
 38
38 -
 39
39 -
40
-
41
-
42
-
43
-
44
-
45
-
46
-
47
-
48
-
49
-
50
-
51
-
52
-
53
-
54
-
55
-
56
-
57
-
58
-
59
-
60
-
61
-
62
-
63
-
64
-
65
-
66
-
67
-
68
-
69
-
70
-
71
-
72
-
73
-
74
-
75
-
76
-
77
-
78
-
79
-
80
-
81
-
82
-
83
-
84
-
85
-
86
-
87
-
88
-
89
-
90
-
91
-
92
-
93
-
94
-
95
-
96
-
97
-
98
-
99
-
100
-
101
-
102
-
103
-
104
-
105
-
106
-
107
-
108
-
109
-
110
 |
 |

1.
Locate the WLAN module
(2)
on the system board.
2.
If installed, remove the plastic piece that covers the antenna connectors
(1)
.
3.
Disconnect the antenna cables from the module
(2)
.
4.
Remove the Phillips screw
(3)
that secures the module to the computer.
5.
Pull the module out of the socket
(4)
.
NOTE:
Computer appearance might vary.
WLAN module
27