HP ProBook 430 HP ProBook 430 G1 Notebook PC Maintenance and Service Guide - Page 96
Using MultiBoot, About the boot device order, Choosing MultiBoot preferences
 |
View all HP ProBook 430 manuals
Add to My Manuals
Save this manual to your list of manuals |
Page 96 highlights
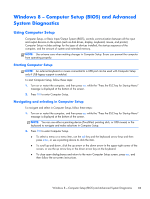
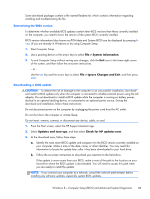
BIOS installation procedures vary. Follow any instructions that are displayed on the screen after the download is complete. If no instructions are displayed, follow these steps: 1. From the Start screen, type e, and then click File Explorer. 2. Click your hard drive designation. The hard drive designation is typically Local Disk (C:). 3. Using the hard drive path you recorded earlier, open the folder on your hard drive that contains the update. 4. Double-click the file that has an .exe extension (for example, filename.exe). The BIOS installation begins. 5. Complete the installation by following the on-screen instructions. NOTE: After a message on the screen reports a successful installation, you can delete the downloaded file from your hard drive. Using MultiBoot About the boot device order As the computer starts, the system attempts to boot from enabled devices. The MultiBoot utility, which is enabled at the factory, controls the order in which the system selects a boot device. Boot devices can include optical drives, diskette drives, a network interface card (NIC), hard drives, and USB devices. Boot devices contain bootable media or files that the computer needs to start and operate properly. NOTE: Some boot devices must be enabled in Computer Setup before they can be included in the boot order. You can change the order in which the computer searches for a boot device by changing the boot order in Computer Setup. You can also press esc while the "Press the ESC key for Startup Menu" message is displayed at the bottom of the screen, and then press f9. Pressing f9 displays a menu that shows the current boot devices and allows you to select a boot device. Or, you can use MultiBoot Express to set the computer to prompt you for a boot location each time the computer turns on or restarts. Choosing MultiBoot preferences You can use MultiBoot in the following ways: ● To set a new boot order that the computer uses each time it is turned on, by changing the boot order in Computer Setup. ● To dynamically choose the boot device, by pressing esc while the "Press the ESC key for Startup Menu" message is displayed at the bottom of the screen, and then pressing f9 to enter the Boot Device Options menu. ● To use MultiBoot Express to set variable boot orders. This feature prompts you for a boot device each time the computer is turned on or restarted. 86 Chapter 7 Computer Setup (BIOS) and Advanced System Diagnostics
-
 1
1 -
2
-
3
-
4
-
5
-
6
-
7
-
8
-
9
-
10
-
11
-
12
-
13
-
14
-
15
-
16
-
17
-
18
-
19
-
20
-
21
-
22
-
23
-
24
-
25
-
26
-
27
-
28
-
29
-
30
-
31
-
32
-
33
-
34
-
35
-
36
-
37
-
38
-
39
-
40
-
41
-
42
-
43
-
44
-
45
-
46
-
47
-
48
-
49
-
50
-
51
-
52
-
53
-
54
-
55
-
56
-
57
-
58
-
59
-
60
-
61
-
62
-
63
-
64
-
65
-
66
-
67
-
68
-
69
-
70
-
71
-
72
-
73
-
74
-
75
-
76
-
77
-
78
-
79
-
80
-
81
-
82
-
83
-
84
-
85
-
86
-
87
-
88
-
89
-
90
-
 91
91 -
 92
92 -
 93
93 -
 94
94 -
 95
95 -
 96
96 -
 97
97 -
 98
98 -
 99
99 -
 100
100 -
 101
101 -
102
-
103
-
104
-
105
-
106
-
107
-
108
-
109
-
110
-
111
-
112
-
113
-
114
-
115
-
116
-
117
-
118
-
119
-
120
-
121
-
122
-
123
-
124
-
125
-
126
-
127
-
128
-
129
-
130
-
131
-
132
-
133
-
134
-
135
-
136
-
137
-
138
-
139
 |
 |