HP StorageWorks 4/32 HP StorageWorks DC and DC04 SAN Backbone Director Switche - Page 30
Site preparation, unpacking the DC SAN Director
 |
View all HP StorageWorks 4/32 manuals
Add to My Manuals
Save this manual to your list of manuals |
Page 30 highlights
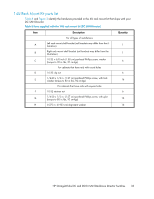
Installation task Time estim- Items required ate Installing SFP and XFP (10-Gb/s) 30 minutes SFP and XFP (10-Gb/s) optical transceivers optical transceivers Attaching fiber optic cables, cable 60 minutes Fiber optic cables, cable ties, and pillars ties, and cable guides Establishing serial connection, logging on to DC SAN Director, and configuring IP addresses 10 minutes Serial cable (provided in the DC SAN Director accessory kit) One workstation computer with a serial port or terminal server port and a terminal emulator application (such as HyperTerminal) Three Ethernet addresses: one each for the DC SAN Director, CP blade, and Core switch blade Installing Ethernet cable(s) and configuring the DC SAN Director name, policies, domain ID, PIDs, or additional system parameters 20 minutes Ethernet cabling (optional) for Telnet access. All other configuration parameters are optional. Refer to the HP StorageWorks Fabric OS 6.2.x administrator guide for Port Identifier (PID). Site preparation, unpacking the DC SAN Director IMPORTANT: See "Regulatory compliance and safety notices" on page 229 for important safety guidelines before setting up the DC SAN Director. The following steps are required to ensure correct installation and operation: 1. Provide a space that is 14 rack units (14U) high, 61.29 cm (24.09 in.) deep, and 43.74 cm (17.22 in.). 1U is equal to 4.45 cm (1.75 in.) 2. Plan to install the DC SAN Director with the non-port side facing the aisle. The DC SAN Director can be installed facing either direction, if serviceability and cooling requirements are met. 3. Plan for cable management before installing the chassis (see "Managing cables" on page 43). Cables can be managed in a variety of ways, such as by routing cables below the chassis, to either side of the chassis, through cable channels on the sides of the cabinet, or by using patch panels. 30 DC SAN Director Installation
-
 1
1 -
2
-
3
-
4
-
5
-
6
-
7
-
8
-
9
-
10
-
11
-
12
-
13
-
14
-
15
-
16
-
17
-
18
-
19
-
20
-
21
-
22
-
23
-
24
-
 25
25 -
 26
26 -
 27
27 -
 28
28 -
 29
29 -
 30
30 -
 31
31 -
 32
32 -
 33
33 -
 34
34 -
 35
35 -
36
-
37
-
38
-
39
-
40
-
41
-
42
-
43
-
44
-
45
-
46
-
47
-
48
-
49
-
50
-
51
-
52
-
53
-
54
-
55
-
56
-
57
-
58
-
59
-
60
-
61
-
62
-
63
-
64
-
65
-
66
-
67
-
68
-
69
-
70
-
71
-
72
-
73
-
74
-
75
-
76
-
77
-
78
-
79
-
80
-
81
-
82
-
83
-
84
-
85
-
86
-
87
-
88
-
89
-
90
-
91
-
92
-
93
-
94
-
95
-
96
-
97
-
98
-
99
-
100
-
101
-
102
-
103
-
104
-
105
-
106
-
107
-
108
-
109
-
110
-
111
-
112
-
113
-
114
-
115
-
116
-
117
-
118
-
119
-
120
-
121
-
122
-
123
-
124
-
125
-
126
-
127
-
128
-
129
-
130
-
131
-
132
-
133
-
134
-
135
-
136
-
137
-
138
-
139
-
140
-
141
-
142
-
143
-
144
-
145
-
146
-
147
-
148
-
149
-
150
-
151
-
152
-
153
-
154
-
155
-
156
-
157
-
158
-
159
-
160
-
161
-
162
-
163
-
164
-
165
-
166
-
167
-
168
-
169
-
170
-
171
-
172
-
173
-
174
-
175
-
176
-
177
-
178
-
179
-
180
-
181
-
182
-
183
-
184
-
185
-
186
-
187
-
188
-
189
-
190
-
191
-
192
-
193
-
194
-
195
-
196
-
197
-
198
-
199
-
200
-
201
-
202
-
203
-
204
-
205
-
206
-
207
-
208
-
209
-
210
-
211
-
212
-
213
-
214
-
215
-
216
-
217
-
218
-
219
-
220
-
221
-
222
-
223
-
224
-
225
-
226
-
227
-
228
-
229
-
230
-
231
-
232
-
233
-
234
-
235
-
236
-
237
-
238
-
239
-
240
-
241
-
242
-
243
-
244
-
245
-
246
-
247
-
248
-
249
-
250
-
251
-
252
-
253
-
254
-
255
-
256
 |
 |
