HP Surestore Tape Library Model 6/60 SAN Solution Installation Guide - Page 22
Switches
 |
View all HP Surestore Tape Library Model 6/60 manuals
Add to My Manuals
Save this manual to your list of manuals |
Page 22 highlights
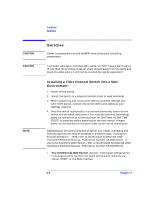
CAUTION CAUTION NOTE Installation Switches Switches Power to components should be OFF when physically installing components. To prevent damage to the fiber-optic cable, DO NOT have a bend radius of less than three inches. Keep all sharp objects away from the cable and place the cable where it will not be crushed by nearby equipment. Installing a Fibre Channel Switch into a SAN Environment: 1. Power-off the switch. 2. Install the switch in a physical location (rack or desk mounted). 3. While supporting and routing the cables to prevent damage (see CAUTION above), connect the correct GBIC and cables as your topology requires. 4. Once the switch is physically in place and connected, power-on the switch and attached components. For multiple switches (cascading), power-on one switch at a time and wait for the Power-on Self-Test (POST) to complete before powering-on the next switch. Always power-on the switches in the same order as the initial installation. Depending on the type and brand of switch you install, managing and monitoring functions may be accessed in different ways. If using the Brocade SilkWorm® 2400, refer to the Brocade SilkWorm®2400 Hardware Reference Manual, Publication Number 53-0001533-01. If using the SilkWorm 2800 Switch, refer to the Brocade SilkWorm®2800 Hardware Reference Manual, Publication Number 53-0001534-01. • The SilkWorm® 2800 Switch (16-port, front panel configuration) is managed locally via the front panel buttons and remotely via Telnet, SNMP, or the Web interface. 2-4 Chapter 2
-
 1
1 -
2
-
3
-
4
-
5
-
6
-
7
-
8
-
9
-
10
-
11
-
12
-
13
-
14
-
15
-
16
-
 17
17 -
 18
18 -
 19
19 -
 20
20 -
 21
21 -
 22
22 -
 23
23 -
 24
24 -
 25
25 -
 26
26 -
 27
27 -
28
-
29
-
30
-
31
-
32
-
33
-
34
-
35
-
36
-
37
-
38
-
39
-
40
-
41
-
42
-
43
-
44
-
45
-
46
-
47
-
48
-
49
-
50
-
51
-
52
-
53
-
54
-
55
-
56
-
57
-
58
-
59
-
60
-
61
-
62
-
63
-
64
-
65
-
66
-
67
-
68
-
69
 |
 |
