IBM 8487 User Manual - Page 27
Downloading the diagnostic program, Starting the diagnostic programs and viewing the test log
 |
UPC - 000435687531
View all IBM 8487 manuals
Add to My Manuals
Save this manual to your list of manuals |
Page 27 highlights
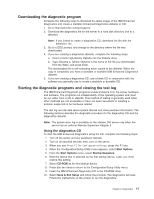
Downloading the diagnostic program Complete the following steps to download the latest image of the IBM Enhanced Diagnostics and create a startable Enhanced Diagnostics diskette or CD: 1. Go to http://www.ibm.com/pc/support/. 2. Download the diagnostics file for the server to a hard disk directory (not to a diskette). Note: If you intend to create a diagnostics CD, download the file with the extension .iso. 3. Go to a DOS prompt, and change to the directory where the file was downloaded. 4. If you are creating a diagnostics diskette, complete the following steps: a. Insert a blank high-density diskette into the diskette drive. b. Type filename a: (where filename is the name of the file you downloaded from the Web), and press Enter. The downloaded file is self-extracting when copied to the diskette. When the copy is completed, you have a startable or bootable IBM Enhanced Diagnostics diskette. 5. If you are creating a diagnostics CD, use a blank CD in conjunction with the software you generally use to create a startable or bootable CD. Starting the diagnostic programs and viewing the test log The IBM Enhanced Diagnostic programs isolate problems from the server hardware and software. The programs run independently of the operating system and must be run either from a CD or diskette. This method of testing is generally used when other methods are not accessible or have not been successful in isolating a problem suspected to be hardware related. The test log records data about system failures and other pertinent information. The following sections describe the diagnostic procedure for the diagnostics CD and the diagnostics diskette. Note: The system-error log is available on the xSeries 206 server only when the server has an optional Remote Supervisor Adapter II. Using the diagnostics CD To start the IBM Enhanced Diagnostics using the CD, complete the following steps: 1. Turn off the server and any peripheral devices. 2. Turn on all attached devices; then, turn on the server. 3. When you see Press F1 For Configuration/Setup, press the F1 key. 4. When the Configuration/Setup Utility menu appears, select Start Options. 5. From the Start Options menu, select Startup Sequence. 6. Note the device that is selected as the first startup device. Later, you must restore this setting. 7. Select CD-ROM as the first startup device. 8. Press Esc two times to return to the Configuration/Setup Utility menu. 9. Insert the IBM Enhanced Diagnostics CD in the CD-ROM drive. 10. Select Save & Exit Setup and follow the prompts. The diagnostics will load. Follow the instructions on the screen to run the diagnostics. Chapter 3. Diagnostics 17
-
 1
1 -
2
-
3
-
4
-
5
-
6
-
7
-
8
-
9
-
10
-
11
-
12
-
13
-
14
-
15
-
16
-
17
-
18
-
19
-
20
-
21
-
 22
22 -
 23
23 -
 24
24 -
 25
25 -
 26
26 -
 27
27 -
 28
28 -
 29
29 -
 30
30 -
 31
31 -
 32
32 -
33
-
34
-
35
-
36
-
37
-
38
-
39
-
40
-
41
-
42
-
43
-
44
-
45
-
46
-
47
-
48
-
49
-
50
-
51
-
52
-
53
-
54
-
55
-
56
-
57
-
58
-
59
-
60
-
61
-
62
-
63
-
64
-
65
-
66
-
67
-
68
-
69
-
70
-
71
-
72
-
73
-
74
-
75
-
76
-
77
-
78
-
79
-
80
-
81
-
82
-
83
-
84
-
85
-
86
-
87
-
88
-
89
-
90
-
91
-
92
-
93
-
94
-
95
-
96
-
97
-
98
-
99
-
100
-
101
-
102
-
103
-
104
-
105
-
106
-
107
-
108
-
109
-
110
-
111
-
112
-
113
-
114
-
115
-
116
-
117
-
118
-
119
-
120
-
121
-
122
-
123
-
124
-
125
-
126
-
127
-
128
-
129
-
130
-
131
-
132
-
133
-
134
-
135
-
136
-
137
-
138
-
139
-
140
-
141
-
142
-
143
-
144
-
145
-
146
-
147
-
148
-
149
-
150
-
151
-
152
-
153
-
154
-
155
-
156
-
157
-
158
-
159
-
160
 |
 |
