Intel SC5600BASE Service Guide - Page 55
Installing Hot Swap Drives
 |
View all Intel SC5600BASE manuals
Add to My Manuals
Save this manual to your list of manuals |
Page 55 highlights
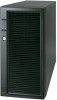
Hardware Installations and Upgrades Installing Hot Swap Drive(s) 1. Press in on the green latch (see letter "A" in Figure 45) at the end of the drive carrier to disengage it from the hot swap drive cage. Pull out on the black lever (see letter "B") to fully open the drive carrier. When the lever reaches a fully opened position, it will push the drive carrier out from the hot swap drive cage. Slide the drive carrier out of the drive cage (see letter "C"). Figure 45. Removing Drive Carrier from Hot Swap Cage 2. Remove the four screws that secure the plastic air baffle to the drive carrier. Remove the plastic air baffle. Figure 46. Removing Plastic Air Baffle from Drive Carrier 3. Secure the hard drive to the drive carrier using the four screws previously attached to the plastic air baffle. Ensure the connector end of the hard drive is facing the back of the drive carrier. The label side of the hard drive should be facing up in the drive carrier. Intel® Server Chassis SC5600 Service Guide 41
-
 1
1 -
2
-
3
-
4
-
5
-
6
-
7
-
8
-
9
-
10
-
11
-
12
-
13
-
14
-
15
-
16
-
17
-
18
-
19
-
20
-
21
-
22
-
23
-
24
-
25
-
26
-
27
-
28
-
29
-
30
-
31
-
32
-
33
-
34
-
35
-
36
-
37
-
38
-
39
-
40
-
41
-
42
-
43
-
44
-
45
-
46
-
47
-
48
-
49
-
 50
50 -
 51
51 -
 52
52 -
 53
53 -
 54
54 -
 55
55 -
 56
56 -
 57
57 -
 58
58 -
 59
59 -
 60
60 -
61
-
62
-
63
-
64
-
65
-
66
-
67
-
68
-
69
-
70
-
71
-
72
-
73
-
74
-
75
-
76
-
77
-
78
-
79
-
80
-
81
-
82
-
83
-
84
-
85
-
86
-
87
-
88
-
89
-
90
-
91
-
92
-
93
-
94
-
95
-
96
-
97
-
98
-
99
-
100
-
101
-
102
-
103
-
104
-
105
-
106
-
107
-
108
-
109
-
110
-
111
-
112
-
113
-
114
-
115
-
116
-
117
-
118
 |
 |
