Intel SC5600BASE Service Guide - Page 56
Securing Hard Drive to Drive Carrier, Inserting Drive Carrier into Hot Swap
 |
View all Intel SC5600BASE manuals
Add to My Manuals
Save this manual to your list of manuals |
Page 56 highlights
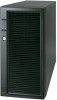
Hardware Installations and Upgrades Figure 47. Securing Hard Drive to Drive Carrier 4. With the black lever open, insert the drive carrier into the drive cage. Once inserted, rotate the black lever upwards to latch the drive carrier into position. Figure 48. Inserting Drive Carrier into Hot Swap Cage 42 Intel® Server Chassis SC5600 Service Guide
-
 1
1 -
2
-
3
-
4
-
5
-
6
-
7
-
8
-
9
-
10
-
11
-
12
-
13
-
14
-
15
-
16
-
17
-
18
-
19
-
20
-
21
-
22
-
23
-
24
-
25
-
26
-
27
-
28
-
29
-
30
-
31
-
32
-
33
-
34
-
35
-
36
-
37
-
38
-
39
-
40
-
41
-
42
-
43
-
44
-
45
-
46
-
47
-
48
-
49
-
50
-
 51
51 -
 52
52 -
 53
53 -
 54
54 -
 55
55 -
 56
56 -
 57
57 -
 58
58 -
 59
59 -
 60
60 -
 61
61 -
62
-
63
-
64
-
65
-
66
-
67
-
68
-
69
-
70
-
71
-
72
-
73
-
74
-
75
-
76
-
77
-
78
-
79
-
80
-
81
-
82
-
83
-
84
-
85
-
86
-
87
-
88
-
89
-
90
-
91
-
92
-
93
-
94
-
95
-
96
-
97
-
98
-
99
-
100
-
101
-
102
-
103
-
104
-
105
-
106
-
107
-
108
-
109
-
110
-
111
-
112
-
113
-
114
-
115
-
116
-
117
-
118
 |
 |

Hardware Installations and Upgrades
42
Intel®
Server Chassis SC5600 Service Guide
Figure 47. Securing Hard Drive to Drive Carrier
4.
With the black lever open, insert the drive carrier into the drive cage. Once inserted, rotate the black lever
upwards to latch the drive carrier into position.
Figure 48. Inserting Drive Carrier into Hot Swap Cage