Invacare M91 Owners Manual - Page 36
Seat
 |
View all Invacare M91 manuals
Add to My Manuals
Save this manual to your list of manuals |
Page 36 highlights
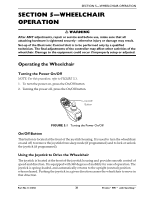
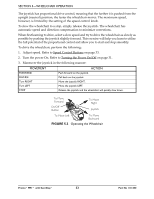
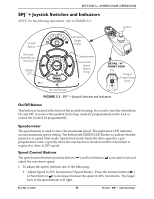
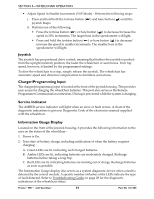
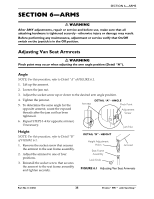
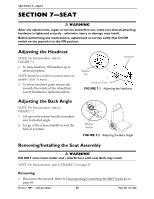
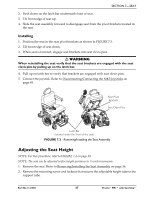
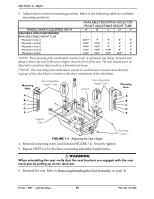
SECTION 7-SEAT SECTION 7-SEAT ƽ WARNING After any adjustments, repair or service and before use, make sure that all attaching hardware is tightened securely - otherwise injury or damage may result. Before performing any maintenance, adjustment or service verify that On/Off switch on the joystick is in the Off position. Adjusting the Headrest NOTE: For this procedure, refer to FIGURE 7.1. 1. To raise headrest, lift headrest up to desired position. NOTE: Headrest is locked in position when an audible "click" is heard. 2. To lower headrest, push release tab towards the inside of the wheelchair. Lower headrest to desired position. Adjusting the Back Angle NOTE: For this procedure, refer to FIGURE 7.2. 1. Lift up on the release handle and adjust seat to desired angle. 2. Let go of the release handle to lock the back in position. Headrest Release Tab Headrest Tube FIGURE 7.1 Adjusting the Headrest Release Handle FIGURE 7.2 Adjusting the Back Angle Removing/Installing the Seat Assembly ƽ WARNING DO NOT store items under seat - interference with seat latch may result. NOTE: For this procedure, refer to FIGURE 7.3 on page 37. Removing 1. Disconnect the joystick. Refer to Disconnecting/Connecting the MK5 Joysticks on page 69. Pronto® M91™ with SureStep® 36 Part No 1141450
-
 1
1 -
2
-
3
-
4
-
5
-
6
-
7
-
8
-
9
-
10
-
11
-
12
-
13
-
14
-
15
-
16
-
17
-
18
-
19
-
20
-
21
-
22
-
23
-
24
-
25
-
26
-
27
-
28
-
29
-
30
-
 31
31 -
 32
32 -
 33
33 -
 34
34 -
 35
35 -
 36
36 -
 37
37 -
 38
38 -
 39
39 -
 40
40 -
 41
41 -
42
-
43
-
44
-
45
-
46
-
47
-
48
-
49
-
50
-
51
-
52
-
53
-
54
-
55
-
56
-
57
-
58
-
59
-
60
-
61
-
62
-
63
-
64
-
65
-
66
-
67
-
68
-
69
-
70
-
71
-
72
 |
 |
