Invacare P9000XDT1818 Owners Manual - Page 51
Batteries, Comments - supply group
 |
View all Invacare P9000XDT1818 manuals
Add to My Manuals
Save this manual to your list of manuals |
Page 51 highlights
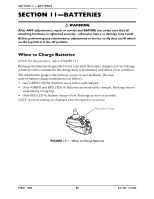
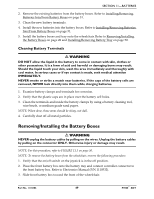
SECTION 11-BATTERIES Installing/Removing Batteries Into/From Battery Boxes ƽ WARNING Make sure power to the wheelchair is OFF before performing this procedure. The use of rubber gloves and chemical goggles or face shields is recommended when working with batteries. Invacare strongly recommends that battery installation and battery replacement ALWAYS be done by a qualified technician. After ANY adjustments, repair or service and BEFORE use, make sure all attaching hardware is tightened securely - otherwise injury or damage may result. NOTE: For this procedure, refer to FIGURE 11.5 on page 52. NOTE: For changing or removing/installing the battery boxes, refer to Removing/Installing the Battery Boxes on page 49. NOTE: To remove the battery(ies) from the battery box(es), reverse the following procedure. NOTE: Have the following tools available: TOOL QTY Battery Lifting Strap 1 1/2-inch (6 pt.) Box Wrench 1 7/16-inch (6pt) Box Wrench 1 3/8-inch (6pt) Box Wrench 1 Diagonal Cutters 1 COMMENTS See following note. Not Supplied Not Supplied Not Supplied Not Supplied NOTE: The battery lifting strap supplied is for Group 22NF batteries ONLY. Refer to the battery manufacturer for the proper lifting strap and/or battery tools for U1 battery removal/installation. ƽ WARNING ALWAYS use a battery lifting strap when lifting a battery. It is the most convenient method and assures that the battery acid will not spill. It also helps to prolong the life of the battery. The battery lifting strap supplied is for Group 22NF batteries ONLY. Refer to the battery manufacturer for the proper lifting strap and/or battery tools for U1 battery removal/installation. DO NOT tip the batteries. Keep the batteries in an upright position. NOTE: If there is battery acid in the bottom or on the sides of the battery box(es) or battery(ies), apply baking soda to these areas to neutralize the battery acid. Before reinstalling the new or existing battery(ies), clean the baking soda from the battery box(es) or battery(ies). NOTE: When securing battery lifting strap to battery, observe polarity markings located on the ends of the battery lifting strap, (+) side to POSITIVE (+) battery terminal/post and (-) side to NEGATIVE (-) battery terminal/post. Part No. 1118386 51 P9000™ XDT
-
 1
1 -
2
-
3
-
4
-
5
-
6
-
7
-
8
-
9
-
10
-
11
-
12
-
13
-
14
-
15
-
16
-
17
-
18
-
19
-
20
-
21
-
22
-
23
-
24
-
25
-
26
-
27
-
28
-
29
-
30
-
31
-
32
-
33
-
34
-
35
-
36
-
37
-
38
-
39
-
40
-
41
-
42
-
43
-
44
-
45
-
 46
46 -
 47
47 -
 48
48 -
 49
49 -
 50
50 -
 51
51 -
 52
52 -
 53
53 -
 54
54 -
 55
55 -
 56
56 -
57
-
58
-
59
-
60
-
61
-
62
-
63
-
64
-
65
-
66
-
67
-
68
 |
 |
