JVC GYHD110U Instructions - Page 5

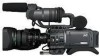
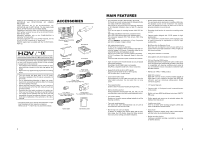
Features Of The Camera - 3 ccd accessories

Page 5 highlights

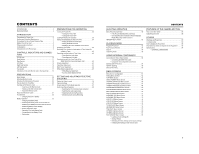
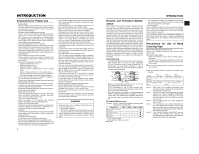
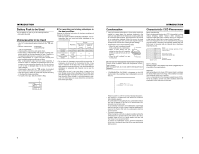
CONTENTS ACCESSORIES 2 MAIN FEATURES 3 INTRODUCTION Precautions for Proper Use 6 Routine and Periodical Maintenance 7 Precautions for Use of Head Cleaning Tape 7 Battery Pack to be Used 8 Videocassette to be Used 8 Condensation 9 Characteristic CCD Phenomena 9 CONTROLS, INDICATORS AND CONNECTORS ZOOM Lens 10 Front Section 11 Rear Section 12 LCD Door 13 Right Side Section 14 Left Side Section 16 Top Section 17 Indications on the LCD Monitor and in the Viewfinder . . . . 19 PREPARATIONS Basic System 29 Attaching the Zoom Lens 30 Attaching the Microphone (Provided 30 How to Attach the Viewfinder 30 Inserting an SD Memory Card 31 • Inserting an SD Memory Card • Taking out the SD memory card • About SD Memory Cards About the Viewfinder Cable 31 AC Operation 32 • Charging the Built-in Battery Battery Operation 33 • Charging the Battery Pack • Attaching the Battery Pack on the GY-HD110 • Detaching the Battery Pack from the GY-HD110 • Remaining Battery Power Display • Battery Recharge Times • Operating Time with Battery Pack • Precautions for the Battery Pack • Recharging PREPARATIONS FOR OPERATION Turning the Power ON 35 • Turning the Power ON • Turning the Power OFF Loading/Unloading the Cassette 36 Setting and Displaying the Date and Time 37 • Setting the Date and Time Style • Setting the Date and Time • Displaying the Time and Date on the Screen Displaying Time Code 39 Recording Time Codes in Continuation of Time Codes Recorded on Tape 40 Presetting and Recording of Time Code 40 • Presetting time code data • Presetting user's bit data Synchronizing with the Time Code of the IEEE1394 (DV)-Connected Master Unit 42 Screen Adjustment 43 Viewfinder Adjustment 43 Back Focus Adjustment 44 White Balance Adjustment 45 • White Balance Adjustment • Full Auto White Balance (FAW) SETTING AND ADJUSTMENTS BEFORE SHOOTING Setting the Video Format 46 Camera Settings 47 Screen Size (4:3/16:9) Mode Selection 47 Audio Input Signal Selection 48 • Selecting the CH-2 channel input connector • Selecting the audio signal input • Adjusting Audio during Recording • Monitoring Audio during Recording CONTENTS SHOOTING OPERATION Basic Recording Operation 50 • If the Record-Standby Mode Continues • Checking Recorded Contents in Record-Standby Mode (Recording Check Function) HEADER REC Function 52 PLAYBACK MODE Playback Procedure 54 Fast-Forward, Rewind 54 Search 54 Outputting Audio 55 USING EXTERNAL COMPONENTS Connecting the Video Signal Cables 56 • Connecting the IEEE1394 Cable • Composite and Component Connections Dubbing with AV Devices 57 HDV/DV Dubbing 58 Backup Recording 60 MENU SCREENS Menu Screen Configuration 61 Setting Menu Screens 62 TOP MENU Screen 63 VIDEO FORMAT Menu Screen 64 CAMERA OPERATION Menu Screen 66 CAMERA PROCESS [1/2] Menu Screen 67 CAMERA PROCESS [2/2] Menu Screen 68 ADVANCED PROCESS Menu Screen 69 COLOR MATRIX ADJUST Menu Screen 70 SKIN COLOR ADJUST Menu Screen 70 SWITCH MODE Menu Screen 71 AUDIO/MIC [1/2] Menu Screen 72 AUDIO/MIC [2/2] Menu Screen 73 LCD/VF [1/3] Menu Screen 74 LCD/VF [2/3] Menu Screen 75 LCD/VF [3/3] Menu Screen 76 TC/UB/CLOCK Menu Screen 77 HEADER REC Menu Screen 78 TIME/DATE Menu Screen 79 OTHERS [1/2] Menu Screen 80 OTHERS [2/2] Menu Screen 81 FILE MANAGE Menu Screen 83 • Loading a menu settings file • Saving settings • Resetting the menu settings to the factory settings • Initializing (formatting) an SD memory card FEATURES OF THE CAMERA SECTION How to Use Skin Detail 86 Outputting color bars 88 OTHERS Warnings and Responses 89 Troubleshooting 92 How to Display the Hour Meter 93 Information for Users on Disposal of Old Equipment . . . . .93 Specifications 94 • EXTERNAL DIMENSIONS 4 5

  • 1
  • 2
  • 3
  • 4
  • 5
  • 6
  • 7
  • 8
  • 9
  • 10
  • 11
  • 12
  • 13
  • 14
  • 15
  • 16
  • 17
  • 18
  • 19
  • 20
  • 21
  • 22
  • 23
  • 24
  • 25
  • 26
  • 27
  • 28
  • 29
  • 30
  • 31
  • 32
  • 33
  • 34
  • 35
  • 36
  • 37
  • 38
  • 39
  • 40
  • 41
  • 42
  • 43
  • 44
  • 45
  • 46
  • 47
  • 48
  • 49
  • 50
  • 51

4
CONTENTS
ACCESSORIES
. . . . . . . . . . . . . . . . . . . . . . . . . . . . . . . . . 2
MAIN FEATURES . . . . . . . . . . . . . . . . . . . . . . . . . . . . . . . . 3
INTRODUCTION
Precautions for Proper Use . . . . . . . . . . . . . . . . . . . . . . . . . 6
Routine and Periodical Maintenance . . . . . . . . . . . . . . . . . . 7
Precautions for Use of Head Cleaning Tape . . . . . . . . . . . . 7
Battery Pack to be Used
. . . . . . . . . . . . . . . . . . . . . . . . . . . 8
Videocassette to be Used . . . . . . . . . . . . . . . . . . . . . . . . . . 8
Condensation
. . . . . . . . . . . . . . . . . . . . . . . . . . . . . . . . . . . 9
Characteristic CCD Phenomena . . . . . . . . . . . . . . . . . . . . . 9
CONTROLS, INDICATORS AND CONNEC-
TORS
ZOOM Lens . . . . . . . . . . . . . . . . . . . . . . . . . . . . . . . . . . . . 10
Front Section . . . . . . . . . . . . . . . . . . . . . . . . . . . . . . . . . . . 11
Rear Section
. . . . . . . . . . . . . . . . . . . . . . . . . . . . . . . . . . . 12
LCD Door
. . . . . . . . . . . . . . . . . . . . . . . . . . . . . . . . . . . . . 13
Right Side Section . . . . . . . . . . . . . . . . . . . . . . . . . . . . . . . 14
Left Side Section . . . . . . . . . . . . . . . . . . . . . . . . . . . . . . . . 16
Top Section . . . . . . . . . . . . . . . . . . . . . . . . . . . . . . . . . . . . 17
Indications on the LCD Monitor and in the Viewfinder . . . . 19
PREPARATIONS
Basic System . . . . . . . . . . . . . . . . . . . . . . . . . . . . . . . . . . . 29
Attaching the Zoom Lens
. . . . . . . . . . . . . . . . . . . . . . . . . 30
Attaching the Microphone (Provided)
. . . . . . . . . . . . . . . . 30
How to Attach the Viewfinder
. . . . . . . . . . . . . . . . . . . . . . 30
Inserting an SD Memory Card . . . . . . . . . . . . . . . . . . . . . . 31
Inserting an SD Memory Card
Taking out the SD memory card
About SD Memory Cards
About the Viewfinder Cable . . . . . . . . . . . . . . . . . . . . . . . . 31
AC Operation . . . . . . . . . . . . . . . . . . . . . . . . . . . . . . . . . . . 32
Charging the Built-in Battery
Battery Operation
. . . . . . . . . . . . . . . . . . . . . . . . . . . . . . . 33
Charging the Battery Pack
Attaching the Battery Pack on the GY-HD110
Detaching the Battery Pack from the GY-HD110
Remaining Battery Power Display
Battery Recharge Times
Operating Time with Battery Pack
Precautions for the Battery Pack
Recharging
PREPARATIONS FOR OPERATION
Turning the Power ON
. . . . . . . . . . . . . . . . . . . . . . . . . . . .35
Turning the Power ON
Turning the Power OFF
Loading/Unloading the Cassette . . . . . . . . . . . . . . . . . . . . .36
Setting and Displaying the Date and Time . . . . . . . . . . . . .37
Setting the Date and Time Style
Setting the Date and Time
Displaying the Time and Date on the Screen
Displaying Time Code . . . . . . . . . . . . . . . . . . . . . . . . . . . . .39
Recording Time Codes in Continuation of Time Codes Re-
corded on Tape
. . . . . . . . . . . . . . . . . . . . . . . . . . . .40
Presetting and Recording of Time Code . . . . . . . . . . . . . . .40
Presetting time code data
Presetting user’s bit data
Synchronizing with the Time Code of the
IEEE1394 (DV)-Connected Master Unit . . . . . . . . . .42
Screen Adjustment . . . . . . . . . . . . . . . . . . . . . . . . . . . . . . .43
Viewfinder Adjustment
. . . . . . . . . . . . . . . . . . . . . . . . . . . .43
Back Focus Adjustment
. . . . . . . . . . . . . . . . . . . . . . . . . . .44
White Balance Adjustment
. . . . . . . . . . . . . . . . . . . . . . . . .45
White Balance Adjustment
Full Auto White Balance (FAW)
SETTING AND ADJUSTMENTS BEFORE
SHOOTING
Setting the Video Format
. . . . . . . . . . . . . . . . . . . . . . . . . .46
Camera Settings . . . . . . . . . . . . . . . . . . . . . . . . . . . . . . . . .47
Screen Size (4:3/16:9) Mode Selection
. . . . . . . . . . . . . . .47
Audio Input Signal Selection . . . . . . . . . . . . . . . . . . . . . . . .48
Selecting the CH-2 channel input connector
Selecting the audio signal input
Adjusting Audio during Recording
Monitoring Audio during Recording
5
CONTENTS
SHOOTING OPERATION
Basic Recording Operation . . . . . . . . . . . . . . . . . . . . . . . . 50
If the Record-Standby Mode Continues
Checking Recorded Contents in Record-Standby
Mode (Recording Check Function)
HEADER REC Function
. . . . . . . . . . . . . . . . . . . . . . . . . . 52
PLAYBACK MODE
Playback Procedure
. . . . . . . . . . . . . . . . . . . . . . . . . . . . . 54
Fast-Forward, Rewind . . . . . . . . . . . . . . . . . . . . . . . . . . . . 54
Search . . . . . . . . . . . . . . . . . . . . . . . . . . . . . . . . . . . . . . . . 54
Outputting Audio
. . . . . . . . . . . . . . . . . . . . . . . . . . . . . . . . 55
USING EXTERNAL COMPONENTS
Connecting the Video Signal Cables . . . . . . . . . . . . . . . . . 56
Connecting the IEEE1394 Cable
Composite and Component Connections
Dubbing with AV Devices
. . . . . . . . . . . . . . . . . . . . . . . . . 57
HDV/DV Dubbing
. . . . . . . . . . . . . . . . . . . . . . . . . . . . . . . 58
Backup Recording . . . . . . . . . . . . . . . . . . . . . . . . . . . . . . . 60
MENU SCREENS
Menu Screen Configuration . . . . . . . . . . . . . . . . . . . . . . . . 61
Setting Menu Screens . . . . . . . . . . . . . . . . . . . . . . . . . . . . 62
TOP MENU Screen . . . . . . . . . . . . . . . . . . . . . . . . . . . . . . 63
VIDEO FORMAT Menu Screen . . . . . . . . . . . . . . . . . . . . . 64
CAMERA OPERATION Menu Screen . . . . . . . . . . . . . . . . 66
CAMERA PROCESS [1/2] Menu Screen
. . . . . . . . . . . . . 67
CAMERA PROCESS [2/2] Menu Screen
. . . . . . . . . . . . . 68
ADVANCED PROCESS Menu Screen
. . . . . . . . . . . . . . . 69
COLOR MATRIX ADJUST Menu Screen
. . . . . . . . . . . . . 70
SKIN COLOR ADJUST Menu Screen . . . . . . . . . . . . . . . . 70
SWITCH MODE Menu Screen
. . . . . . . . . . . . . . . . . . . . . 71
AUDIO/MIC [1/2] Menu Screen . . . . . . . . . . . . . . . . . . . . . 72
AUDIO/MIC [2/2] Menu Screen . . . . . . . . . . . . . . . . . . . . . 73
LCD/VF [1/3] Menu Screen . . . . . . . . . . . . . . . . . . . . . . . . 74
LCD/VF [2/3] Menu Screen . . . . . . . . . . . . . . . . . . . . . . . . 75
LCD/VF [3/3] Menu Screen . . . . . . . . . . . . . . . . . . . . . . . . 76
TC/UB/CLOCK Menu Screen
. . . . . . . . . . . . . . . . . . . . . . 77
HEADER REC Menu Screen . . . . . . . . . . . . . . . . . . . . . . . 78
TIME/DATE Menu Screen . . . . . . . . . . . . . . . . . . . . . . . . . 79
OTHERS [1/2] Menu Screen . . . . . . . . . . . . . . . . . . . . . . . 80
OTHERS [2/2] Menu Screen . . . . . . . . . . . . . . . . . . . . . . . 81
FILE MANAGE Menu Screen
. . . . . . . . . . . . . . . . . . . . . . 83
Loading a menu settings file
Saving settings
Resetting the menu settings to the factory settings
Initializing (formatting) an SD memory card
FEATURES OF THE CAMERA SECTION
How to Use Skin Detail . . . . . . . . . . . . . . . . . . . . . . . . . . . .86
Outputting color bars
. . . . . . . . . . . . . . . . . . . . . . . . . . . . .88
OTHERS
Warnings and Responses . . . . . . . . . . . . . . . . . . . . . . . . . .89
Troubleshooting
. . . . . . . . . . . . . . . . . . . . . . . . . . . . . . . . .92
How to Display the Hour Meter . . . . . . . . . . . . . . . . . . . . . .93
Information for Users on Disposal of Old Equipment
. . . . .93
Specifications
. . . . . . . . . . . . . . . . . . . . . . . . . . . . . . . . . . .94
EXTERNAL DIMENSIONS