Konica Minolta Kodak Ngenuity 9090DB Setup Guide - Page 21
Actual Printed Example, Font Height
 |
View all Konica Minolta Kodak Ngenuity 9090DB manuals
Add to My Manuals
Save this manual to your list of manuals |
Page 21 highlights
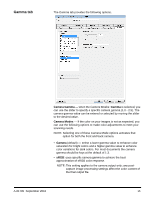
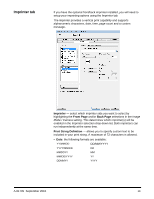
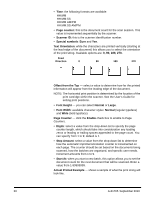
• Time: the following formats are available: HH:MM HH:MM:SS HH:MM AM/PM HH:MM:SS AM/PM • Page counter: this is the document count for the scan session. This value is incremented sequentially by the scanner. • Scanner ID: this is the scanner identification number. • Special symbols: Euro and Yen. Text Orientation: while the characters are printed vertically (starting at the lead edge of the document) this allows you to select the orientation of the print string. Available options are: 0, 90, 180, 270. Feed Direction 0 90 180 270 Offset from the Top - select a value to determine how far the printed information will appear from the leading edge of the document. NOTE: The horizontal print position is determined by the location of the print cartridge within the scanner. See the User's Guide for setting print positions. • Font Height - you can select Normal or Large. • Font Width: available character styles: Normal (regular typeface) and Wide (bold typeface). Page Counter - click the Enable check box to enable to Page Counters. • Digits: select a value from the drop-down list to specify the page counter length, which should take into consideration any leading zeros or leading or trailing spaces appended to the page count. You can specify from 1 to 9; default is 1. • Step Amount: select a value from the drop-down list to determine how the automatic imprinter/annotation counter is incremented on each page. The counter should be set based on the documents being scanned, how the batches are organized, and specific user needs. Increment amounts from 1 to 9. • Start At: when you start a new batch, this option allows you to set the document count for the next document that will be scanned. Enter a value from 1-99999999. Actual Printed Example - shows a sample of what the print string will look like. 20 A-61705 September 2010
-
 1
1 -
2
-
3
-
4
-
5
-
6
-
7
-
8
-
9
-
10
-
11
-
12
-
13
-
14
-
15
-
 16
16 -
 17
17 -
 18
18 -
 19
19 -
 20
20 -
 21
21 -
 22
22 -
 23
23
 |
 |
