Konica Minolta Kodak Ngenuity 9090DB Setup Guide - Page 8
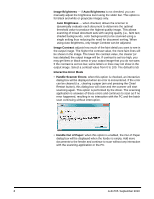
Auto Color Detection
 |
View all Konica Minolta Kodak Ngenuity 9090DB manuals
Add to My Manuals
Save this manual to your list of manuals |
Page 8 highlights
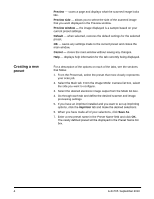
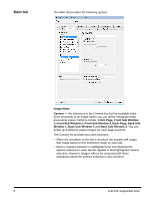
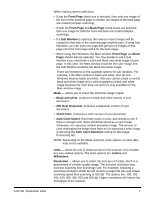
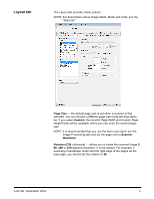
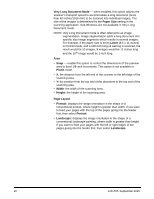
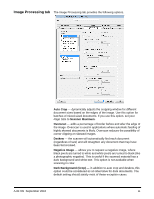
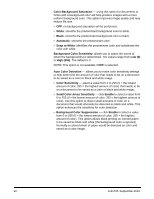
When making camera selections: • If just the Front Page check box is selected, then only one image of the front of the scanned page is created. No images of the back page are created (simplex scanning). • If both the Front Page and Back Page check boxes are selected, then one image for both the front and back are created (duplex scanning). • If a Sub Window is selected, then two (or more) images will be created for that side of the scanned page (multistream). If using Sub Windows, you can scan one page and get up to 8 images of that page (4 for the front page and 4 for the back page). • When using Sub Windows, the Main window (Front Page and Back Page) should also be selected. You may decide to use a Sub Window if you need both a color and black and white image of your page. In this case, the Main window would be the color image and the Sub Window would be the black and white image. There are limitations on the available options for sub windows. For example, if the Main window is black and white, then all Sub Windows must be black and white. Also you cannot create a normal black and white image and a color dropped-out black and white image because the color drop-out option is only available for the Main window image. Mode - allows you to select the electronic image output. • Black and white: produces a black and white version of your document. • 256-level Grayscale: produces a grayscale version of your document. • 24-bit Color: produces a color version of your document. • Auto Color Detect: this mode scans in color, and checks to see if there is enough color that it should be saved as a color image. Otherwise, it is saved as a black and white image. The amount of color information the image must have so it is saved as a color image is set using the Auto Color Detection setting on the Image Processing tab. NOTE: Depending on the Mode selected, some options on other tabs may not be available. Units - select the unit of measurement for the scanner; this includes any size-related options. The Units options are: Inches and Millimeters. Resolution - allows you to select the dots per inch (dpi), which is a determinant of a better quality image. The selected resolution may increase scanning time and image size. For example, selecting a scanning resolution of 600 dpi will result in a larger file size and slower scanning speed than scanning at 200 dpi. The options are: 100, 150, 200, 240, 300, 400, 500 and 600 dpi. Higher resolutions will reduce the throughput of the scanner. A-61705 September 2010 7
-
 1
1 -
2
-
 3
3 -
 4
4 -
 5
5 -
 6
6 -
 7
7 -
 8
8 -
 9
9 -
 10
10 -
 11
11 -
 12
12 -
 13
13 -
14
-
15
-
16
-
17
-
18
-
19
-
20
-
21
-
22
-
23
 |
 |
