Konica Minolta Kodak Ngenuity 9090DB Setup Guide - Page 5
Creating a new preset, Preview, Preview side, Default, Cancel, Imprinter, Save
 |
View all Konica Minolta Kodak Ngenuity 9090DB manuals
Add to My Manuals
Save this manual to your list of manuals |
Page 5 highlights
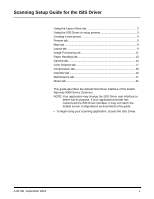
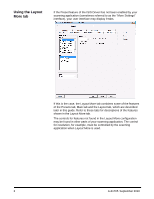
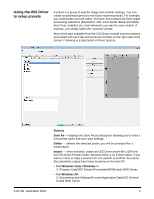
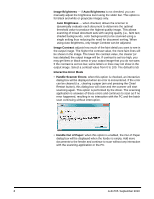
Creating a new preset Preview - scans a page and displays what the scanned image looks like. Preview side - allows you to select the side of the scanned image that you want displayed in the Preview window. Preview window - the image displayed is a sample based on your current preset settings. Default - when selected, restores the default settings for the selected preset. OK - saves any settings made to the current preset and closes the main window. Cancel - closes the main window without saving any changes. Help - displays help information for the tab currently being displayed. For a description of the options on each of the tabs, see the sections that follow. 1. From the Preset tab, select the preset that most closely represents your scan job. 2. Select the Main tab. From the Image Mode: Camera list box, select the side you want to configure. 3. Select the desired electronic image output from the Mode list box. 4. Go through each tab and define the desired scanner and image processing settings. 5. If you have an imprinter installed and you want to set up imprinting options, click the Imprinter tab and make the desired selections. 6. When you have made all of your selections, click Save As. 7. Enter a new preset name in the Preset Name field and click OK. The newly defined preset will be displayed in the Preset Name list box. 4 A-61705 September 2010
-
 1
1 -
 2
2 -
 3
3 -
 4
4 -
 5
5 -
 6
6 -
 7
7 -
 8
8 -
 9
9 -
 10
10 -
 11
11 -
12
-
13
-
14
-
15
-
16
-
17
-
18
-
19
-
20
-
21
-
22
-
23
 |
 |
