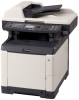
Kyocera FS-C2126MFP FS-C2026MFPplus/C2126MFPplus/C2526MFP/C2626MFP Driver Guid - Page 14
Installing in Custom Mode with a USB Connection using Custom Select
 |
View all Kyocera FS-C2126MFP manuals
Add to My Manuals
Save this manual to your list of manuals |
Page 14 highlights
Installation 1-8 The Status Monitor displays system status messages on your computer screen during printing tasks. The Status Monitor button appears on the Advanced tab. Show Quick Print Tab This selection lets you define basic print options into group profiles that can be accessed easily. The Show Quick Print tab option also appears in the Administrator Settings in Device Settings. Device Settings Select the Device Settings check box to open Device Settings where you can choose installed options for your printing system. (The Device Settings check box appears only in Windows XP.) When the installation completes successfully, click Finish to exit the installation wizard. A message may appear if there is a software installation failure. Click Finish, and retry the installation. If the same message appears again, contact your system administrator. The installation of the printer is now complete. If prompted, restart your computer. Installing in Custom Mode with a USB Connection using Custom Select This section describes the custom installation procedure of the driver software in Windows operating systems using a USB connection. With the Custom select option, you manually select the printing system and printer port to install. In Custom mode, Custom Select is not recommended for USB in environments where printing systems are connected and reconnected using USB ports. The Discover method provides a more reliable installation path. 1 Ensure that your printer and computer are turned on and connected using a USB cable. Note: In Windows 7 and Windows Vista, a driver installation will be made from the Microsoft Windows Update site if a certified driver is available and the system is connected to the web. We recommend the Custom Mode using Discover for USB connections to ensure a reliable installation. 2 On the Installation Method page, select Custom Mode. 3 The Discover Printing System page opens, searching for your printing system. The Discover button is automatically selected. Choose Custom select and click Next. 4 The Printing System page appears. Select your printing system model from the list and click Next. 5 On the Printer Port page, select an existing port connected to your printing system. Click Next. 6 On the Custom Installation page, select the driver and software packages you want to install from the Driver and Utility tabs, and clear those not intended for installation. Click Next. User Guide
-
 1
1 -
2
-
3
-
4
-
5
-
6
-
7
-
8
-
 9
9 -
 10
10 -
 11
11 -
 12
12 -
 13
13 -
 14
14 -
 15
15 -
 16
16 -
 17
17 -
 18
18 -
 19
19 -
20
-
21
-
22
-
23
-
24
-
25
-
26
-
27
-
28
-
29
-
30
-
31
-
32
-
33
-
34
-
35
-
36
-
37
-
38
-
39
-
40
-
41
-
42
-
43
-
44
-
45
-
46
-
47
-
48
-
49
-
50
-
51
-
52
-
53
-
54
-
55
-
56
-
57
-
58
-
59
-
60
-
61
-
62
-
63
-
64
-
65
-
66
-
67
-
68
-
69
-
70
-
71
-
72
-
73
-
74
-
75
-
76
-
77
-
78
-
79
-
80
-
81
-
82
-
83
-
84
-
85
-
86
-
87
-
88
-
89
-
90
-
91
-
92
-
93
-
94
-
95
-
96
 |
 |