Kyocera FS-C2126MFP FS-C2026MFPplus/C2126MFPplus/C2526MFP/C2626MFP Driver Guid - Page 23
Selecting SNMP Settings, Lock Settings, Command Center - cost per page
 |
View all Kyocera FS-C2126MFP manuals
Add to My Manuals
Save this manual to your list of manuals |
Page 23 highlights
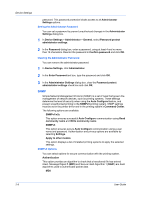
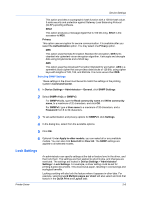
Device Settings This option provides a cryptographic hash function with a 128 bit hash value. It adds security and protection against Gateway Load Balancing Protocol (GLBP)-spoofing software. SHA1 This option produces a message digest that is 160 bits long. SHA1 is the successor to MD5. Privacy This option uses encryption for secure communication. It is available after you select the Authentication option. You may select one Privacy option. DES This option uses the Data Encryption Standard for encryption. DES turns cleartext into ciphertext via an encryption algorithm. It encrypts and decrypts data using 8-byte blocks and a 56-bit key. AES This option uses the Advanced Encryption Standard for encryption. AES is a symmetric block cipher that can process data blocks of 128 bits, using cipher keys with lengths of 128, 192, and 256 bits. It is more secure than DES. Selecting SNMP Settings These settings in the driver must be set to match the settings in the printing system's Command Center. 1 In Device Settings > Administrator > General, click SNMP Settings. 2 Select SNMPv1/v2c or SNMPv3. For SNMPv1/v2c, type the Read community name and Write community name, to a maximum of 32 characters, and click OK. For SNMPv3, type a User name to a maximum of 32 characters, and a Password from 8 to 32 characters. 3 To set authentication and privacy options for SNMPv3, click Settings. 4 In the dialog box, select from the available options. 5 Click OK. 6 Optional: Under Apply to other models, you can select all or any available models. You can also click Select All or Clear All. The SNMP settings are applied to all selected models. Lock Settings Printer Driver An administrator can specify settings at the tab or feature level in the driver, and then lock them. The settings are then applied to all print jobs, and changes are restricted. The settings are locked in Device Settings > Administrator Settings > Lock Settings. For example, a driver setting could be set for printing duplex documents. This would save paper, resulting in cost savings and ecological benefits. Locking a setting will also lock the feature where it appears in other tabs. For example, selecting Lock Multiple pages per sheet will also select and lock that feature in the Quick Print and Layout tabs. 2-6
-
 1
1 -
2
-
3
-
4
-
5
-
6
-
7
-
8
-
9
-
10
-
11
-
12
-
13
-
14
-
15
-
16
-
17
-
 18
18 -
 19
19 -
 20
20 -
 21
21 -
 22
22 -
 23
23 -
 24
24 -
 25
25 -
 26
26 -
 27
27 -
 28
28 -
29
-
30
-
31
-
32
-
33
-
34
-
35
-
36
-
37
-
38
-
39
-
40
-
41
-
42
-
43
-
44
-
45
-
46
-
47
-
48
-
49
-
50
-
51
-
52
-
53
-
54
-
55
-
56
-
57
-
58
-
59
-
60
-
61
-
62
-
63
-
64
-
65
-
66
-
67
-
68
-
69
-
70
-
71
-
72
-
73
-
74
-
75
-
76
-
77
-
78
-
79
-
80
-
81
-
82
-
83
-
84
-
85
-
86
-
87
-
88
-
89
-
90
-
91
-
92
-
93
-
94
-
95
-
96
 |
 |