Kyocera TASKalfa 3501i File Management Utility Operation Guide Rev 3.01.2013.3 - Page 14
Workflow, Adding Workflow, Workflow Settings - default login
 |
View all Kyocera TASKalfa 3501i manuals
Add to My Manuals
Save this manual to your list of manuals |
Page 14 highlights
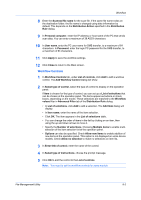
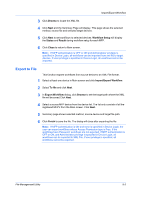
8 Workflow With FMU, you can create custom workflows for handling scanned documents. The added workflows can be selected and run from the Application or Favorites screen on the MFP operation panel. A customized button can be displayed on the operation panel of an MFP to trigger a custom workflow. Adding Workflow To add a workflow while the device is enabled with authentication, the User name and Password for the MFP must be correctly set in Device Login. The maximum number of workflows that can be added depend on the device model. Note: Login user name and Login password may not be entered in the Windows XP Workgroup environment. Workflow Settings 1 Select the MFP in the Main screen, and click the Workflow icon. 2 In the Workflow dialog box, click New. You can delete a workflow in the list by selecting it and clicking Delete. 3 Enter the registered Name for the workflow, to a maximum of 32 characters. 4 Enter the Owner name for the workflow which has a maximum of 64 characters. This is a mandatory entry when user authentication is set to ON in the MFP. This is not available when user authentication is OFF. On some models, when user authentication is ON, the login user name is registered automatically and so it is not available. 5 Set the Access settings for the workflow. Check Published for shared access or uncheck so that only the owner can have access. When user authentication is set to OFF in the MFP, Published is checked by default and is not available for edit. 6 Enter the Password to access the workflow, to a maximum of 64 characters (to a maximum of 16 characters for some models). This option is available only when the Access settings is set to Published. 7 On the Workflow Settings tab, in the Receiving folder (Share name), enter the share name for receiving scan data. Alternatively, click Browse and select the path to the receiving folder. 8-1 User Guide
-
 1
1 -
2
-
3
-
4
-
5
-
6
-
7
-
8
-
 9
9 -
 10
10 -
 11
11 -
 12
12 -
 13
13 -
 14
14 -
 15
15 -
 16
16 -
 17
17 -
 18
18 -
 19
19 -
20
 |
 |