Kyocera TASKalfa 3501i File Management Utility Operation Guide Rev 3.01.2013.3 - Page 16
Specifying Scanning Preferences, Editing Workflow
 |
View all Kyocera TASKalfa 3501i manuals
Add to My Manuals
Save this manual to your list of manuals |
Page 16 highlights
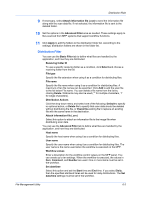
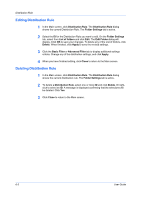
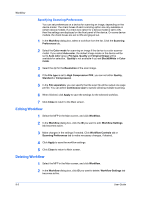
Workflow Specifying Scanning Preferences You can set preferences on a device for scanning an image, depending on the device model. The check boxes of each scanning option are only available on certain device models. If a check box option for a device model is set to ON, then the settings are displayed on the front panel of the device. On some device models, the check boxes are set to ON and grayed out. 1 In the Workflow dialog box, select a workflow from the list. Click the Scanning Preferences tab. 2 Select the Color mode for scanning an image if the device is a color scanner model. If you select Auto color, the default image mode on the device will be set to Auto color (gray). File type, Quality and Original Image will be available for selection. Quality is not available if you set Black&White in Color mode. 3 Select the dpi for the Resolution of the scan image. 4 If the File type is set to High Compression PDF, you can set either Quality, Standard or Compression. 5 In the File separation, you can specify that the scan file will be output one page per file. You can select Continuous scan to specify allowing multiple scanning. 6 When finished, click Apply to save the settings for the selected workflow. 7 Click Close to return to the Main screen. Editing Workflow 1 Select the MFP in the Main screen, and click Workflow. 2 In the Workflow dialog box, click the ID you want to edit. Workflow Settings tab becomes active. 3 Make changes in the settings if needed. Click Workflow Controls tab or Scanning Preferences tab to make necessary changes, if desired. 4 Click Apply to save the workflow settings. 5 Click Close to return to Main screen. Deleting Workflow 1 Select the MFP in the Main screen, and click Workflow. 2 In the Workflow dialog box, click ID you want to delete. Workflow Settings tab becomes active. 8-3 User Guide
-
 1
1 -
2
-
3
-
4
-
5
-
6
-
7
-
8
-
9
-
10
-
 11
11 -
 12
12 -
 13
13 -
 14
14 -
 15
15 -
 16
16 -
 17
17 -
 18
18 -
 19
19 -
 20
20
 |
 |