Lexmark C782 User's Guide
Lexmark C782 Manual
 |
View all Lexmark C782 manuals
Add to My Manuals
Save this manual to your list of manuals |
Lexmark C782 manual content summary:
- Lexmark C782 | User's Guide - Page 1
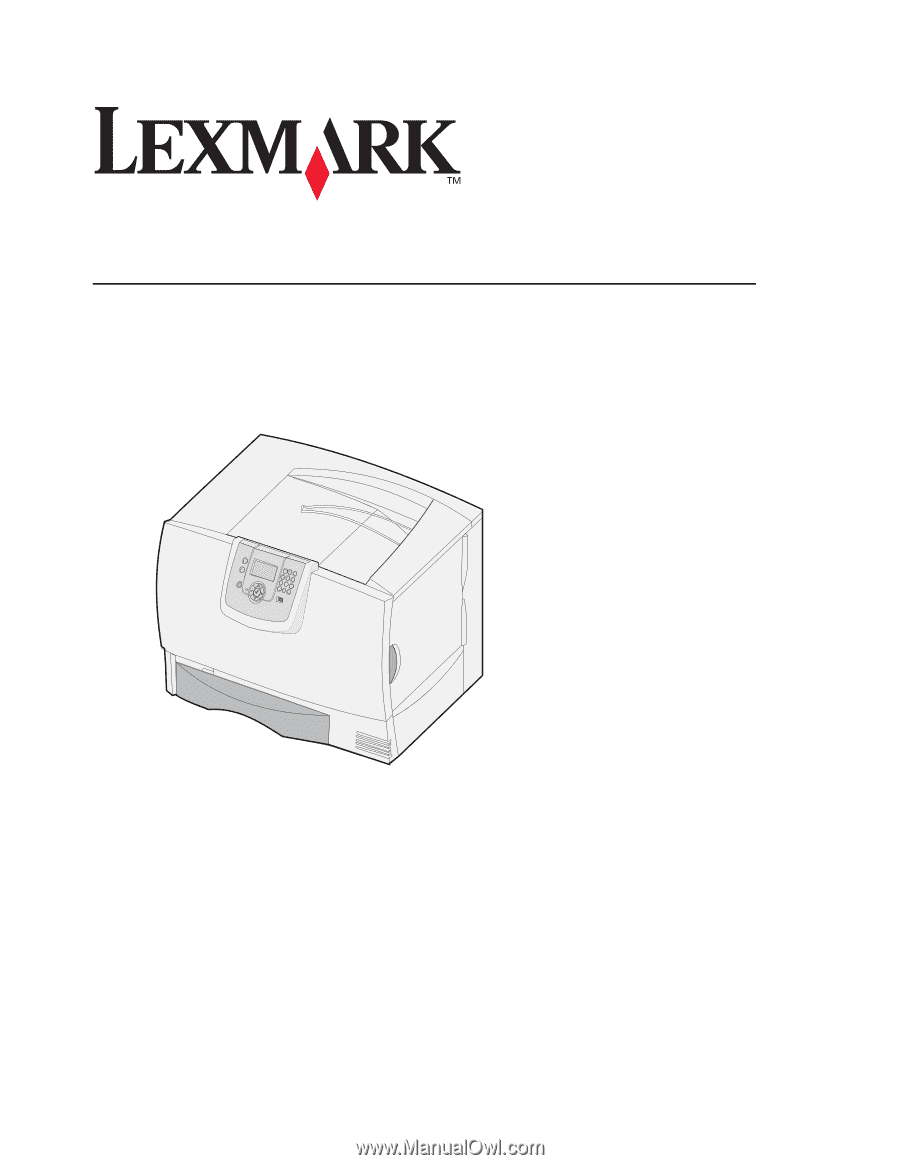
C780, C782 User's Guide October 2007 Lexmark and Lexmark with diamond design are trademarks of Lexmark International, Inc., registered in the United States and/or other countries. © 2007 Lexmark International, Inc. 740 West New Circle Road Lexington, Kentucky 40550 - Lexmark C782 | User's Guide - Page 2
or repairs, other than those described in the operating instructions, to a professional service person. • This product is designed, tested, and approved to meet strict global safety standards with the use of specific Lexmark components. The safety features of some parts may not always be obvious - Lexmark C782 | User's Guide - Page 3
...37 Printing on specialty media (transparencies, labels, other 39 Linking trays ...40 Linking output bins ...41 Holding a job in the printer ...41 Printing confidential jobs ...42 Tips for successful printing ...46 Chapter 3: Media specifications 48 Media guidelines ...48 Storing paper ...50 - Lexmark C782 | User's Guide - Page 4
...85 Configuring printer alerts ...86 Chapter 7: Troubleshooting 87 Online customer support ...87 Calling for service ...87 Checking an unresponsive printer ...87 Printing multi-language PDFs ...87 Solving printing problems ...88 Solving mailbox problems ...89 Solving option problems ...90 Solving - Lexmark C782 | User's Guide - Page 5
off and unplug the power cord before continuing. • High capacity feeder (2000-sheet drawer) • Optional drawers • Duplex unit • Printer • Output options The instructions in this section cover the following options: Input options High capacity feeder (2000-sheet drawer) Optional drawers Duplex unit - Lexmark C782 | User's Guide - Page 6
and removing options Installing a 2000-sheet drawer Your printer supports one optional 2000-sheet drawer. Warning: If you and remove any packing material. 2 Place the drawer in the location you have chosen for your printer. 3 If you are installing a 500-sheet drawer on top of the 2000-sheet drawer, - Lexmark C782 | User's Guide - Page 7
Installing and removing options 5 Install the power cord for the 2000-sheet drawer. Note: The HCIT power supply shall be capable of running off of AC line voltages from 90-256 VAC and from 47-63 Hz. The HCIT shall provide an IEC inlet power connector and an outlet power connector rated at 10 amperes - Lexmark C782 | User's Guide - Page 8
and removing options Installing a 500-sheet drawer Your printer supports up to three additional 500-sheet drawers. However remove any packing material. 2 Place the drawer in the location you have chosen for your printer, or install it on another drawer. To install it on another drawer: a Align the - Lexmark C782 | User's Guide - Page 9
and removing options Installing a duplex unit Your printer supports an optional duplex unit that lets you print and remove any packing material. 2 Place the duplex unit in the location you have chosen for your printer or install it on a 500-sheet drawer. To install it on a 500-sheet drawer: a - Lexmark C782 | User's Guide - Page 10
at least three (3) people to lift it safely. Use the printer handholds to lift it, do not lift by the front of the printer, and make sure your fingers are not under the printer when you set it down. 1 Unpack the printer. 2 Place the printer on the duplex unit or 500-sheet drawer: a Align the - Lexmark C782 | User's Guide - Page 11
removing options Installing an output expander Your printer supports an optional output expander that lets you or fabrics. 1 Unpack the output expander and remove any packing material. 2 Remove the printer top cover. Warning: The output expander tray is designed to hold the weight of print - Lexmark C782 | User's Guide - Page 12
Installing and removing options 4 Attach the printer top cover to the output expander. 5 Attach the output expander paper bail to the top cover. Installing an output expander 12 - Lexmark C782 | User's Guide - Page 13
Installing and removing options Installing a 5-bin mailbox Your printer supports a 5-bin mailbox that lets you collate and stack up to 500 sheets of paper. Note: After you unpack the mailbox, install it immediately. Otherwise, the - Lexmark C782 | User's Guide - Page 14
Installing and removing options 4 Attach the printer top cover to the mailbox. 5 Attach the mailbox paper bail to the top cover. Installing a 5-bin mailbox 14 - Lexmark C782 | User's Guide - Page 15
Installing and removing options Installing a StapleSmart finisher Your printer supports a StapleSmart finisher. See the information sheet included with the finisher for detailed installation instructions. Installing memory and option cards CAUTION: If you are installing memory or option cards - Lexmark C782 | User's Guide - Page 16
and removing options Installing a memory card Follow the instructions in this section to install a printer memory card. Memory cards must have 100-pin connectors. Note: Memory cards designed for other Lexmark printers may not work with your printer. 1 Remove the system board access cover. For more - Lexmark C782 | User's Guide - Page 17
Follow the instructions in this section to install an optional "option-added" firmware or flash memory card. Note: "Option-added" firmware and flash memory cards offered for other Lexmark printers cannot be used with your printer. "Option-added" fiOnly one of each type of card is supported. Warning - Lexmark C782 | User's Guide - Page 18
a hard disk Follow the instructions in this section to install an optional hard disk. You need a small flathead screwdriver to attach the hard disk to the mounting plate. Warning: Hard disks are easily damaged by static electricity. Touch something metal on the printer before you touch a disk - Lexmark C782 | User's Guide - Page 19
Installing and removing options 7 Press the ribbon cable connector into the connector on the system board. 8 Flip the hard disk over, and then press the three posts on the mounting plate into the holes on the system board. The hard disk snaps into place. Installing memory and option cards 19 - Lexmark C782 | User's Guide - Page 20
Installing and removing options Installing an option card Your printer has one expansion card slot that supports a number of option cards. The following table describes their function. Card MarkNet internal print server Parallel 1284-B Interface Card Serial Interface Card Function Adds an - Lexmark C782 | User's Guide - Page 21
. Option card connector Firmware and flash memory card connectors Memory card connector Hard disk connector Accessing the printer system board 1 Turn the printer off. 2 Unplug the printer power cord. 3 Disconnect all cables from the back of the printer. 4 Locate the access cover on the back of the - Lexmark C782 | User's Guide - Page 22
options 5 Remove the four access cover screws as shown. 6 Remove the access cover. Removing memory cards Complete the following steps to remove printer memory or flash memory cards. Warning: Printer memory and flash memory cards are easily damaged by static electricity. Touch something metal on the - Lexmark C782 | User's Guide - Page 23
server, Coax/Twinax Adapter, Parallel Interface Card, or Serial Interface Card. Warning: Option cards are easily damaged by static electricity. Touch something metal on the printer before you touch an option card. 1 Remove the system board access cover. For more information, see Accessing the - Lexmark C782 | User's Guide - Page 24
Installing and removing options 3 Gently pull the three posts on the hard disk mounting plate out of the holes on the system board. 4 Gently pull the ribbon cable connector out of the connector on the system board. 5 Place the disk in its original packaging, or wrap the disk in paper and store it in - Lexmark C782 | User's Guide - Page 25
cards are easily damaged by static electricity. Touch something metal on the printer before you touch an optional firmware card. 1 Remove the system board slots at the top of the access cover with the screws near the top of the printer. 2 Slide the cover up under the top cover lip as far as it will - Lexmark C782 | User's Guide - Page 26
2 Printing Understanding the printer operator panel The printer operator panel has a four-line, back lit, gray scale display that can show both graphics and text. The Back, Menu, and Stop buttons are located - Lexmark C782 | User's Guide - Page 27
is used on the operator panel. The lights indicate whether the printer power is on, the printer is busy, idle, processing a job, or requires operator panel is used to plug in a USB flash memory device and print PDF and supported graphic files (.gif, .jpeg, .jpg, .bmp, .png, .tiff, .tif, .pcx, - Lexmark C782 | User's Guide - Page 28
entries. Note: The pound (#) sign is not used. The display panel shows messages and graphics describing the current state of the printer and indicating possible printer problems you must resolve. The top line of the display is the header line. If applicable, it will contain the graphic indicating - Lexmark C782 | User's Guide - Page 29
USB flash memory devices, see the Lexmark Web site at www.lexmark.com. Note the following when using a USB flash memory device with the printer USB Direct Interface: • USB devices must be compatible with the USB 2.0 standard. • Hi-Speed USB devices must support the Full-Speed standard as well - Lexmark C782 | User's Guide - Page 30
drive My_document_01 My_document_02 Copies 1 4 To print only one copy, press , or manually input the number of copies with the number pad, then press . Note: Do printing. The document prints. If you leave the drive in the printer after leaving the initial USB menu screen, you can still print files - Lexmark C782 | User's Guide - Page 31
to verify the network connection. This page also provides important information that helps in configuring for network printing. 1 Make sure the printer is on and the Ready message appears. 2 Press on the operator panel. 3 Press until Reports appears, and then press . Printing a menu settings - Lexmark C782 | User's Guide - Page 32
", the LAN drop may not be active, or the network cable may be malfunctioning. Consult a system support person for a solution, and print another network setup page to verify that the printer is connected to the network. Printing a font sample list To print samples of the fonts currently available - Lexmark C782 | User's Guide - Page 33
trays while a print job is printing. It could damage the tray or the printer. Loading 500-sheet trays To load any of the 500-sheet trays: 1 Remove 2 Squeeze the front guide lever and slide the guide to the front of the tray. 3 Squeeze the side guide lever and slide the guide to the correct position - Lexmark C782 | User's Guide - Page 34
stack height. Overfilling the tray may cause jams. 6 Squeeze the front guide lever and slide the guide until it firmly touches the stack of paper. 7 Reinstall the tray. Make sure the tray is pushed completely into the printer. 8 If you are loading a different type of media than was previously - Lexmark C782 | User's Guide - Page 35
Printing Loading the 2000-sheet tray Follow these instructions to load a 2000-sheet tray. Do not load any print media other than paper in the 2000-sheet tray. 1 Pull open the tray. 2 Squeeze the side guide lever, lift the guide, and place it into the appropriate slot for the size paper you are - Lexmark C782 | User's Guide - Page 36
Printing 4 Slide the bottom support toward the front of the tray until it touches the front guide. 5 Flex the sheets back and forth to the tray. Make sure the tray is pushed completely into the printer. Note: Do not exceed the maximum stack height. Overfilling the tray may cause paper jams. Loading - Lexmark C782 | User's Guide - Page 37
-As a manual bypass feeder, you send a print job to the feeder while specifying the type and size of media from your computer. The printer then prompts you to load the appropriate print media before it prints. To load the multipurpose feeder: 1 Open the multipurpose feeder. 2 Squeeze the paper guide - Lexmark C782 | User's Guide - Page 38
go. Do not force the media. Note: Do not exceed the maximum stack height. Overfilling the feeder may cause jams. 6 Squeeze the paper guide lever and slide the guide until it lightly touches the side of the stack. 7 If you are loading a different type of media than was previously loaded in the - Lexmark C782 | User's Guide - Page 39
specialty media (transparencies, labels, other) Follow these instructions when you want to print on media such as transparencies select File Print. 2 Click Properties (or Options, Printer, or Setup, depending on the application) to view the printer driver settings. 3 Click the Paper tab, and then - Lexmark C782 | User's Guide - Page 40
you load the same size and type of paper or specialty media in more than one tray, the printer automatically links the trays. This means that when one tray is empty, it feeds from the next . For more information, see the Menus and Messages Guide on the Software and Documentation CD Linking trays 40 - Lexmark C782 | User's Guide - Page 41
value as the bin configuration default. 7 Press until you get to the Ready state. Holding a job in the printer When sending a job to the printer, you can specify in the driver that you want the printer to hold the job in memory. When you are ready to print the job, you must go to - Lexmark C782 | User's Guide - Page 42
Hold Æ Confidential Print, click Help and see the topic "Confidential Print" or "Print and Hold", and then follow the driver instructions. 4 Enter a User Name and PIN. 5 Send your job to the printer. Go to the printer when you are ready to retrieve your confidential print job, and follow the At the - Lexmark C782 | User's Guide - Page 43
number (PIN). 5 Press until appears next to the job you want to print, and then press . After your job prints, it is deleted from printer memory. Entering a personal identification number (PIN) When you select Confidential Job from the Held job menu, the following prompt appears on the display after - Lexmark C782 | User's Guide - Page 44
Æ Held Jobs, click Help, and see the topic Held Jobs or Print and Hold, then follow the driver instructions. 4 Select the type of held job you want, and then send your job to the printer. Go to the printer when you are ready to retrieve your confidential print job, and follow the At the - Lexmark C782 | User's Guide - Page 45
Printing At the printer 1 Press until 2 Press until 3 Press until Held jobs appears, and then press . appears next to your user name, and then press . appears next to the - Lexmark C782 | User's Guide - Page 46
Storing paper Use the following guidelines to avoid paper feeding problems and uneven print quality. • Store paper in an its original wrapper until you load it into the printer. Storing supplies Choose a cool, clean storage area for your printer supplies. Store supplies right side up in their - Lexmark C782 | User's Guide - Page 47
for loading instructions: • Loading 500-sheet trays • Loading the 2000-sheet tray • Loading the multipurpose feeder The following hints can help you avoid paper jams: • Use only recommended paper. Refer to the Card Stock & Label Guide available on the Lexmark Web site at www.lexmark.com/publications - Lexmark C782 | User's Guide - Page 48
media for the printer helps avoid printing problems. The following sections contain guidelines for choosing the correct media for the printer. For detailed information about media characteristics, see the Card Stock & Label Guide available on the Lexmark Web site at www.lexmark.com/publications - Lexmark C782 | User's Guide - Page 49
Media specifications Curl Curl is the tendency of media to curve at its edges. Excessive curl can cause paper feeding problems. Curl can occur after the paper passes through the printer, where it is exposed to high temperatures. Storing paper unwrapped in hot, humid, cold and dry conditions, even in - Lexmark C782 | User's Guide - Page 50
trouble using a source that does not support auto size sensing. • Do Menu" in the Menus and Messages Guide on the publications CD for detailed guidelines to avoid paper feeding problems and uneven print quality. • paper for the printer: • Use inks designed for use in xerographic copiers. The ink - Lexmark C782 | User's Guide - Page 51
emissions. For detailed information, see the Card Stock & Label Guide, which is available on the Lexmark Web site at www.lexmark.com/publications. Envelopes Try a sample of any envelopes being considered for use with the printer before buying large quantities. For more information, see Loading the - Lexmark C782 | User's Guide - Page 52
, see the Card Stock & Label Guide available on the Lexmark Web site at www.lexmark.com/publications. When printing on labels: • Set the Paper Type menu item to Labels in the Paper Menu. Set the Paper Type from the printer operator panel, the printer driver, or from MarkVision Professional. • Do - Lexmark C782 | User's Guide - Page 53
Paper Menu to Card Stock from the operator panel, the printer driver, or from MarkVision Professional. Set the Paper Weight to printer. • The use of grain long card stock is recommended. Storing media Use the following guidelines for proper media storage. These help avoid media feeding problems - Lexmark C782 | User's Guide - Page 54
. For detailed information on label printing, characteristics, and design, see the Card Stock & Label Guide, available on the Lexmark Web site at www.lexmark.com/publications. Media sizes and support 500-sheet trays Multi-purpose feeder Optional high capacity feeder Optional duplex unit Optional - Lexmark C782 | User's Guide - Page 55
8 Other Envelope 104.8 mm x 210 mm 8 † 8 8 † 8 8 8 8 8 to 215.9 mm x 355.6 mm 4.125 in. x 8.27 in. to 8.5 in. x 14 in.) * Supported as selected paper with tray size sensing turned off in the appropriate trays. ** When selected, the page is formatted for 215.9 x 355.6 mm (8.5 x 14 in - Lexmark C782 | User's Guide - Page 56
) 199 g/m2 (110 lb) Not recommended Not supported 203 g/m2 (125 lb) 203 g/m2 (125 lb) Not supported Not supported Cover 216 g/m2 (80 lb) 216 g/m2 (80 lb) Not supported Not supported Transparencies2 Laser printer 161 to 169 g/m2 161 to 169 g/m2 Not supported (43 to 45lb bond) (43 to 45lb bond - Lexmark C782 | User's Guide - Page 57
less than 60% relative humidity. 2 This paper weight in any source is not supported for duplex (two-sided) printing. 3 For 60 to 176 g/m2(16 (47 lb bond), grain short is recommended. 4 Pressure sensitive area must enter the printer first. 5 100% cotton content maximum weight is 90.2g/m2 (24 lb) bond - Lexmark C782 | User's Guide - Page 58
lb) 203 g/m2 (125 lb) 203 g/m2 (125 Not supported lb) Cover 216 g/m2 (80 lb) Not supported 216 g/m2 (80 216 g/m2 (80 Not supported lb) lb) Transparencies2 Laser printer 161 to 169 g/m2 (43 to 45lb bond)4,5 Not supported 161 to 169 g/ 161 to 169 g/ m2 m2 (43 to 45lb bond)4,5 (43 - Lexmark C782 | User's Guide - Page 59
Media specifications Media capacities Legend 3 - supported 8- unsupported Media type Optional Optional Optional 500-sheet Multipurpose 2000-sheet envelope banner tray feeder tray drawer tray Paper 500 100 sheets* 2000* 8 8 sheets* Card - Lexmark C782 | User's Guide - Page 60
printer. Refer printing problems and maintenance tasks to this key operator. In the U.S., contact Lexmark at 1-800-539-6275 for information about Lexmark and open the supplies screen to view the current status of your print cartridge. Ready. Tray 1 Low, Tray 2 Status / Supplies Held jobs Status - Lexmark C782 | User's Guide - Page 61
application or printer driver to send Lexmark Web site at www.lexmark.com or contact the place where you bought your printer. Note: All life estimates for printer supplies assume printing on letter or A4 size plain paper. Print cartridges The initial print cartridges that shipped with your printer - Lexmark C782 | User's Guide - Page 62
on the display, you should order a new fuser.Order the correct type of fuser for your printer. Only order a web oiler fuser if an authorized servicer has installed a web oiler upgrade kit to allow your printer to print large quantities of vinyl or dual web labels. Type of fuser Standard fuser or - Lexmark C782 | User's Guide - Page 63
CD Ordering staple cartridges Staple cartridges hold 3,000 staples. Use part number 11K3188 to order a pack of three staple cartridges. Recycling Lexmark products To return Lexmark products to Lexmark for recycling: 1 Visit our Web site: www.lexmark.com/recycle 2 Follow the instructions on the - Lexmark C782 | User's Guide - Page 64
will be displayed on the printer operator panel. If you select Show areas on the operator panel, you can view one or more images to help you clear the jam. 23.13 Paper jam, 2 pages jammed Continue Show areas Show areas Show duplex Show rear door 1. Open manual feed door. See the - Lexmark C782 | User's Guide - Page 65
Clearing paper jams Access doors and trays The following illustrations show areas where jams can occur. Area A Multipurpose feeder 250.yy Paper Jam Area B Left access door (beside tray 1) 200.yy Paper Jam 24.yy Paper Jam Area C Paper input options: 500-sheet drawer or 2000-sheet drawer 24.yy - Lexmark C782 | User's Guide - Page 66
(trays 1-4) 250 Paper Jam (multipurpose feeder) 27.yy Paper Jam (mailbox and output expander) Check Areas B, T1 D, K, L K, L E, J B,C, T A,D M What to do Follow the instructions for clearing Area B, and Area T1. If the jam message persists, paper may be caught in the image transfer unit. For - Lexmark C782 | User's Guide - Page 67
and reload your media. Area B 1 Open the left access door until it latches open. 2 Remove all visible media. Note: Remove any torn media from the printer. 3 Close the door. Note: Open Tray 1 and make sure the entire media stack is pushed all the way down into the tray. Clearing the entire - Lexmark C782 | User's Guide - Page 68
Clearing paper jams Area C 1 If you have one or more optional 500-sheet drawers: a Open the 500-sheet drawer access door. Hold the door down while removing jams. Note: Make sure the entire paper stack is loaded correctly and pushed all the way down into the tray. b Close the door. 2 If you have an - Lexmark C782 | User's Guide - Page 69
remove any paper caught in the rollers. Also, look up inside, as some jams may be above the rollers. 2 Reinstall the duplex mechanism in the printer. Area T 1 If you cannot clear all the 500-sheet drawer jams from Area C: a Carefully open trays 2 through 4 (all 500-sheet trays) and remove jams - Lexmark C782 | User's Guide - Page 70
Clearing paper jams Area J 1 Remove the duplex tray J. 2 Remove any jams, and then reinstall the tray. Area K 1 Open the lower right access door. 2 Remove any jams, and then close the door. Area L 1 Open the upper right access door. 2 Remove jams from the rollers, and then close the door. Clearing - Lexmark C782 | User's Guide - Page 71
Clearing paper jams Clearing mailbox, finisher, or output expander jams (Area M) 1 Open the rear door of the 5-bin mailbox or output expander. 2 Pull the jam straight out, and then close the door. Clearing fuser jams 1 Clear the paper path. If the jam error message persists, go to step 2. 2 Open - Lexmark C782 | User's Guide - Page 72
fuser roller cover and remove the jam. 7 Close the fuser roller cover. 8 Snap the housing back onto the fuser. 9 Insert the fuser back into the printer. 10 Slide the latches out, and then pull up to refasten them. 11 Close the doors. Clearing fuser jams 72 - Lexmark C782 | User's Guide - Page 73
entire width of the paper path. 3 Close the left access door and the front access door. If the jam persists, continue with step 4. 4 Turn the printer off. Open the front cover. Clearing image transfer unit jams 73 - Lexmark C782 | User's Guide - Page 74
Clearing paper jams 5 Remove all the print cartridges. a Pull up slightly on the cartridge handhold. b Pull the cartridge straight out and use the handle to lift it off the guides. c Place the cartridges on a clean, flat surface out of direct light. 6 Release the latches to open the multipurpose - Lexmark C782 | User's Guide - Page 75
Clearing paper jams 7 Remove the image transfer unit. a Raise the lever to unlock the image transfer unit. b Pull down on the handle. c Slide the image transfer unit out and place it on a clean, flat surface. Warning: Do not touch the transfer belt. Touching the belt will damage the image transfer - Lexmark C782 | User's Guide - Page 76
Clearing paper jams 8 Look inside the printer. Remove all torn paper or other jams. 9 Insert the image transfer unit back into the printer. a Align the guides with the insertion grooves and gently slide the unit in. b Rotate the handle up, and push gently to lock the unit in place. Clearing image - Lexmark C782 | User's Guide - Page 77
. 10 Return the multipurpose feeder to its working position. Reinstall all the print cartridges. 11 Close the printer door. 12 Turn the printer on. The printer returns to a Ready state. If you still need help 1 Turn the printer off and then back on. 2 Contact your administrator or Help desk if you - Lexmark C782 | User's Guide - Page 78
the Utilities menu. For more information, see the Menus and Messages Guide. The LCD Brightness and LCD Contrast settings are adjusted separately. To change the LCD Brightness or LCD Contrast settings: 1 Make sure your printer is on. 2 Press on the operator panel. 3 Press until Settings appears - Lexmark C782 | User's Guide - Page 79
Administrative support Enabling operator panel menus 1 Turn the printer off. 2 Press and hold and while turning the printer on. 3 Release both buttons when Performing Self Test appears on the display. The printer performs its power-on sequence, and then Config Menu appears on the first line of the - Lexmark C782 | User's Guide - Page 80
Administrative support Adjusting Power Saver To adjust the Power Saver setting: 1 Make sure the printer is on and Ready appears on the issuing a Printer Job Language (PJL) command. For more information, see the Technical Reference available on the Lexmark Web site at www.lexmark.com/publications. - Lexmark C782 | User's Guide - Page 81
SSL port: Open your Web browser. In the address line, enter the IP address of the printer you want to configure using the format: https: //ip_address/. Supporting SNMPv3 (Simple Network Management Protocol version 3) SNMPv3 protocol allows for encrypted and authenticated network communications. It - Lexmark C782 | User's Guide - Page 82
click Network/Ports. 4 Click IPSec. Two types of authentication are supported for IPSec: • Shared Key Authentication-Any ASCII phrase shared among even in Secure mode. • Unsecured Only-Allows the port to only open when the printer is not in Secure mode. Note: A password must be set to enable Secure - Lexmark C782 | User's Guide - Page 83
Protected Access) feature of an optional internal wireless print server to provide WPA-Enterprise security support. Support for 802.1x requires the establishment of credentials for the printer. The printer must be known to the Authentication Server (AS). The AS will allow network access to devices - Lexmark C782 | User's Guide - Page 84
support Printing Lockout Printing Lockout lets you lock or unlock a printer using an assigned PIN. When locked, every job the printer mode both in the driver and through the printer operator panel. Under certain circumstances after printing a job in black only mode, the printer may enter an energy - Lexmark C782 | User's Guide - Page 85
values may vary from printer to printer. The accuracy of the estimates may be affected by how full the print cartridges are, environmental conditions, the media type, the software application, software settings, the driver, driver settings, and the content of the page. Lexmark makes no claim as - Lexmark C782 | User's Guide - Page 86
utility, indicates when it is time to replace supplies and points out actual or potential problems. When a printer needs attention, it alerts the network administrator with a detailed graphic of the printer showing the cause for the alert (for example, an empty paper tray). For more information - Lexmark C782 | User's Guide - Page 87
Online customer support Customer support is available on the Lexmark Web site at www.lexmark.com. Calling for service When you call for printer service, describe the problem you are experiencing, the message on the display, and the troubleshooting steps you have already taken to find - Lexmark C782 | User's Guide - Page 88
off and call for service. The USB device you are using may not be supported or has an error. Only specific USB flash memory devices are supported. For information regarding tested and approved USB flash memory devices, see the Lexmark Web site at www.lexmark.com. The printer is not ready to - Lexmark C782 | User's Guide - Page 89
cable. We recommend Lexmark part number 1329605 (10 Guide. • Set Collation to On in the Finishing Menu or through the printer driver. Note: Setting Collation to Off in the driver Guide. Solving mailbox problems Symptom Paper jams before reaching the mailbox. Cause The mailbox and the printer - Lexmark C782 | User's Guide - Page 90
Troubleshooting Solving option problems If an option does not operate correctly after it is installed or if it quits working: • Turn the printer off, wait for about 10 seconds, and turn the printer on. If this does not fix the problem, unplug the printer, and check the connection between the option - Lexmark C782 | User's Guide - Page 91
. Service messages A service message indicates printer failure that may require service. Turn the printer off, wait about 10 seconds, and then turn the printer on. If the error recurs, write down the error number, the problem, and a detailed description. Call 1-800-LEXMARK for service. Solving - Lexmark C782 | User's Guide - Page 92
Troubleshooting Solving paper feed problems Symptom Cause Solution Paper frequently jams. You are using paper that does not meet the printer specifications. Use recommended paper and other specialty media. See the Card Stock & Label Guide available on the Lexmark Web site at www.lexmark.com - Lexmark C782 | User's Guide - Page 93
Troubleshooting The information in the following table may help you solve print quality problems. If these suggestions still do not correct the problem, call for service. You may have a printer to Right: 1 Re-seat the cartridges by removing them from the printer and then reinserting them. 2 Invoke - Lexmark C782 | User's Guide - Page 94
unit, or fuser may be defective, empty, or worn. Replace the print cartridge, the transfer roller, the image transfer unit, or fuser as needed. From the printer operator panel, print the repetitive defects guide to determine which component needs to be replaced. ABCDE ABCDE Streaked vertical - Lexmark C782 | User's Guide - Page 95
is too dark. • The print cartridges are defective. • Select a different Toner Darkness setting from the printer driver before sending the job to print. • Replace the image transfer unit. • Replace the fuser. • Call for service. Toner rubs off the paper easily when you handle the sheets. • The - Lexmark C782 | User's Guide - Page 96
Troubleshooting Symptom Gray background ABCDE ABCDE ABCDE Cause • The Toner Darkness setting is too dark. • The print cartridges are defective. Solution • Select a different Toner Darkness setting from the printer driver before sending the job to print. • Replace the print cartridge that - Lexmark C782 | User's Guide - Page 97
Troubleshooting Symptom Cause Solution Solid color pages • The print cartridges are • Replace the print cartridge that corresponds to defective. the color displayed on the control panel. • Your printer requires servicing. • Call for service. The paper curls badly once it prints and exits - Lexmark C782 | User's Guide - Page 98
a particular color (such as a color in a corporate logo)? on page 99 for recommendations on how the printer Color Samples pages may be useful in solving certain color-matching problems. The printed page appears tinted. Can I slightly adjust the color? Sometimes a user may consider printed pages to - Lexmark C782 | User's Guide - Page 99
Troubleshooting How can I match a particular of colormatching problem. The nine Color Samples values correspond to color conversion tables in the printer. Selecting software application Help section provides instructions for modifying the color of an object. Manual Color Correction may be necessary - Lexmark C782 | User's Guide - Page 100
Troubleshooting What are Detailed Color Samples and how do I access them? This information applies to network models only. Detailed Color Samples are pages similar to the default pages of color samples accessible from the Quality Menu on the printer , and Black. Solving color quality problems 100 - Lexmark C782 | User's Guide - Page 101
, if not installed and used in accordance with the instruction manual, may cause harmful interference to radio communications. Operation of directives has been signed by the Director of Manufacturing and Technical Support, Lexmark International, S.A., Boigny, France. This product satisfies the Class - Lexmark C782 | User's Guide - Page 102
Radio interference notice Notices Warning: When a network cable is attached, this is a Class A product. In a domestic environment, this product may cause radio interference, in which case, the user may be required to take adequate measures. Taiwan BSMI notice Japanese VCCI notice Korean MIC - Lexmark C782 | User's Guide - Page 103
installed and used in accordance with the instructions, may cause harmful interference to radio directed to: Director of Lexmark Technology & Services Lexmark International, Inc. 740 West by the Director of Manufacturing and Technical Support, Lexmark International, S.A., Boigny, France. This product - Lexmark C782 | User's Guide - Page 104
Straße 12 63128 Dietzenbach Telefon: 0180 - 564 56 44 (Produktinformationen) Telefon: 01805 - 00 01 15 (Technischer Kundendienst) E-Mail: [email protected] Die folgenden Messungen wurden gemäß ISO 7779 durchgeführt und gemäß ISO 9296 gemeldet. Drucken Leerlauf Durchschnittlicher Schallpegel (dB - Lexmark C782 | User's Guide - Page 105
Max-Planck-Straße 12 63128 Dietzenbach Phone: 0180 - 564 56 44 (Produktinformationen) Telefon: 01805 - 00 01 15 (Technischer Kundendienst) E-mail: [email protected] The following measurements were made in accordance with ISO 7779 and reported in conformance with ISO 9296. 1-meter average sound - Lexmark C782 | User's Guide - Page 106
electronic products in countries of the European Union. We encourage the recycling of our products. If you have further questions about recycling options, visit the Lexmark Web site at www.lexmark.com for your local sales office phone number. Notices 106 - Lexmark C782 | User's Guide - Page 107
substances. ENERGY STAR C780n/C780dn/C780dtn C782dn/C782dtn Laser advisory label A laser notice label may be affixed to this printer. LUOKAN 1 LASERLAITE VAROITUS! Laitteen käyttäminen muulla kuin tässä käyttoohjeessa mainitulla tavalla saattaa altistaa käyttäjän turvallisuusluokan 1 ylittävälle - Lexmark C782 | User's Guide - Page 108
attachments Accidents, misuse, abuse or use inconsistent with Lexmark user's guides, manuals, instructions or guidance Unsuitable physical or operating environment Maintenance by anyone other than Lexmark or a Lexmark authorized servicer Operation of a product beyond the limit of its duty - Lexmark C782 | User's Guide - Page 109
as toners and inks), software, or interfaces not furnished by Lexmark TO THE EXTENT PERMITTED BY APPLICABLE LAW, NEITHER LEXMARK NOR ITS THIRD WILL APPLY AFTER THIS PERIOD. ALL INFORMATION, SPECIFICATIONS, PRICES, AND SERVICES ARE SUBJECT TO CHANGE AT ANY TIME WITHOUT NOTICE. Limitation of liability - Lexmark C782 | User's Guide - Page 110
Index Numerics 5-bin mailbox 13 A access doors 65 adjusting Power Saver 80 areas Area A 67 Area B 67 Area C 68 Area E 69 Area G 68 Area J 70 Area K 70 Area L 70 Area M 71 Area T 69 Area T1 69 attaching option cards 20 print server 20 auto size sensing 40 disabling 85 special sizes 85 automatic - Lexmark C782 | User's Guide - Page 111
the printer 60 ordering a print cartridge 61 MarkNet internal print servers maximum stack height multipurpose feeder 38 trays 1, 2, 3 34, 36 media guidelines 48 letterhead 50 letterhead, printing 51 letterhead guidelines 50 loading instructions based on source 51 sizes supported 7 3/4 (Monarch - Lexmark C782 | User's Guide - Page 112
R removing firmware card 25 flash memory option 22 option cards 23 printer memory option 22 repeat print 44 reserve print 44 S safety information button 27 storing 46 media 53 paper 46 supplies 46 supplies print cartridge 61 storing 46 system board accessing 15 T transfer roller ordering 63 tray
-
 1
1 -
 2
2 -
 3
3 -
 4
4 -
 5
5 -
 6
6 -
 7
7 -
8
-
9
-
10
-
11
-
12
-
13
-
14
-
15
-
16
-
17
-
18
-
19
-
20
-
21
-
22
-
23
-
24
-
25
-
26
-
27
-
28
-
29
-
30
-
31
-
32
-
33
-
34
-
35
-
36
-
37
-
38
-
39
-
40
-
41
-
42
-
43
-
44
-
45
-
46
-
47
-
48
-
49
-
50
-
51
-
52
-
53
-
54
-
55
-
56
-
57
-
58
-
59
-
60
-
61
-
62
-
63
-
64
-
65
-
66
-
67
-
68
-
69
-
70
-
71
-
72
-
73
-
74
-
75
-
76
-
77
-
78
-
79
-
80
-
81
-
82
-
83
-
84
-
85
-
86
-
87
-
88
-
89
-
90
-
91
-
92
-
93
-
94
-
95
-
96
-
97
-
98
-
99
-
100
-
101
-
102
-
103
-
104
-
105
-
106
-
107
-
108
-
109
-
110
-
111
-
112
 |
 |
C780, C782
User’s Guide
October 2007
Lexmark and Lexmark with diamond design are trademarks of Lexmark International, Inc.,
registered in the United States and/or other countries.
© 2007 Lexmark International, Inc.
740 West New Circle Road
Lexington, Kentucky 40550