Lexmark C782 User's Guide - Page 78
Administrative support, Adjusting operator panel brightness and contrast
 |
View all Lexmark C782 manuals
Add to My Manuals
Save this manual to your list of manuals |
Page 78 highlights
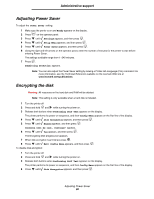
6 Administrative support Adjusting operator panel brightness and contrast The LCD operator panel contrast and brightness can be adjusted through the Utilities menu. For more information, see the Menus and Messages Guide. The LCD Brightness and LCD Contrast settings are adjusted separately. To change the LCD Brightness or LCD Contrast settings: 1 Make sure your printer is on. 2 Press on the operator panel. 3 Press until Settings appears, and then press . 4 Press until Utilities Menu appears, and then press . 5 Press until appears next to the LCD setting you want to change, and then press . 6 Press to increase the brightness or contrast, or press to decrease the brightness or contrast. 7 When the adjustment is complete, press . This saves this setting as the new user default and the printer returns to Ready. Disabling operator panel menus Since many people could be using the printer, an administrator may choose to lock the operator panel menus to keep others from changing menu settings from the operator panel. To disable the operator panel menus so that changes cannot be made to the printer default settings: 1 Turn the printer off. Note: Disabling the operator panel menus does not prevent access to Print and Hold functionality. 2 Press and hold and while turning the printer on. 3 Release both buttons when Performing Self Test appears on the display. The printer performs its power-on sequence, and then Config Menu appears on the first line of the display. 4 Press until Panel Menus appears, and then press . 5 Press until Disable appears, and then press . The following messages appear briefly: Submitting Selection and Disabling Menus. The operator panel returns to Panel Menus. 6 Press until Exit Config Menus appears, and then press . Activating Menu Changes appears. The menus are disabled. Resetting the Printer appears briefly followed by a clock. The operator panel then returns to Ready. Administrative support 78
-
 1
1 -
2
-
3
-
4
-
5
-
6
-
7
-
8
-
9
-
10
-
11
-
12
-
13
-
14
-
15
-
16
-
17
-
18
-
19
-
20
-
21
-
22
-
23
-
24
-
25
-
26
-
27
-
28
-
29
-
30
-
31
-
32
-
33
-
34
-
35
-
36
-
37
-
38
-
39
-
40
-
41
-
42
-
43
-
44
-
45
-
46
-
47
-
48
-
49
-
50
-
51
-
52
-
53
-
54
-
55
-
56
-
57
-
58
-
59
-
60
-
61
-
62
-
63
-
64
-
65
-
66
-
67
-
68
-
69
-
70
-
71
-
72
-
 73
73 -
 74
74 -
 75
75 -
 76
76 -
 77
77 -
 78
78 -
 79
79 -
 80
80 -
 81
81 -
 82
82 -
 83
83 -
84
-
85
-
86
-
87
-
88
-
89
-
90
-
91
-
92
-
93
-
94
-
95
-
96
-
97
-
98
-
99
-
100
-
101
-
102
-
103
-
104
-
105
-
106
-
107
-
108
-
109
-
110
-
111
-
112
 |
 |