Lexmark MX810 Quick Reference - Page 22
Clearing jams
 |
View all Lexmark MX810 manuals
Add to My Manuals
Save this manual to your list of manuals |
Page 22 highlights
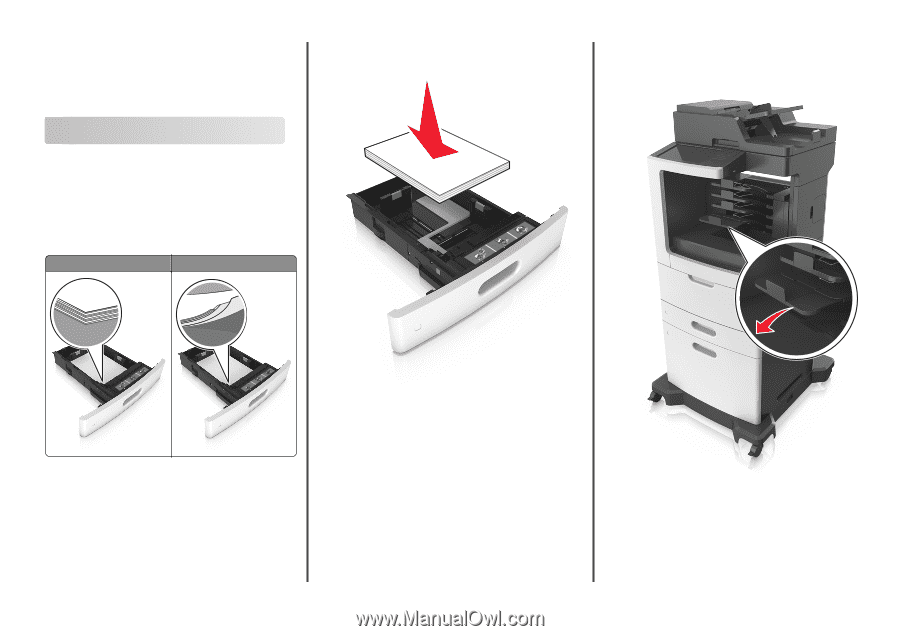
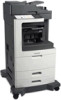
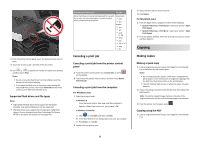
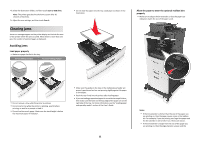
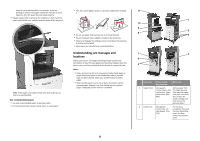
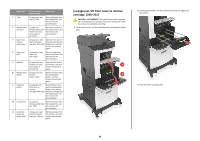
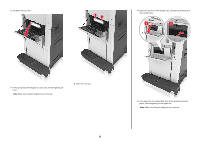
4 Select the destination folder, and then touch Scan to USB drive. Note: The printer goes back to the home screen after 30 seconds of inactivity. 5 Adjust the scan settings, and then touch Scan It. Clearing jams Jam error messages appear on the printer display and include the area of the printer where the jam occurred. When there is more than one jam, the number of jammed pages is displayed. Avoiding jams Load paper properly • Make sure paper lies flat in the tray. Correct loading of paper Incorrect loading of paper • Do not slide the paper into the tray. Load paper as shown in the illustration. Allow the paper to enter the optional mailbox bins properly • Make sure to adjust the bin extender so that the paper size indicators match the size of the paper used. • Do not remove a tray while the printer is printing. • Do not load a tray while the printer is printing. Load it before printing, or wait for a prompt to load it. • Do not load too much paper. Make sure the stack height is below the maximum paper fill indicator. • Make sure the guides in the tray or the multipurpose feeder are properly positioned and are not pressing tightly against the paper or envelopes. • Push the tray firmly into the printer after loading paper. • If you are loading prepunched paper for use with the staple finisher, then make sure the holes on the long edge of the paper are on the right side of the tray. For more information, see the "Loading paper and specialty media" section of the User's Guide. 22 Notes: - If the bin extender is shorter than the size of the paper you are printing on, then the paper causes a jam in the mailbox bin. For example, if you are printing on a legal-size paper and the bin extender is set to letter-size, then a jam occurs. - If the bin extender is longer than the size of the paper you are printing on, then the edges become uneven and the
-
 1
1 -
2
-
3
-
4
-
5
-
6
-
7
-
8
-
9
-
10
-
11
-
12
-
13
-
14
-
15
-
16
-
 17
17 -
 18
18 -
 19
19 -
 20
20 -
 21
21 -
 22
22 -
 23
23 -
 24
24 -
 25
25 -
 26
26 -
 27
27 -
28
-
29
-
30
-
31
-
32
-
33
 |
 |