Lexmark MX810 Quick Reference - Page 8
Without an optional staple finisher, With an optional staple finisher, sided printing
 |
View all Lexmark MX810 manuals
Add to My Manuals
Save this manual to your list of manuals |
Page 8 highlights
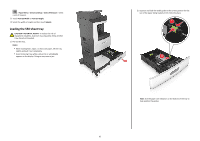
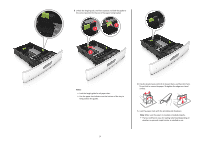
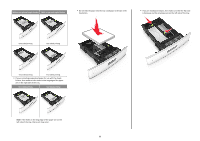
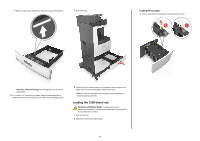
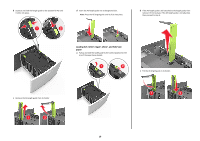
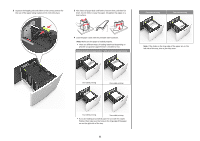
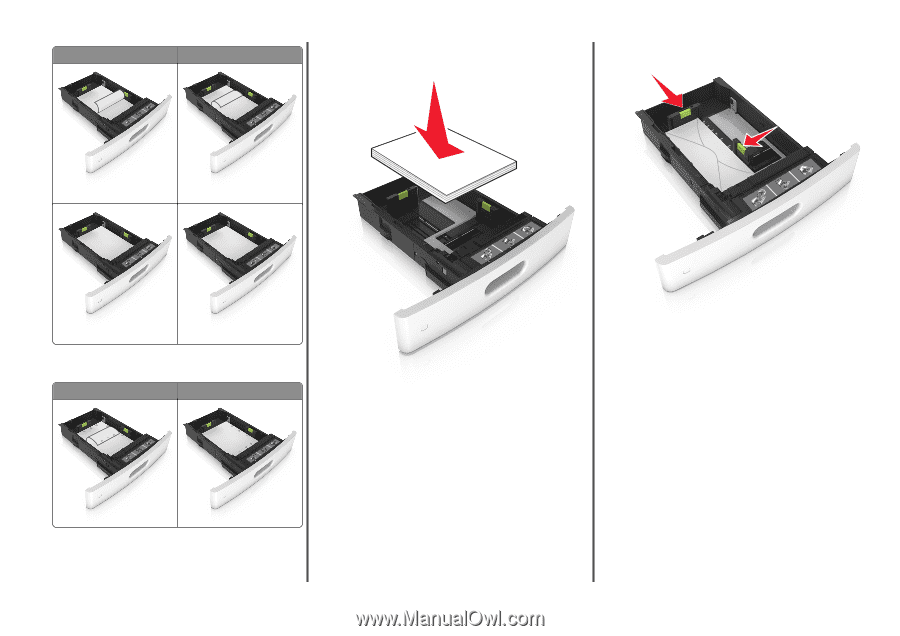
ABC ABC Without an optional staple finisher With an optional staple finisher ABC • Do not slide the paper into the tray. Load paper as shown in the illustration. • If you are loading envelopes, then make sure that the flap side is facing up and the envelopes are on the left side of the tray. One‑sided printing ABC One‑sided printing Two‑sided printing Two‑sided printing • If you are loading prepunched paper for use with the staple finisher, then make sure the holes on the long edge of the paper are on the right side of the tray. One‑sided printing Two‑sided printing ABC ABC Note: If the holes on the long edge of the paper are on the left side of the tray, then a jam may occur. 8
-
 1
1 -
2
-
 3
3 -
 4
4 -
 5
5 -
 6
6 -
 7
7 -
 8
8 -
 9
9 -
 10
10 -
 11
11 -
 12
12 -
 13
13 -
14
-
15
-
16
-
17
-
18
-
19
-
20
-
21
-
22
-
23
-
24
-
25
-
26
-
27
-
28
-
29
-
30
-
31
-
32
-
33
 |
 |
Without an optional staple finisher
With an optional staple finisher
ABC
One
‑
sided printing
ABC
One
‑
sided printing
ABC
Two
‑
sided printing
ABC
Two
‑
sided printing
•
If you are loading prepunched paper for use with the staple
finisher, then make sure the holes on the long edge of the paper
are on the right side of the tray.
One
‑
sided printing
Two
‑
sided printing
ABC
ABC
Note:
If the holes on the long edge of the paper are on the
left side of the tray, then a jam may occur.
•
Do not slide the paper into the tray. Load paper as shown in the
illustration.
•
If you are loading envelopes, then make sure that the flap side
is facing up and the envelopes are on the left side of the tray.
8