Lexmark X543 User's Guide - Page 171
Too many trays attached, 58 Input config error, 59 Incompatible tray <x> - waste toner box
 |
View all Lexmark X543 manuals
Add to My Manuals
Save this manual to your list of manuals |
Page 171 highlights
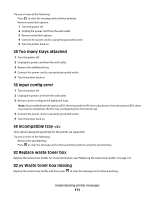
Try one or more of the following: • Press to clear the message and continue printing. • Remove extra flash options: 1 Turn the printer off. 2 Unplug the power cord from the wall outlet. 3 Remove extra flash options. 4 Connect the power cord to a properly grounded outlet. 5 Turn the printer back on. 58 Too many trays attached 1 Turn the printer off. 2 Unplug the power cord from the wall outlet. 3 Remove the additional trays. 4 Connect the power cord to a properly grounded outlet. 5 Turn the printer back on. 58 Input config error 1 Turn the printer off. 2 Unplug the power cord from the wall outlet. 3 Remove and re-configure the additional trays. Note: If you installed both the optional 550-sheet tray and the 650-sheet duo drawer, then the optional 550-sheet tray must be installed as the first tray (configuring from the bottom up). 4 Connect the power cord to a properly grounded outlet. 5 Turn the printer back on. 59 Incompatible tray Only options designed specifically for this printer are supported. Try one or more of the following: • Remove the specified tray. • Press to clear the message and continue printing without using the specified tray. 82 Replace waste toner box Replace the waste toner bottle. For more information, see "Replacing the waste toner bottle" on page 179. 82.yy Waste toner box missing Replace the waste toner bottle, and then press to clear the message and continue printing. Understanding printer messages 171
-
 1
1 -
2
-
3
-
4
-
5
-
6
-
7
-
8
-
9
-
10
-
11
-
12
-
13
-
14
-
15
-
16
-
17
-
18
-
19
-
20
-
21
-
22
-
23
-
24
-
25
-
26
-
27
-
28
-
29
-
30
-
31
-
32
-
33
-
34
-
35
-
36
-
37
-
38
-
39
-
40
-
41
-
42
-
43
-
44
-
45
-
46
-
47
-
48
-
49
-
50
-
51
-
52
-
53
-
54
-
55
-
56
-
57
-
58
-
59
-
60
-
61
-
62
-
63
-
64
-
65
-
66
-
67
-
68
-
69
-
70
-
71
-
72
-
73
-
74
-
75
-
76
-
77
-
78
-
79
-
80
-
81
-
82
-
83
-
84
-
85
-
86
-
87
-
88
-
89
-
90
-
91
-
92
-
93
-
94
-
95
-
96
-
97
-
98
-
99
-
100
-
101
-
102
-
103
-
104
-
105
-
106
-
107
-
108
-
109
-
110
-
111
-
112
-
113
-
114
-
115
-
116
-
117
-
118
-
119
-
120
-
121
-
122
-
123
-
124
-
125
-
126
-
127
-
128
-
129
-
130
-
131
-
132
-
133
-
134
-
135
-
136
-
137
-
138
-
139
-
140
-
141
-
142
-
143
-
144
-
145
-
146
-
147
-
148
-
149
-
150
-
151
-
152
-
153
-
154
-
155
-
156
-
157
-
158
-
159
-
160
-
161
-
162
-
163
-
164
-
165
-
 166
166 -
 167
167 -
 168
168 -
 169
169 -
 170
170 -
 171
171 -
 172
172 -
 173
173 -
 174
174 -
 175
175 -
 176
176 -
177
-
178
-
179
-
180
-
181
-
182
-
183
-
184
-
185
-
186
-
187
-
188
-
189
-
190
-
191
-
192
-
193
-
194
-
195
-
196
-
197
-
198
-
199
-
200
-
201
-
202
-
203
-
204
-
205
-
206
-
207
-
208
-
209
-
210
-
211
-
212
-
213
-
214
-
215
-
216
-
217
-
218
-
219
-
220
-
221
-
222
-
223
-
224
-
225
-
226
-
227
-
228
-
229
-
230
-
231
-
232
-
233
-
234
-
235
-
236
-
237
-
238
-
239
-
240
-
241
-
242
-
243
-
244
-
245
-
246
-
247
-
248
-
249
-
250
-
251
-
252
-
253
-
254
-
255
-
256
-
257
-
258
 |
 |
