Lexmark X543 User's Guide - Page 207
Jobs do not print, Job takes longer than expected to print, Ready, Power Saver, Settings, Setup Menu - troubleshooting
 |
View all Lexmark X543 manuals
Add to My Manuals
Save this manual to your list of manuals |
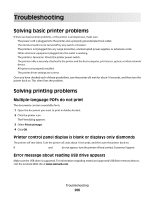
Page 207 highlights
Jobs do not print These are possible solutions. Try one or more of the following: MAKE SURE THE PRINTER IS READY TO PRINT Make sure Ready or Power Saver appears on the display before sending a job to print. Press printer to the Ready state. to return the CHECK TO SEE IF THE STANDARD EXIT BIN IS FULL Remove the stack of paper from the standard exit bin, and then press . CHECK TO SEE IF THE PAPER TRAY IS EMPTY Load paper in the tray. MAKE SURE THE PRINTER IS CONNECTED TO THE NETWORK Print a network setup page and check that the status shows Connected. If the status is Not Connected, check the network cables, and then try printing the network setup page again. Contact your system support person to make sure the network is functioning correctly. Copies of the printer software are also available on the Lexmark Web site at www.lexmark.com. MAKE SURE YOU ARE USING A RECOMMENDED USB OR ETHERNET CABLE For more information, visit the Lexmark Web site at www.lexmark.com. MAKE SURE PRINTER CABLES ARE SECURELY CONNECTED Check the cable connections to the printer and print server to make sure they are secure. For more information, see the setup documentation that came with the printer. Job takes longer than expected to print These are possible solutions. Try one or more of the following: REDUCE THE COMPLEXITY OF THE PRINT JOB Eliminate the number and size of fonts, the number and complexity of images, and the number of pages in the job. CHANGE THE PAGE PROTECT SETTING TO OFF 1 From the printer control panel, press . 2 Press the arrow buttons until Settings appears, and then press . 3 Press the arrow buttons until Setup Menu appears, and then press . 4 Press the arrow buttons until Print Recovery appears, and then press . Troubleshooting 207
-
 1
1 -
2
-
3
-
4
-
5
-
6
-
7
-
8
-
9
-
10
-
11
-
12
-
13
-
14
-
15
-
16
-
17
-
18
-
19
-
20
-
21
-
22
-
23
-
24
-
25
-
26
-
27
-
28
-
29
-
30
-
31
-
32
-
33
-
34
-
35
-
36
-
37
-
38
-
39
-
40
-
41
-
42
-
43
-
44
-
45
-
46
-
47
-
48
-
49
-
50
-
51
-
52
-
53
-
54
-
55
-
56
-
57
-
58
-
59
-
60
-
61
-
62
-
63
-
64
-
65
-
66
-
67
-
68
-
69
-
70
-
71
-
72
-
73
-
74
-
75
-
76
-
77
-
78
-
79
-
80
-
81
-
82
-
83
-
84
-
85
-
86
-
87
-
88
-
89
-
90
-
91
-
92
-
93
-
94
-
95
-
96
-
97
-
98
-
99
-
100
-
101
-
102
-
103
-
104
-
105
-
106
-
107
-
108
-
109
-
110
-
111
-
112
-
113
-
114
-
115
-
116
-
117
-
118
-
119
-
120
-
121
-
122
-
123
-
124
-
125
-
126
-
127
-
128
-
129
-
130
-
131
-
132
-
133
-
134
-
135
-
136
-
137
-
138
-
139
-
140
-
141
-
142
-
143
-
144
-
145
-
146
-
147
-
148
-
149
-
150
-
151
-
152
-
153
-
154
-
155
-
156
-
157
-
158
-
159
-
160
-
161
-
162
-
163
-
164
-
165
-
166
-
167
-
168
-
169
-
170
-
171
-
172
-
173
-
174
-
175
-
176
-
177
-
178
-
179
-
180
-
181
-
182
-
183
-
184
-
185
-
186
-
187
-
188
-
189
-
190
-
191
-
192
-
193
-
194
-
195
-
196
-
197
-
198
-
199
-
200
-
201
-
 202
202 -
 203
203 -
 204
204 -
 205
205 -
 206
206 -
 207
207 -
 208
208 -
 209
209 -
 210
210 -
 211
211 -
 212
212 -
213
-
214
-
215
-
216
-
217
-
218
-
219
-
220
-
221
-
222
-
223
-
224
-
225
-
226
-
227
-
228
-
229
-
230
-
231
-
232
-
233
-
234
-
235
-
236
-
237
-
238
-
239
-
240
-
241
-
242
-
243
-
244
-
245
-
246
-
247
-
248
-
249
-
250
-
251
-
252
-
253
-
254
-
255
-
256
-
257
-
258
 |
 |
