Lexmark X543 User's Guide - Page 172
yy <color> Cartridge is low, 88.yy Replace <color> Cartridge, 150 displayed - fuser replace
 |
View all Lexmark X543 manuals
Add to My Manuals
Save this manual to your list of manuals |
Page 172 highlights
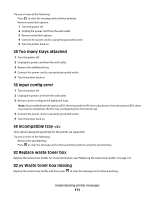
88.yy Cartridge is low Press to clear the message and continue printing. 88.yy Replace Cartridge Replace the toner cartridge. 150 displayed The USB drive contains more than 150 files; only 150 files will be displayed. 200.yy Paper jam 1 Clear the paper path. 2 Press to clear the message and continue printing. 201.yy Paper jam 1 Clear the paper path. 2 Remove the jammed paper below the fuser. 3 Press to clear the message and continue printing. 202.yy Paper jam 1 Clear the paper path. 2 Remove the jammed paper from the fuser. 3 Press to clear the message and continue printing. 230.yy Paper jam 1 Clear the paper path. 2 Open the front door, and then remove the jammed paper. 3 Close the front door. 4 Press to clear the message and continue printing. Note: When there is more than one jam, the message displays the number of pages jammed. 235 Paper Jam Check Duplex An unsupported paper size is jammed in the duplex unit. 1 Open the front door 2 Remove the jam. 3 Load the tray with the correct paper size. 4 Press to continue printing. Understanding printer messages 172
-
 1
1 -
2
-
3
-
4
-
5
-
6
-
7
-
8
-
9
-
10
-
11
-
12
-
13
-
14
-
15
-
16
-
17
-
18
-
19
-
20
-
21
-
22
-
23
-
24
-
25
-
26
-
27
-
28
-
29
-
30
-
31
-
32
-
33
-
34
-
35
-
36
-
37
-
38
-
39
-
40
-
41
-
42
-
43
-
44
-
45
-
46
-
47
-
48
-
49
-
50
-
51
-
52
-
53
-
54
-
55
-
56
-
57
-
58
-
59
-
60
-
61
-
62
-
63
-
64
-
65
-
66
-
67
-
68
-
69
-
70
-
71
-
72
-
73
-
74
-
75
-
76
-
77
-
78
-
79
-
80
-
81
-
82
-
83
-
84
-
85
-
86
-
87
-
88
-
89
-
90
-
91
-
92
-
93
-
94
-
95
-
96
-
97
-
98
-
99
-
100
-
101
-
102
-
103
-
104
-
105
-
106
-
107
-
108
-
109
-
110
-
111
-
112
-
113
-
114
-
115
-
116
-
117
-
118
-
119
-
120
-
121
-
122
-
123
-
124
-
125
-
126
-
127
-
128
-
129
-
130
-
131
-
132
-
133
-
134
-
135
-
136
-
137
-
138
-
139
-
140
-
141
-
142
-
143
-
144
-
145
-
146
-
147
-
148
-
149
-
150
-
151
-
152
-
153
-
154
-
155
-
156
-
157
-
158
-
159
-
160
-
161
-
162
-
163
-
164
-
165
-
166
-
 167
167 -
 168
168 -
 169
169 -
 170
170 -
 171
171 -
 172
172 -
 173
173 -
 174
174 -
 175
175 -
 176
176 -
 177
177 -
178
-
179
-
180
-
181
-
182
-
183
-
184
-
185
-
186
-
187
-
188
-
189
-
190
-
191
-
192
-
193
-
194
-
195
-
196
-
197
-
198
-
199
-
200
-
201
-
202
-
203
-
204
-
205
-
206
-
207
-
208
-
209
-
210
-
211
-
212
-
213
-
214
-
215
-
216
-
217
-
218
-
219
-
220
-
221
-
222
-
223
-
224
-
225
-
226
-
227
-
228
-
229
-
230
-
231
-
232
-
233
-
234
-
235
-
236
-
237
-
238
-
239
-
240
-
241
-
242
-
243
-
244
-
245
-
246
-
247
-
248
-
249
-
250
-
251
-
252
-
253
-
254
-
255
-
256
-
257
-
258
 |
 |
