Nokia 6670 User Guide - Page 118
Creating a new synchronisation profile
 |
UPC - 758478001387
View all Nokia 6670 manuals
Add to My Manuals
Save this manual to your list of manuals |
Page 118 highlights
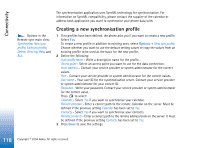
Connectivity The synchronisation application uses SyncML technology for synchronisation. For information on SyncML compatibility, please contact the supplier of the calendar or address book application you want to synchronise your phone data with. Options in the Remote sync main view: Synchronise, New sync profile, Edit sync profile, Delete, View log, Help, and Exit. Creating a new synchronisation profile 1 If no profiles have been defined, the phone asks you if you want to create a new profile. Select Yes. To create a new profile in addition to existing ones, select Options→ New sync profile. Choose whether you want to use the default setting values or copy the values from an existing profile to be used as the basis for the new profile. 2 Define the following: Sync profile name - Write a descriptive name for the profile. Access point - Select an access point you want to use for the data connection. Host address - Contact your service provider or system administrator for the correct values. Port - Contact your service provider or system administrator for the correct values. User name - Your user ID for the synchronisation server. Contact your service provider or system administrator for your correct ID. Password - Write your password. Contact your service provider or system administrator for the correct value. Press to select: Calendar - Select Yes if you want to synchronise your calendar. Remote calendar - Enter a correct path to the remote calendar on the server. Must be defined if the previous setting Calendar has been set to Yes. Contacts - Select Yes if you want to synchronise your contacts. Remote contacts - Enter a correct path to the remote address book on the server. It must be defined if the previous setting Contacts has been set to Yes. 3 Press Done to save the settings. 118 Copyright © 2004 Nokia. All rights reserved.
-
 1
1 -
2
-
3
-
4
-
5
-
6
-
7
-
8
-
9
-
10
-
11
-
12
-
13
-
14
-
15
-
16
-
17
-
18
-
19
-
20
-
21
-
22
-
23
-
24
-
25
-
26
-
27
-
28
-
29
-
30
-
31
-
32
-
33
-
34
-
35
-
36
-
37
-
38
-
39
-
40
-
41
-
42
-
43
-
44
-
45
-
46
-
47
-
48
-
49
-
50
-
51
-
52
-
53
-
54
-
55
-
56
-
57
-
58
-
59
-
60
-
61
-
62
-
63
-
64
-
65
-
66
-
67
-
68
-
69
-
70
-
71
-
72
-
73
-
74
-
75
-
76
-
77
-
78
-
79
-
80
-
81
-
82
-
83
-
84
-
85
-
86
-
87
-
88
-
89
-
90
-
91
-
92
-
93
-
94
-
95
-
96
-
97
-
98
-
99
-
100
-
101
-
102
-
103
-
104
-
105
-
106
-
107
-
108
-
109
-
110
-
111
-
112
-
 113
113 -
 114
114 -
 115
115 -
 116
116 -
 117
117 -
 118
118 -
 119
119 -
 120
120 -
 121
121 -
 122
122 -
 123
123 -
124
-
125
-
126
-
127
-
128
-
129
-
130
-
131
 |
 |