Olympus SP-610UZ SP-610UZ Instruction Manual (English) - Page 45
Using the ib PC software and, importing data back to the camera, Changing the image size, Cropping
 |
View all Olympus SP-610UZ manuals
Add to My Manuals
Save this manual to your list of manuals |
Page 45 highlights
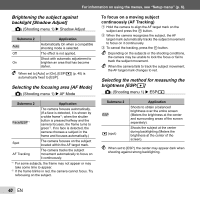
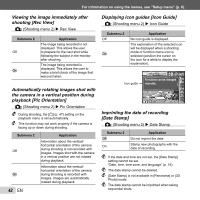
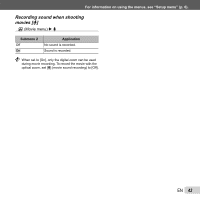
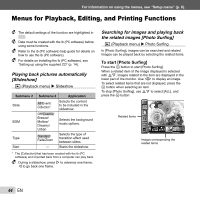
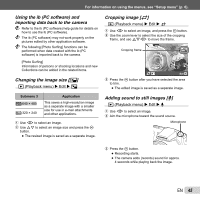
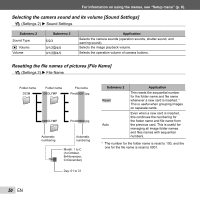
For information on using the menus, see "Setup menu" (p. 6). Using the ib (PC software) and importing data back to the camera Refer to the ib (PC software) help guide for details on how to use the ib (PC software). The ib (PC software) may not work properly on the pictures edited by other application software. The following [Photo Surfing] functions can be performed when data created with the ib (PC software) is imported back to the camera. [Photo Surfing] Information of persons or shooting locations and new Collections can be added in the related items. Changing the image size [Q] q (Playback menu) X Edit X Q Cropping image [P] q (Playback menu) X Edit X P 1 Use HI to select an image, and press the A button. 2 Use the zoom lever to select the size of the cropping frame, and use FGHI to move the frame. Cropping frame Set OK 3 Press the A button after you have selected the area to trim. ● The edited image is saved as a separate image. Submenu 3 C 640 × 480 E 320 × 240 Application This saves a high-resolution image as a separate image with a smaller size for use in e-mail attachments and other applications. 1 Use HI to select an image. 2 Use FG to select an image size and press the A button. ● The resized image is saved as a separate image. Adding sound to still images [R] q (Playback menu) X Edit X R 1 Use HI to select an image. 2 Aim the microphone toward the sound source. Microphone 3 Press the A button. ● Recording starts. ● The camera adds (records) sound for approx. 4 seconds while playing back the image. EN 45
-
 1
1 -
2
-
3
-
4
-
5
-
6
-
7
-
8
-
9
-
10
-
11
-
12
-
13
-
14
-
15
-
16
-
17
-
18
-
19
-
20
-
21
-
22
-
23
-
24
-
25
-
26
-
27
-
28
-
29
-
30
-
31
-
32
-
33
-
34
-
35
-
36
-
37
-
38
-
39
-
 40
40 -
 41
41 -
 42
42 -
 43
43 -
 44
44 -
 45
45 -
 46
46 -
 47
47 -
 48
48 -
 49
49 -
 50
50 -
51
-
52
-
53
-
54
-
55
-
56
-
57
-
58
-
59
-
60
-
61
-
62
-
63
-
64
-
65
-
66
-
67
-
68
-
69
-
70
-
71
-
72
-
73
-
74
-
75
-
76
-
77
-
78
-
79
-
80
-
81
-
82
-
83
-
84
 |
 |
