Olympus SP-610UZ SP-610UZ Instruction Manual (English) - Page 54
Setting the date and time, Choosing home and alternate time zones [World Time]
 |
View all Olympus SP-610UZ manuals
Add to My Manuals
Save this manual to your list of manuals |
Page 54 highlights
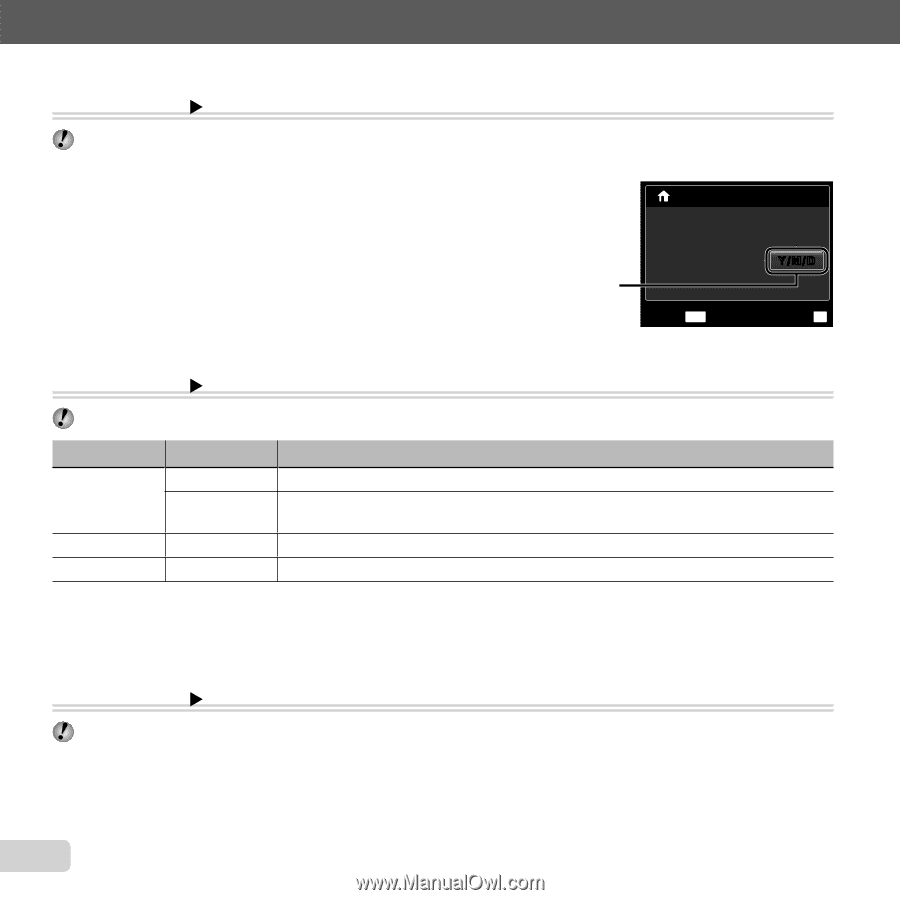
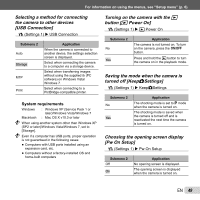
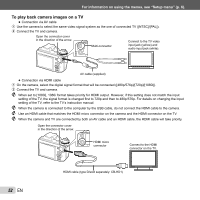
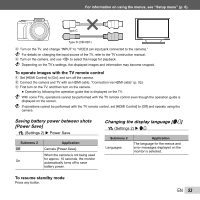
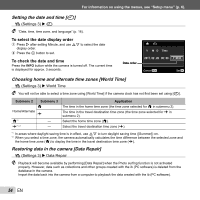
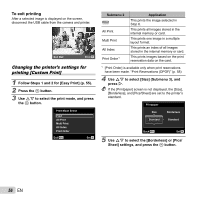
For information on using the menus, see "Setup menu" (p. 6). Setting the date and time [X] t (Settings 3) X X "Date, time, time zone, and language" (p. 16). To select the date display order 1 Press I after setting Minute, and use FG to select the date display order. 2 Press the A button to set. To check the date and time Press the INFO button while the camera is turned off. The current time is displayed for approx. 3 seconds. Date order X Y M D Time 2011. 02 . 26 00 : 00 Y/M/D Cancel MENU Set OK Choosing home and alternate time zones [World Time] t (Settings 3) X World Time You will not be able to select a time zone using [World Time] if the camera clock has not first been set using [X]. Submenu 2 Submenu 3 x Home/Alternate z x*1 - z*1, 2 - Application The time in the home time zone (the time zone selected for x in submenu 2). The time in the travel destination time zone (the time zone selected for z in submenu 2). Select the home time zone (x). Select the travel destination time zone (z). *1 In areas where daylight saving time is in effect, use FG to turn daylight saving time ([Summer]) on. *2 When you select a time zone, the camera automatically calculates the time difference between the selected zone and the home time zone (x) to display the time in the travel destination time zone (z). Restoring data in the camera [Data Repair] t (Settings 3) X Data Repair Playback will become available by performing [Data Repair] when the Photo surfing function is not activated properly. However, data such as collections and other groups created with the ib (PC software) is deleted from the database in the camera. Import the data back into the camera from a computer to playback the data created with the ib (PC software). 54 EN
-
 1
1 -
2
-
3
-
4
-
5
-
6
-
7
-
8
-
9
-
10
-
11
-
12
-
13
-
14
-
15
-
16
-
17
-
18
-
19
-
20
-
21
-
22
-
23
-
24
-
25
-
26
-
27
-
28
-
29
-
30
-
31
-
32
-
33
-
34
-
35
-
36
-
37
-
38
-
39
-
40
-
41
-
42
-
43
-
44
-
45
-
46
-
47
-
48
-
 49
49 -
 50
50 -
 51
51 -
 52
52 -
 53
53 -
 54
54 -
 55
55 -
 56
56 -
 57
57 -
 58
58 -
 59
59 -
60
-
61
-
62
-
63
-
64
-
65
-
66
-
67
-
68
-
69
-
70
-
71
-
72
-
73
-
74
-
75
-
76
-
77
-
78
-
79
-
80
-
81
-
82
-
83
-
84
 |
 |