Onkyo TX-NR709 Owner Manual - Page 54
Picture Adjust, To correct a character, ENTER, RETURN, Wide Mode, Picture Mode
 |
View all Onkyo TX-NR709 manuals
Add to My Manuals
Save this manual to your list of manuals |
Page 54 highlights
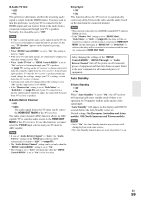
Name input area 4 - 4. Name Edit Name BD/DVD abcde f gh i j k lm nopq r s t uvwxy z 1234567890- ` {}|: ? Space Shift Back Space OK +10 Shift CLR All Erase ABCDEFGH I JKLM NOPQRS T UVWX Y Z !@# $%^& ( )_ ~ [] ;',./ Space Shift Back Space OK +10 Shift CLR All Erase Picture Adjust Using Picture Adjust, you can adjust the picture quality and reduce any noise appearing on the screen. To view the TV picture while setting, press ENTER. To return to the previous screen, press RETURN. ■ Wide Mode*1*2 This setting determines the aspect ratio. ` 4:3: ` Full: Space: Enter a space character. Shift*1: Toggles between lower and upper case characters. (Left)/ (Right): Moves the cursor left or right in the Name input area. Back Space*2: Moves the cursor backward and deletes one character. OK: Confirms your entry. Tip *1 This can also be performed by using +10 on the remote controller. *2 Press CLR on the remote controller to delete all the characters you have input. To correct a character: 1 Use R/X/F/S to select " "(Left) or " "(Right), and then press ENTER. 2 Press ENTER several times to highlight the incorrect character (For each pressure, the cursor is moved on the next character). 3 Use R/X/F/S to select the correct character, and then press ENTER. Tip • To name a radio preset, use TUNER to select AM or FM, and then select the preset (➔ page 29). • To restore a custom name to its default, erase the custom name by entering an empty white space for each letter. Note • This setting cannot be used for the NET and USB input selector. En 54 ` Zoom: ` Wide Zoom: ` Auto: According to the input signals and monitor output setting, the AV receiver automatically selects the "4 : 3", "Full", "Zoom" or "Wide Zoom" mode. See "Monitor Out" for details on the monitor output setting (➔ page 44). ■ Picture Mode*1 ` Custom: All settings can be performed manually. ` Cinema: Select when the picture source is a movie or alike. ` Game: Select when the video source is a game console. ` Through: Does not adjust picture quality (changes resolution). ` Direct: Does not adjust picture quality (does not change resolution). When video is output from HDMI output(s), it is processed the same as "Through". With "Picture Mode", you can change the following settings to be suitable for the movie or game screen by one operation; "Game Mode", "Film Mode", "Edge Enhancement", "Noise Reduction", "Brightness", "Contrast", "Hue", "Saturation" or "Color Temperature".
-
 1
1 -
2
-
3
-
4
-
5
-
6
-
7
-
8
-
9
-
10
-
11
-
12
-
13
-
14
-
15
-
16
-
17
-
18
-
19
-
20
-
21
-
22
-
23
-
24
-
25
-
26
-
27
-
28
-
29
-
30
-
31
-
32
-
33
-
34
-
35
-
36
-
37
-
38
-
39
-
40
-
41
-
42
-
43
-
44
-
45
-
46
-
47
-
48
-
 49
49 -
 50
50 -
 51
51 -
 52
52 -
 53
53 -
 54
54 -
 55
55 -
 56
56 -
 57
57 -
 58
58 -
 59
59 -
60
-
61
-
62
-
63
-
64
-
65
-
66
-
67
-
68
-
69
-
70
-
71
-
72
-
73
-
74
-
75
-
76
-
77
-
78
-
79
-
80
-
81
-
82
-
83
-
84
-
85
-
86
-
87
-
88
-
89
-
90
-
91
-
92
-
93
-
94
-
95
-
96
 |
 |
