Panasonic 55 Professional Display for Entry-Level Digital Signage Operating In - Page 99
Data Cloning, Copying the display data to the USB memory
 |
View all Panasonic 55 Professional Display for Entry-Level Digital Signage manuals
Add to My Manuals
Save this manual to your list of manuals |
Page 99 highlights
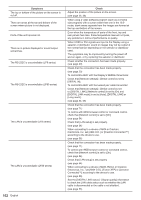
Data Cloning Menu settings and adjusted values set on a single display can be copied to multiple displays using a USB memory. ■■Data that can be copied Settings and set values of [Picture], [Sound], [Setup], [Position] and [Options] menus ● The following data cannot be copied. Setting is required for each display. [Date and time] Setting for [Network settings] - [LAN setup] Display ID in [Options] - [Display ID] ■■Supported device ● Commercially available USB memory devices are supported. (Those with security functions are not supported.) ● USB memory devices other than those formatted in FAT16 or FAT32 cannot be used. ● Up to 32 GB of USB memory in size are supported. ● Only single partition configuration is supported. Note ● If the inch size/series (LF8, LF80) for display differ, the cloning function does not operate. Use the common inch size/series. ● The remote control is used to display [USB data cloning] menu. Unit buttons cannot be used to display the menu. ● Set the input to something other than [USB], and perform the data cloning. Copying the display data to the USB memory 1 Insert the USB memory device to the USB terminal at the bottom of the display. USB terminal USB memory USB Note ● Depending on the type of a USB memory device, it may come in contact with the periphery such as a back cover, and cannot be attached. Use a commercially sold extension cable, or use a small type of a USB memory device connectable to this unit. ● If the USB memory containing the data for cloning is connected in power-on state, the [Select Copy Type] message in step 5 is displayed. Select [Display → USB Memory]. Also, if the data copy is performed, the saved data is overwritten. ● Failure to save in or read from the USB memory displays an error message. 2 Display [Setup] menu pressing . 3 Select [OSD Language] with and press for over 3 seconds. The following display appears. Options Display serial number Software licenses USB data cloning Shipping 4 Select [USB data cloning] with and press . 5 Select [Display → USB Memory] with and press . Select Copy Type Display → USB Memory USB Memory → Display English 99
-
 1
1 -
2
-
3
-
4
-
5
-
6
-
7
-
8
-
9
-
10
-
11
-
12
-
13
-
14
-
15
-
16
-
17
-
18
-
19
-
20
-
21
-
22
-
23
-
24
-
25
-
26
-
27
-
28
-
29
-
30
-
31
-
32
-
33
-
34
-
35
-
36
-
37
-
38
-
39
-
40
-
41
-
42
-
43
-
44
-
45
-
46
-
47
-
48
-
49
-
50
-
51
-
52
-
53
-
54
-
55
-
56
-
57
-
58
-
59
-
60
-
61
-
62
-
63
-
64
-
65
-
66
-
67
-
68
-
69
-
70
-
71
-
72
-
73
-
74
-
75
-
76
-
77
-
78
-
79
-
80
-
81
-
82
-
83
-
84
-
85
-
86
-
87
-
88
-
89
-
90
-
91
-
92
-
93
-
 94
94 -
 95
95 -
 96
96 -
 97
97 -
 98
98 -
 99
99 -
 100
100 -
 101
101 -
 102
102 -
 103
103 -
 104
104 -
105
-
106
-
107
-
108
 |
 |
