Panasonic PT52LCX66 Service Manual - Page 49
Electrical Picture Position Adjustment
 |
View all Panasonic PT52LCX66 manuals
Add to My Manuals
Save this manual to your list of manuals |
Page 49 highlights
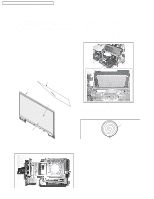
c. Electrical Picture Position Adjustment 1) Adjust OPT HPOSI so that "C" is symmetrical to "D." by pressing the VOLUME UP/DOWN key on the remote to change the value. 2) Press the CH UP/DOWN key on the remote to return to the OTHER menu. 3) Select OPT VPOSI by pressing CH UP/DOWN key on the remote. 4) Adjust OPT VPOSI so that "A" is symmetrical to "B" by pressing the VOLUME UP/DOWN key on the remote to change the value. "E" "A" "F" "I" "J" OPT OPT HPOSI VPOSI F6 02 "C" "D" "K" "G" "B" "L" "H" "C" width "c" "D" width "c" = width "d" width "d" "A" width "a" width "a" = width "b" width "b" "B" 5) Confirm that all "A", "B", "C", "D", "E", "F", "G", "H", "I", "J", "K", "L" are each almost symmetrical. 6) If not, adjust the "OPT HPOSI" and "OPT VPOSI" (repeat steps 1-6) until the picture is in the correct position. 7) Press the CH UP/DOWN key on the remote to return to the OTHER menu. PT-52LCX66 / PT-56LCX66 / PT-61LCX66 / PT-52LCX16 / PT-56LCX16 49
-
 1
1 -
2
-
3
-
4
-
5
-
6
-
7
-
8
-
9
-
10
-
11
-
12
-
13
-
14
-
15
-
16
-
17
-
18
-
19
-
20
-
21
-
22
-
23
-
24
-
25
-
26
-
27
-
28
-
29
-
30
-
31
-
32
-
33
-
34
-
35
-
36
-
37
-
38
-
39
-
40
-
41
-
42
-
43
-
 44
44 -
 45
45 -
 46
46 -
 47
47 -
 48
48 -
 49
49 -
 50
50 -
 51
51 -
 52
52 -
 53
53 -
 54
54 -
55
-
56
-
57
-
58
-
59
-
60
-
61
-
62
-
63
-
64
-
65
-
66
-
67
-
68
-
69
-
70
-
71
-
72
-
73
-
74
-
75
-
76
-
77
-
78
-
79
-
80
-
81
-
82
-
83
 |
 |
