Pfaff 340 - 751 Owner's Manual
Pfaff 340 - 751 Manual
 |
View all Pfaff 340 - 751 manuals
Add to My Manuals
Save this manual to your list of manuals |
Pfaff 340 - 751 manual content summary:
- Pfaff 340 - 751 | Owner's Manual - Page 1
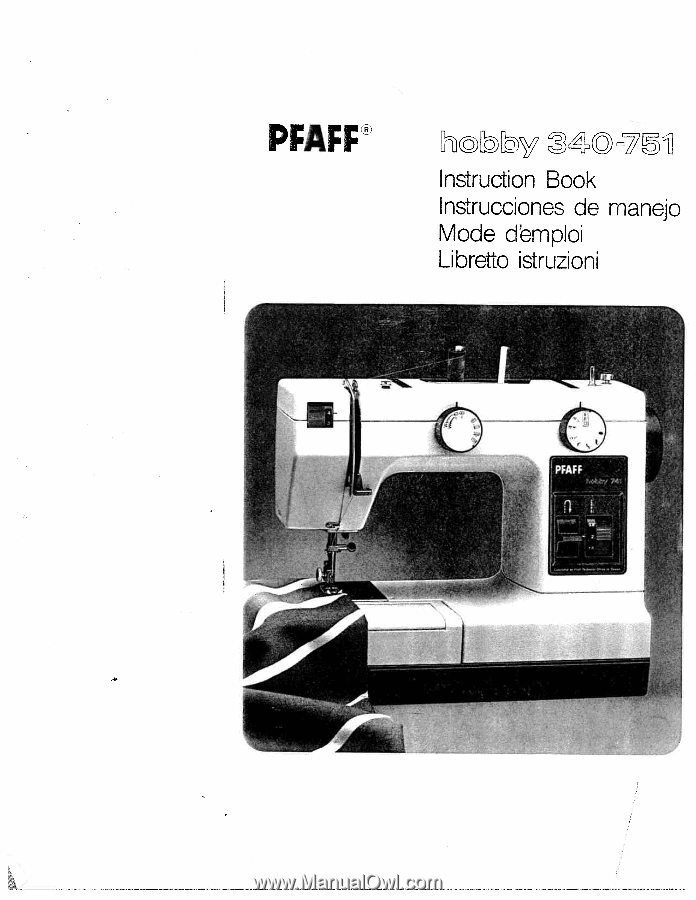
PFAFF ©v 34©=7 Instruction Book Instrucciones de manejo Mode dëmploi Libretto istruzioni - Pfaff 340 - 751 | Owner's Manual - Page 2
K Fold out this page Extienda esta hoja Rabattre ce volet vers I'extérieur ) Girare questa pagina verso l'esterno 4 Some safety rules a) Take care to avoid injury to your fingers by the needle during sewing. b) Make sure you unplug the power cord whenever you have to leave the machine or want to - Pfaff 340 - 751 | Owner's Manual - Page 3
4 - Pfaff 340 - 751 | Owner's Manual - Page 4
Hand wheel 7 Disengaging knob 8 Stitch length control 9 Detachable work support with accessories box 10 Free-arm cover, enclosing sewing hook 1 1 foot holder with sewing foot 13 Needle holder with retaining screw 14 Thread guides 15 Threading slots 16 Needle thread tension 17 Free arm 18 Presser bar - Pfaff 340 - 751 | Owner's Manual - Page 5
11 Plaque aiguille 12 Support de semelle du pied presseur avec semelle 13 Pince-aiguille avec vis de fixation 14 Guide-fil 15 Passage du til Bottone regolatore per punti utili, flexi e ricami nel modelli 550-571; 730-751 22 Tasto per ii ritorno 23 Placca base 24 Zoccolo 25 Chiusura scorrevole della - Pfaff 340 - 751 | Owner's Manual - Page 6
Some safety rules valid for United Kingdom only The wires in this mains lead are coloured according to following code: Blue: Neutral Brown: Live As the colours of the wires in the mains lead of this appliance may not correspond with the colour coding of the terminals in your plug, proceed as follows - Pfaff 340 - 751 | Owner's Manual - Page 7
4Removing the carry case, Flatbed machine models: Push both catches fully down (A), then allow them to move up (B). Cómo quitar Ia maleta-funda - Modelos de base plana: Abra hacia abajo los dos cierres (A) y suéltelos (B). a Pour retirer Ia valisette - Modéles a plateau: Basculer les deux fermetures - Pfaff 340 - 751 | Owner's Manual - Page 8
4 4Removing the carry case, free-arm models Fold down the carrying handle. Cômo sacar Ia maleta-funda de los modelos de brazo al aire Eche hacia atrás el asa en direcciOn de a flecha. Pour retirer Ia valisette - Modèles a bras libre Basculer Ia poignee vers l'arrière. Come sollevare ii - Pfaff 340 - 751 | Owner's Manual - Page 9
Bobbin winding preparations: Reach under work support 9 and pull it out towards the left. Preparación para & devanado: Meta Ia mano izquierda por debajo del brazo 9 y desvielo hacia Ia izquierda. Preparer le bobinage: - Pfaff 340 - 751 | Owner's Manual - Page 10
4 Place the bobbin on winder spindle 5. lntroduzca Ia canilla en el husillo 5 del devanador. Placer Ia canette sur Ia broche 5 du dévidoir, Infilare a spolina sub perno 5. Push the bobbin to the right against stop A. Presione Ia canilla hacia Ia derecha contra el tope A. Pousser Ia canette vers Ia - Pfaff 340 - 751 | Owner's Manual - Page 11
I Bobbin winding: Pull the thread from the spool into tensioner 2, to the bobbin, through one hole of the bobbin, then hold it there. Press the foot control to wind the bobbin. After a few turns, let go of the thread again. Push the filled bob bin to the left, remove it and cut the thread. - Pfaff 340 - 751 | Owner's Manual - Page 12
4 Engaging the sewing mechanism: Hold the balance wheel firmly and turn knob 7 away from you. Conexiôn del mecanismo de costura: Sujete el volante y gire el disco 7 hacia atrás. Embrayage du mécanisme: Retenir le volant et tourner le disque 7 vers I'arrière. lnserire ii meccanismo di cucito: Tenere - Pfaff 340 - 751 | Owner's Manual - Page 13
4 Checking the bobbin thread tension: With a brief sharp upward movement of your hand, the bobbin must gradually slip downwards. (Turn screw A to the left for a weaker tension and to the right for a tighter tension.) Comprobación de Ia tension del hilo inferior: Suspendiendo Ia capsula con Ia - Pfaff 340 - 751 | Owner's Manual - Page 14
,ceralhlleaclonIehiaôCgidllan,roaerasl portagujas. Passage releveur du de fit d'aiguille: fil en position Aiguille et haute. Tirer le fil dans derriere le Ia guide A, dans Ia fente plaque C, vers le haut B, dans Ia fente revenir D, dans le releveur de fil, dans Ia fente D, dans les - Pfaff 340 - 751 | Owner's Manual - Page 15
\ 4 N Hold the needle thread taut. Turn the hand wheel toward you until the needle moves down and up again. Needle and take-up lever must be raised. Pull the bobbin thread up by pulling on the needle thread. Sujete el hilo superior, gire el volante hacia el frente y haga una puntada. La - Pfaff 340 - 751 | Owner's Manual - Page 16
pour Ia mise en ceuvre d'articles tubulaires. I modelli a braccio libero hanno un braccio libero per cucire capi tubolari. Push the detachable work support onto the machine (guide pin in hole). Acople el suplemento a Ia mãquina de forma que el perno gula encaje en el orificio. Mettre le plan de - Pfaff 340 - 751 | Owner's Manual - Page 17
faster the machine runs. Accionamiento del pedal: Cuanto más profundo pise el pedal tanto mayor será Ia velocidad de costura de Ia Hobby. Abaisser Ia pédale du rheostat. Plus Ia pédale sera abaissée, plus a Hobby" coudra vito. Premere ii reostato: PiU a fondo Si preme ii pedale, piü veloce cucirà Ia - Pfaff 340 - 751 | Owner's Manual - Page 18
4 Tensions des fits Position do reglage normale dans Ia plage blanche, entre 3 et 5. Tension d'autant plus forte que le chiffre est grand. ContrOler a I'aide d'un point zigzag large. Coudre quelques points. Los fiTs doivent so nouer dans lépais seur des tissus. 4 Controllo della tensione del f ito: - Pfaff 340 - 751 | Owner's Manual - Page 19
Setting the stitch length (8): Set the required stitch length, from 0 to 4 mm, at mark A. The red setting range from 0 to 1 is for sewing buttonholes. Regulación del largo de puntada (8): Gire el botOn hasta que el argo de puntada deseado entre 0 y 4 coincida con Ia marca A. La zona roja entre 0 y 1 - Pfaff 340 - 751 | Owner's Manual - Page 20
of stitch patterns see pages 18/19. Botón selector de puntadas 20 de los modelos 340-541 y 720, 721: Gire el botOn do forma que el tipo do puntada do puntadas en las paginas 18 y 19. Sélecteur de points 20 pour los modèlos 340-54 1 et 720, 721. Par rotation du bouton, placer le point désiré face au - Pfaff 340 - 751 | Owner's Manual - Page 21
Models 550-571 and 730-751 Modelos 550-571 y 730-75 1 j. Zigzag- and utility-stitch knob en las pãginas 18 y 19. Modèles 550-571 et 730-751 a Sélecteur de point zigzag et de boutonniere 20 ModellI 550-571 e 730-751 Bottone regolatore dello zig-zag e per occhielll 20: Placer le point désir - Pfaff 340 - 751 | Owner's Manual - Page 22
"SySmymbobIoIlSeliSmimboboIoll C) t) Stitch pattern table Tabla de puntadas Stitch Puntada Strarght stItch, toddle needle sition Strarght stitch, left needle posuon Punto recto, p sIcidtt central de Ia puntalla Punto rect poscidn icqulerda de Ia punted Tableau des Point PoInt droll, posItion - Pfaff 340 - 751 | Owner's Manual - Page 23
Punto dntto posiziona ago OniOn Settore dello zi. gzag Modelle Types 340 350 520 530 341 351 521 531 540 541 550 551 560 561 570 571 720 730 740 750 721 731 741 751 ,, •,, 0 0 000 Cucitura tripla diritta flexi Cucitura tripla a zig-zagflexi Simboli per - Pfaff 340 - 751 | Owner's Manual - Page 24
Changing the needle (System 1301705 H): Loosen screw A. Take out the needle. Push the needle (with its flat side facing towards the back) up as far as it will go. Tighten the screw. Cambio de Ia aguja (sistema 130/705 H): Afloje el tornillo A. Saque Ia aguja. Intro duzca Ia nueva aguja (lada piano - Pfaff 340 - 751 | Owner's Manual - Page 25
F is the Sewing foot holder srew. D y E sirven para fijar guias. F sirve para fijar el soporte del prensatelas. D et E servent a fixer l'ètrier guide bord. La vis F fixe le support de semelle. D e E servono per ii fissaggio del lineale. F e Ia vite di fissaggio per ii supporto del piedino. j 21 - Pfaff 340 - 751 | Owner's Manual - Page 26
98-694 563-00 2 98-694414-00 98-694 407-00 (Mod. 540-751) D4 98-694 104-00 I Sewing feet (standard 1 Ordinary sewing 3 accessories) : (Free-arm models) To open accessory compartment raise cover of work support 9. Compartimento para accesorios (Modelos de brazo al aire) Abriendo Ia tapa - Pfaff 340 - 751 | Owner's Manual - Page 27
Piano di lavoro supplementare: (Modelli a base piana) Accostarlo in maniera che i due ganci 51 innestano nelle aperture sullo zoccolo. I After attaching the support, push it downwards a little. Una vez encajado el suplemento, presio nelo un poco hacia abajo. Ensuite, abaisser le plateau amovible - Pfaff 340 - 751 | Owner's Manual - Page 28
attached, it is easy to sew parallel lines of stitches or to stitch parallel to the edge. The guide either follows an edge (Fig. D) or when making parallel lines of stitches runs along the preceding line of stitches (Fig. E). The seam thus made looks - Pfaff 340 - 751 | Owner's Manual - Page 29
âres paralléles et le surpiquage des bords. Ce faisant, le bord du tissu (fig. D) ou bien Ia piqüre precédente suit le guide-droit (fig. E). La couture sera toujours nette et reguliere. Lavori di impunture: Piedino: piedino normale o piedino trasparente e lineale di guida (accessorlo fuori corredo - Pfaff 340 - 751 | Owner's Manual - Page 30
!e penetration Place the prepared hem under the blindstitch sewing foot. The crease line of the outer fabric runs along edge guide B of the blindstitch sewing foot. Turn screw A to adjust edge guide B so far to the left that the needle picks up only one thread of the outer fabric when penetrating on - Pfaff 340 - 751 | Owner's Manual - Page 31
lo a amen B Orre r le for rde I Point invisible elastique: a Pied presseur: Pied points invisibles Tension: Fil daiguille moms tendu Fil: Fil a coudre Point: Point invisible elastique Longueur de point: 3a4 Aiguille: Grosseur 70 ou 80 Reglage de Ia jetée du point Poser l'ourlet - Pfaff 340 - 751 | Owner's Manual - Page 32
. 6. Set the knob at D and sew a num ber of securing stitches. Cut buttonhole open with slitting knife (special accessory). 4 Ojales (modelos 340, 341, 520 y 521): Prensatelas: Transparente TensOn del hilo superior: Algo más floja de 10 normal Hilo: Hilo fino de bordar Largo de puntada - Pfaff 340 - 751 | Owner's Manual - Page 33
rojo) g20 bio del !ilfinal liora la Jire a 6n20 te a haga ctor ojat Eleve H.. -z*. haga leveta Dy (acce 4 Boutonnières (modèles 340, Pied presseur: 341, 520 et 521) Pied a semette Tension: Fit: Longueur transparente Fit daiguitte un peu Fmitoma sbrtoednedru fin du point: Plage rouge - Pfaff 340 - 751 | Owner's Manual - Page 34
10 normal Hilo: Hilo fino de bordar Largo de puntada: Zona del ojal (sector rojo) Selector de puntada utili tarialen el modelos 550-571 y 730-751: En sOmbolo para ojal rojo Aguja: N° 70 u 80 1. Ponga el selector de puntada utilitaria 20 en y cosa el primer Iabio del ojal. Eleve Ia - Pfaff 340 - 751 | Owner's Manual - Page 35
filato per ricamo a macchina fine Lunghezza del punto: settore occhielli (rosso) Bottone regolatore per punti utili 21 sul Modellos 550-571 e 730-751: simbolo per occhielli rosso Ago: grossezza 70-80 primer 1 Régler le bouton 20 (points utilitaires) 111 sur et coudre a premiere lèvre. Arr - Pfaff 340 - 751 | Owner's Manual - Page 36
N Sewing on buttons Sewing foot: without sewing foot or with clear-view foot Stitch: straight stitch, left needle position Feed: dropped Thread: fine sewing thread Place the button in the location marked beforehand and push it under the sewing foot holder. Lower the sewing foot holder - Pfaff 340 - 751 | Owner's Manual - Page 37
D,, -. - arado ajc del .scender a aguja Eleve zona de recho del zigzag y :agujero el3nes PPioesdepdreessbeouur:tosnasns pied apiseedmperlteesseur ou Point: Griffe: Fit: transparente point droit gauche déporté a Feistcaamcooutédere fin gqbvjbtdaduduo' - Pfaff 340 - 751 | Owner's Manual - Page 38
foot to the left as far as it will go. Place the open zip under the foot so that its teeth run along the right guiding edge on the sole of the foot (Fig. B). Sew about half the length of the zip at the required width. Leave the needle down in - Pfaff 340 - 751 | Owner's Manual - Page 39
D a pie en liacia Ia encaje correr Iierda 1 ensate- bajo del Jntes de de Ia mallera dtad jc!avada i€rre a telas, ga Ia 1allera ..ancia. deje el pren O), baje •ra. IPniesdertpiroenssdeeur:ferPmieedtuarefserma egtluisresieare glissiere Longueur de point: 2 a 3 mm Point: FiI: Point droit en Fil a - Pfaff 340 - 751 | Owner's Manual - Page 40
groove in the foot (Fig. F). Finish sewing the zip. Now sew down the zip tape letting the zip teeth run along the guiding edge of the foot (Fig. G). 36 Cremallera cosida en una costura (Para Ia preparación de Ia máquina, véase Ia Pág. 34) Preparación y colocaciOn de Ia cremallera: - Pfaff 340 - 751 | Owner's Manual - Page 41
,,_ ,/ C nsra cloque el ado . Los en un istura ;ichado. 1 forma ero le a dis l pie 4 Ia los cu ra eIa. lun alfi lera al abra a .era el : Con Ia haber Ia con eStra Ia era dis ha del -coser Ia tinta de ncho 'laalo fi ,/ermeture a gIissièe invisible '\ Reglage de Ia machine voir page 34 Void - Pfaff 340 - 751 | Owner's Manual - Page 42
same time as you sew the zip. The zip teeth run along the right guiding edge of the foot (Fig. A). Shortly before the end of the seam leave intended seam line. Baste left zip edge (Fig. B). Open zip. Attach the edge guide and position it for the desired seam margin so that it moves along the edge of - Pfaff 340 - 751 | Owner's Manual - Page 43
____\ HB • na, ci Ia planche e Ia ado ueden era. Fije - ara que • ostura. urren a iensate 'iiateIa, imalIera, costura. tente ira. Hit aIlera Fermeture dame a glisslére pour pantalon (gtcErplfodPtfEfaaaatioIGoeRaprgereeaiubpueuotr.irsgutgermnicafsmtiitgaungltuseBsghibeiacesagisplneres)le, - Pfaff 340 - 751 | Owner's Manual - Page 44
4 Darning Preparing the machine: Sewing foot: Darning foot (special accessory) Stitch type: Straight stitch Needle position: Centre Tension: Ease needle thread tension Thread: Fine machine embroidery thread Needle: Size 70 How to fit the darning foot Remove the sewing foot holder, - Pfaff 340 - 751 | Owner's Manual - Page 45
Tension du fit d'aiguitte: moms forte Fit: Fit a broder fin Aiguitte: Grosseur 70 Griffe: abaissée Mise en place du pied a repriser Entever te support de pied presseur; a 'aide de Ia vis tout en veiltant A, a fixer te ce que pied a t'étrier repriser B repose sur a tige C du pince - Pfaff 340 - 751 | Owner's Manual - Page 46
t Cleaning and oiling Raise the needle and the sewing foot. Remove the two needle plate screws and take off the needle plate. Clean the feed dog with the brush. Push catches A of the sewing hook outwards. Take out ring B and sewing hook C. Clean the hook raceway. Apply a drop of oil to the hook - Pfaff 340 - 751 | Owner's Manual - Page 47
. Afloje etire a jsportador ira el ). Retire el pista del do una go yfio. 4caIga el 4 Changing the bulb Pull out the mains plug. Push the bulb upwards, then in direction A and pull it out. Insert the new bulb so that the pins enter slots C, push the bulb upwards and turn it in direction B. Cambio - Pfaff 340 - 751 | Owner's Manual - Page 48
130/705 H-PS 75, 90 130/705 H-SKF 70, 110 - - Medium ball point Heavy ball point Stretch-fabric needle developed especially for Pfaff. Particularly suitable for delicate stretch and knitted fabrics. Wide-meshed corsetry, Lycra, Simplex and Lastex. 130/705 H-J 90-110 Acute round point Twill - Pfaff 340 - 751 | Owner's Manual - Page 49
Needle chart :_ejeans als, 3 silk System & No. Stitch length 130/705H-ZWI 80 130/705H-ZWI 80 90 100 2.5mm 2.5 mm 2.5 mm 2.5 mm 3.0mm Stitch width - - - - - Needle spacing 1.6 mm 2.0 mm 2.5 mm 3.0mm 4.0 mm Suitable for Medium-wide cording Wide cording Extra wide cording Extra-wide cording - Pfaff 340 - 751 | Owner's Manual - Page 50
lana, terciopelo, costuras decorativas, bordados. Géneros de punto de malla gruesa. tricot, lastex, interlock, quiana, simplex. Aguja diseñada especialmente para Pfaff. Especial para géneros elásticos y gene ros de punto delicados. Corseteria a base de malla gruesa, licra, simplex, lastex, 130/705 - Pfaff 340 - 751 | Owner's Manual - Page 51
_______ Tabla de agujas tEtiCOS de ist1. organdi, rativas, esa, tricot, x. para Pfatf. s y gene licra, abajo, jera. bra [ jJ. Sistema y nOmero 130/705 H-ZWI N° 80 130/705 H-ZWJ N° 80 N° 90 N° 100 Largo de puntada 2,5 mm 2,5 mm 2,5 mm 2,5 mm 3,0mm Ancho de puntada - - -- Distanca entre agujas - Pfaff 340 - 751 | Owner's Manual - Page 52
tissus maille, Lastex, Interlock, Quiana, Simplex pointe bille moyenne - grande pointe bille Aiguille Stretch, spécialement développée pour machines Pfaff. Convient tout particuliè rement pour tissus stretch et maille délicats. Lycra grande maille (gaines, combines, etc.) Lycra, Simplex, Lastex - Pfaff 340 - 751 | Owner's Manual - Page 53
Tableau des aiguilles I r Designation jj_ 1301705H-ZWI Grosseur: 80 I 130/705H-ZWI Grosseur: 80 Grosseur: 90 Grosseur: 100 Longueur de point 2,5mm 2,5mm 2,5 mm 2,5 mm 3,0 mm Largeur de point - - - - Espacement des aiguilles 1,6mm 2,0mm Utilisations nervures normales 2,5 mm 3,0mm 4,0 mm - Pfaff 340 - 751 | Owner's Manual - Page 54
di lana, velluto, cuciture ornamentali, ricami stoffe a maglia larga, tessuti in maglia in genere, Lastex, Interlock, Quiana, Simplex ago speciale Pfaff per punti flexi. Adatto particolarmente per stoffe delicate elastiche e in maglia tessuti per busti a maglia larga, Lycra, Simplex, Lastex punta - Pfaff 340 - 751 | Owner's Manual - Page 55
Tabella degli aghi Uastoffa ante 0 H U 1I Ii tfHici a f4batista, 'to, cuciture magliain exi. Adatto hcate a, Lycra, Denominazione tunghezza i 130/705 H-ZWI 2,5mm Grossezza: 80 2,5 mm - - 130/750 H-ZWI Grossezza: 80 2,5 mm Grossezza: 90 2,5 mm - Grossezza: 100 3,0mm - - distanza aghi - Pfaff 340 - 751 | Owner's Manual - Page 56
new needle and push it up as far as it will go. Insert new needle. See Needle Chart. Let machine feed the work alone. Only guide the material lightly. When inserting the bobbin case, push it in as far as it will go. Check upper and lower tensions. Use first-class - Pfaff 340 - 751 | Owner's Manual - Page 57
Cause: Remedy: 5. Machrne feeds irregularly or not at all Lint has accumulated between tooth Remove needle plate and clean out lint. J(. rows of feed dog. Feed dog dropped. (Drop-feed control is Flick drop-feed control to the left. at right.) art. 6. Machine runs with difficulty Thread - Pfaff 340 - 751 | Owner's Manual - Page 58
4 Fallos y remedios Causa Remedio 1. La máquina hace puntadas saltadas La aguja no estã bien colocada. No se ha colocado Ia aguja correcta. La aguja estã torcida o despuntada. La mãquina no estã enhebrada debidamente. La aguja es demasiado fina para el hilo utilizado. Compruebe si está - Pfaff 340 - 751 | Owner's Manual - Page 59
I Causa Remedlo 5. La máquina no arrastra el material o Se las ha acumulado polvo y hileras de dientes del suciedad entre transportador. El transportador esta está a Ia derecha). oculto (Ia palanca 10 hace irregularmente Retire pincel a el placa de aguja transportador. y limpie - Pfaff 340 - 751 | Owner's Manual - Page 60
I Causes de derangements et remèdes Causes: Remèdes: 1. Points manqués L'aiguille nest pas placee selon es prescriptions L'aiguille n'est pas du système prescrit. L'aiguille est déformée ou épointée. L'enfilage n'est pas correct. L'aiguille est trop fine pour le fil. Engager l'aiguille a fond, - Pfaff 340 - 751 | Owner's Manual - Page 61
Causes: Remèdes 5. La machine n'entraine pas ou irregulièrement Bourres agglomérées entre es dents de a gritfe. Enlever Ia plaque a aigaille, Oter les bourres au pinceau. Griffe abaissée (levier de marche arrière en position droite). Placer le levier do marcho arrière a gauche. 6. Marche dure - Pfaff 340 - 751 | Owner's Manual - Page 62
/7 Possibili inconvenienti e come ovviarli Inconveniente Come ovviare 1. La macchina salta punti L'ago non è inserito bene. E stato inserito un ago sbagliato. L'ago è storto 0 spuntato, La macchina non è infilata bene. L'ago è troppo fine per ii fib. Inserire 'ago fino aIl'arresto, con Ia parte - Pfaff 340 - 751 | Owner's Manual - Page 63
V - V V V -V Vj Inconveniente Come ovviare 5. La macchina non trasporta 0 trasporta solo irregolarmente Tra I dentini del trasporto si e pressata della polvere di cucito. Togliere Ia placca dell'ago e pulire I dentini con un pennello. II trasporto e abbassato. II dispositivo per abbassaro ii - Pfaff 340 - 751 | Owner's Manual - Page 64
-91 For binding edges with tape For cording work (needle size 80, for fine cording needle size 70) For sewing fringes and for basting Edge guide 98-802422-00 For top-stitching (wadding) Straight-stitch foot Needle plate with round needle hole 98-694 803-00 in preperation For topstitching and - Pfaff 340 - 751 | Owner's Manual - Page 65
the Sewing feet sewing foot Accessory compartment Detachable work support Top-stitching Elastic blind stitch Sewing Sewing Sewing buttonholes, buttonholes, on buttons Models Models 340, 350, 341, 520 and 521 351 and 530-751 Inserting zippers Seam-like zipper closures Zippers in ladies - Pfaff 340 - 751 | Owner's Manual - Page 66
Accesorios especiales Para labores de costura puede adquir)r en su agenda tioncla accesorjos especiales. /cesorio No. de pedido OperaciOn Pie prensatelas pare apiicaciones 93-035 920-91 Aparato ribeteador (retirese el soporte del prensatelas) Pie prensatelas para Iorzas, con 5 ranuras (agujas - Pfaff 340 - 751 | Owner's Manual - Page 67
Enhebrado del bib superior ExtracciOn del fib inferior Fallos y remedios OcultaciOn del transportador Ojales Modelos 340, 341, 520 y 521 Ojabes Modelos 350, 351 y 530-751 Palanca aizaprensatelas Pespunteados Pies prensatelas PreparaciOn para el devanado Puntadas elásticas Punto invisible elOstico - Pfaff 340 - 751 | Owner's Manual - Page 68
en vente chez votre dépositaire Pfaff contre facturation. /cessoires Pied pour applications Bordeur (enlever support du pied) a Pied no 80; pour nervures fines, aiguilles n 0 70) couture de franges: batissage Guide-droit Pied pour point droit a Plaque aiguille avec trou rond 98-802 422-00 - Pfaff 340 - 751 | Owner's Manual - Page 69
-fil Selection de Ia Iongueur du point Couture en arrière Point élastique Sélecteur de points (modèles 340-541 et 720, 721) Sélectour de points (modèles 550-571 et 730-751) Sélecteur de motifs Tableau des points Remplacement de l'aiguille Remplacement de Ia semelle du pied presseur Piecis presseurs - Pfaff 340 - 751 | Owner's Manual - Page 70
Accessori fuori corredo Gli accessori fuori corredo servono per Pt atf. avon di cucito special). Si possono acquistare nei negozi essonio No dordine lavoro di Cucito Piedino per applicazioni Piedino per bordare (rimuovere portapiedino) Piedino nervature 5 scanalature (ago gemello con distanza - Pfaff 340 - 751 | Owner's Manual - Page 71
superiore punto Regolazione punti flexi Regolazione del punti Regolazione del motivi La tabella del punti modelli modelli 340-541 550-571 e e 720, 721 730-751 Cam blare ago Abbassare ii trasporto Sostituzione del piedino I piedini Scomparto accessori Piano supplementare Impunture Punto
-
 1
1 -
 2
2 -
 3
3 -
 4
4 -
 5
5 -
 6
6 -
 7
7 -
8
-
9
-
10
-
11
-
12
-
13
-
14
-
15
-
16
-
17
-
18
-
19
-
20
-
21
-
22
-
23
-
24
-
25
-
26
-
27
-
28
-
29
-
30
-
31
-
32
-
33
-
34
-
35
-
36
-
37
-
38
-
39
-
40
-
41
-
42
-
43
-
44
-
45
-
46
-
47
-
48
-
49
-
50
-
51
-
52
-
53
-
54
-
55
-
56
-
57
-
58
-
59
-
60
-
61
-
62
-
63
-
64
-
65
-
66
-
67
-
68
-
69
-
70
-
71
 |
 |
PFAFF
©v
34©=7
Instruction
Book
Instrucciones
de
manejo
Mode
dëmploi
Libretto
istruzioni