Pfaff creative 7550 Owner's Manual - Page 124
continuously
 |
View all Pfaff creative 7550 manuals
Add to My Manuals
Save this manual to your list of manuals |
Page 124 highlights
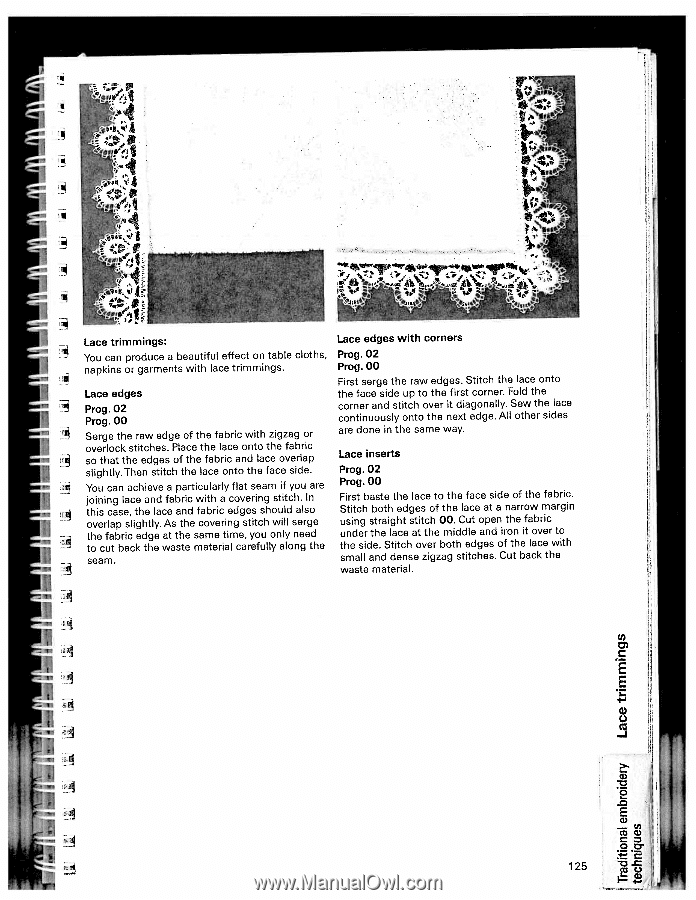
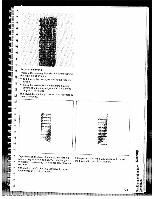
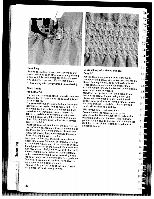
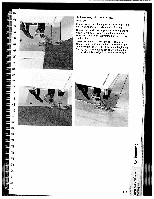
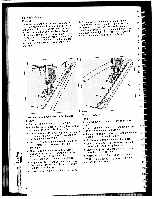
U I Lace trimmings: Lace edges with corners You can produce a beautiful effect on table cloths, Prog. 02 napkins or garments with lace trimmings. Prog. 00 First serge the raw edges. Stitch the lace onto Lace edges Prog. 02 Prog.00 Serge the raw edge of the fabric with zigzag or the face side up to the first corner. Fold the corner and stitch over it diagonally. Sew the lace continuously onto the next edge. All other sides are done in the same way. overlock stitches. Place the lace onto the fabric fl so that the edges of the fabric and lace overlap slightly. Then stitch the lace onto the face side. Lace inserts Prog. 02 j ' You can achieve a particularly flat seam if you are joining lace and fabric with a covering stitch. In this case, the lace and fabric edges should also overlap slightly. As the covering stitch will serge the fabric edge at the same time, you only need to cut back the waste material carefully along the seam. Prog. 00 First baste the lace to the face side of the fabric. Stitch both edges of the lace at a narrow margin using straight stitch 00. Cut open the fabric under the lace at the middle and iron it over to the side. Stitch over both edges of the lace with small and dense zigzag stitches. Cut back the waste material. U) C E E 4-' C.) -J a, - 2 E C', 41 125 I4f
-
 1
1 -
2
-
3
-
4
-
5
-
6
-
7
-
8
-
9
-
10
-
11
-
12
-
13
-
14
-
15
-
16
-
17
-
18
-
19
-
20
-
21
-
22
-
23
-
24
-
25
-
26
-
27
-
28
-
29
-
30
-
31
-
32
-
33
-
34
-
35
-
36
-
37
-
38
-
39
-
40
-
41
-
42
-
43
-
44
-
45
-
46
-
47
-
48
-
49
-
50
-
51
-
52
-
53
-
54
-
55
-
56
-
57
-
58
-
59
-
60
-
61
-
62
-
63
-
64
-
65
-
66
-
67
-
68
-
69
-
70
-
71
-
72
-
73
-
74
-
75
-
76
-
77
-
78
-
79
-
80
-
81
-
82
-
83
-
84
-
85
-
86
-
87
-
88
-
89
-
90
-
91
-
92
-
93
-
94
-
95
-
96
-
97
-
98
-
99
-
100
-
101
-
102
-
103
-
104
-
105
-
106
-
107
-
108
-
109
-
110
-
111
-
112
-
113
-
114
-
115
-
116
-
117
-
118
-
 119
119 -
 120
120 -
 121
121 -
 122
122 -
 123
123 -
 124
124 -
 125
125 -
 126
126 -
 127
127 -
 128
128 -
 129
129 -
130
-
131
-
132
-
133
-
134
-
135
-
136
-
137
-
138
-
139
-
140
-
141
-
142
-
143
-
144
-
145
-
146
-
147
-
148
-
149
-
150
-
151
-
152
-
153
-
154
-
155
-
156
-
157
-
158
-
159
-
160
-
161
-
162
-
163
-
164
-
165
-
166
-
167
-
168
-
169
-
170
-
171
-
172
-
173
-
174
-
175
-
176
-
177
-
178
-
179
-
180
-
181
-
182
-
183
 |
 |