Pfaff creative vision Owner's Manual - Page 86
Embroidery Mode - Preparations
 |
View all Pfaff creative vision manuals
Add to My Manuals
Save this manual to your list of manuals |
Page 86 highlights
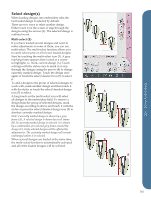
7. Clear sufficient space to accommodate D movement of the embroidery arm and the hoop. Hold the needle thread and touch the start/stop button (D) or the foot control. The machine starts embroidering. 8. After stitching a few stitches, the machine stops and a pop-up appears on the screen asking you to cut the thread end. Cut the thread and press start/stop to continue embroidering. 9. When the first color is completed, your machine stops. A pop-up appears asking you to change color. Re-thread with the next color and continue embroidering by pressing start/ stop. Each color segment is tied off at the end and the needle thread is cut. 10. When the embroidery is completed, your machine cuts the needle and bobbin thread and stops. The needle and presser foot raise automatically for easy removal of the hoop. A pop-up informs you that your embroidery is finished. Touch OK to clear your design from the screen. Embroidery Mode - Preparations 7:6
-
 1
1 -
2
-
3
-
4
-
5
-
6
-
7
-
8
-
9
-
10
-
11
-
12
-
13
-
14
-
15
-
16
-
17
-
18
-
19
-
20
-
21
-
22
-
23
-
24
-
25
-
26
-
27
-
28
-
29
-
30
-
31
-
32
-
33
-
34
-
35
-
36
-
37
-
38
-
39
-
40
-
41
-
42
-
43
-
44
-
45
-
46
-
47
-
48
-
49
-
50
-
51
-
52
-
53
-
54
-
55
-
56
-
57
-
58
-
59
-
60
-
61
-
62
-
63
-
64
-
65
-
66
-
67
-
68
-
69
-
70
-
71
-
72
-
73
-
74
-
75
-
76
-
77
-
78
-
79
-
80
-
 81
81 -
 82
82 -
 83
83 -
 84
84 -
 85
85 -
 86
86 -
 87
87 -
 88
88 -
 89
89 -
 90
90 -
 91
91 -
92
-
93
-
94
-
95
-
96
-
97
-
98
-
99
-
100
-
101
-
102
-
103
-
104
-
105
-
106
-
107
-
108
-
109
-
110
-
111
-
112
-
113
-
114
-
115
-
116
-
117
-
118
-
119
-
120
-
121
-
122
-
123
-
124
-
125
-
126
-
127
-
128
-
129
-
130
-
131
-
132
-
133
-
134
-
135
-
136
-
137
-
138
-
139
-
140
-
141
-
142
 |
 |
