Pioneer BDP-150 Operating Instructions - Page 37
Select and set Display Setting - ip control
 |
View all Pioneer BDP-150 manuals
Add to My Manuals
Save this manual to your list of manuals |
Page 37 highlights
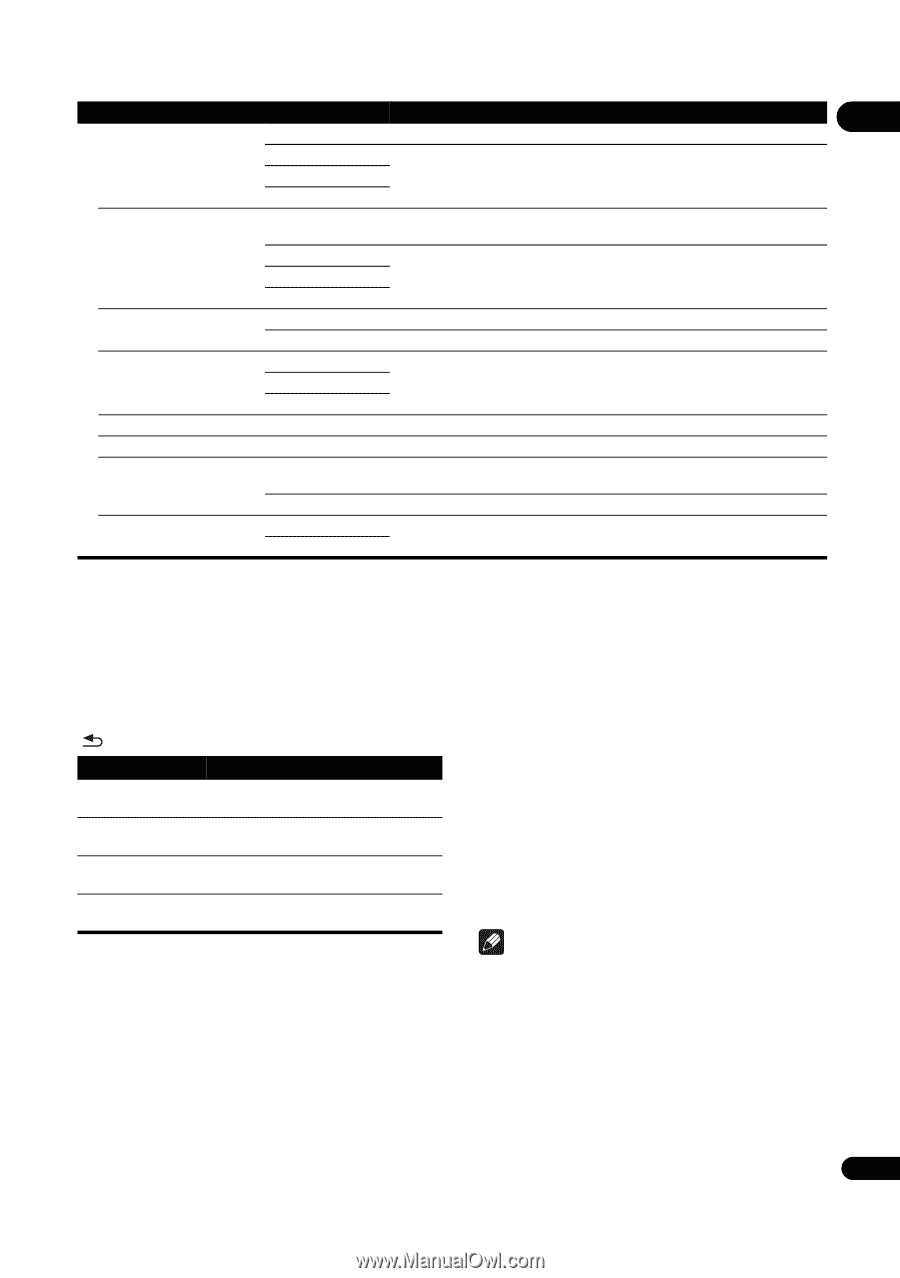
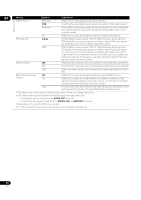
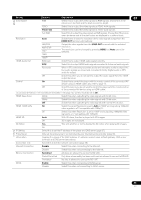
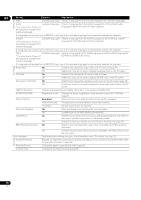
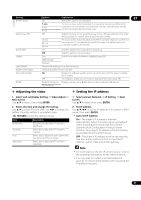
Options Setting Screen Saver Auto Power Off Quick Start Update Load Default System Information Disc Auto Update BUDA Options Explanation 07 Off The screen saver is not activated. 1 min 2 min 3 min The screen saver will be activated if no operation has been performed for more than one minute/two minutes/three minutes. Operating the remote control can deactivate the screen saver. Off Select this if you do not want the power to turn off automatically. This is the default setting for models other than European models. 10 min 20 min 30 min The power will be automatically turned off if no operation has been performed for more than 10 minutes/20 minutes/30 minutes. The default setting for European models is 30 minutes. On Select to shorten the required time to boot up. Off Select to perform normal bootup. Disc Select the method of software updating. (page 39) USB Storage Network Restore the settings to the factory default. Check the system version number. On Display the software update screen when the disc with the player's update file is loaded. Off The software update screen must be displayed manually. (page 39) BUDA Information Display and set up the BUDA data on the connected USB device. BUDA Setup Adjusting the video 1 Select and set Display Setting Video Adjust Next Screen. Use / to select, then press ENTER. 2 Select the item and change the setting. Use / to select the item, then use / to change the setting. Once the setting is completed, press RETURN to close the settings screen. Item Brightness Contrast Hue Saturation Description Select this to adjust the TV screen's brightness. Select this to adjust the TV screen's contrast. Select this to adjust the color (green and red) balance of the TV screen. Select this to adjust the TV screen's saturation. Setting the IP address 1 Select and set Network IP Setting Next Screen. Use / to select, then press ENTER. 2 Set IP address. Use to set the IP address of the player or DNS server, then press ENTER. • Auto Set IP Address On - The player's IP address is obtained automatically. Select this when using a broadband router or broadband modem that has a DHCP (Dynamic Host Configuration Protocol) server function. This player's IP address will automatically be allocated from the DHCP server. Off - The player's IP address must be set manually. Use the number buttons (0 to 9) to input the IP address, subnet mask and default gateway. Note • For information on the DHCP server function, refer to the operating instructions for the network device. • You may need to contact your Internet service provider or network administrator when inputting the IP address manually. 37 En
-
 1
1 -
2
-
3
-
4
-
5
-
6
-
7
-
8
-
9
-
10
-
11
-
12
-
13
-
14
-
15
-
16
-
17
-
18
-
19
-
20
-
21
-
22
-
23
-
24
-
25
-
26
-
27
-
28
-
29
-
30
-
31
-
 32
32 -
 33
33 -
 34
34 -
 35
35 -
 36
36 -
 37
37 -
 38
38 -
 39
39 -
 40
40 -
 41
41 -
 42
42 -
43
-
44
-
45
-
46
-
47
-
48
-
49
-
50
-
51
-
52
 |
 |