Pioneer SC-67 Owner's Manual - Page 104
Select 'Multi Ch In Setup' from the Other Setup menu. - 4k
 |
View all Pioneer SC-67 manuals
Add to My Manuals
Save this manual to your list of manuals |
Page 104 highlights
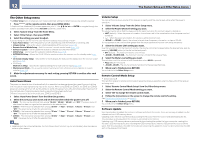
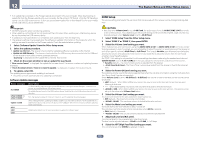
12 The System Setup and Other Setup menus The low frequency component output from the AUDIO ZONE 2 OUT terminals is cut. When a subwoofer is connected in Zone 2, we recommend setting this to "ON". This is only valid when Zone 2 is connected using the AUDIO ZONE 2 OUT terminals. ! OFF (default) - The High Pass Filter function is disabled. ! ON - The High Pass Filter function is enabled. 9 Select the TONE setting you want. This can only be set when ZONE 2 is selected in step 2. The bass and treble for ZONE 2 can be adjusted. When BYPASS is selected, the original sound is played as such. When ON is selected, the BASS and TREBLE can be adjusted. ! The ZONE 2 TONE effect is valid when Speaker System is set to 7.1ch FH/FW + ZONE 2, 5.1ch Bi-Amp + ZONE 2 or 5.1ch + ZONE 2+3. When set to 7.1ch + ZONE 2, the ZONE 2 TONE effect is not applied. 10 Adjust the bass (BASS) and treble (TREBLE) to your tastes. This can only be set when ZONE 2 is selected in step 2 and ON is selected in step 8. The BASS and TREBLE can each be adjusted between -10.0dB and +10.0dB, in 1 dB steps. 11 When you're finished, press RETURN. You will return to the Other Setup menu. EXTENSION Setup ! Default setting: OFF A separately sold the CU-RF100 can be used to operate the receiver by RF communications. To do so, set the EXTENSION setting to ON. When ON is set here, the receiver can be operated even when the receiver is in the standby mode. 1 Select 'EXTENSION Setup' from the Other Setup menu. 2 Select the EXTENSION setting you want. 3 When you're finished, press RETURN. You will return to the Other Setup menu. Note ! This cannot be set when Basic is selected for the Operation Mode. Change the operation mode to Expert (page 48). ! ZONE 4 cannot be operated when using the CU-RF100 omni-directional remote control (separately sold). On Screen Display Setup When the receiver is operated, its status (the input name, listening mode, etc.) is displayed superimposed over the video output on the display. This status display can be turned off by switching this setting to OFF. ! Default setting: ON 1 Select 'On Screen Display Setup' from the Other Setup menu. 2 Select the On Screen Display setting you want. 3 When you're finished, press RETURN. You will return to the Other Setup menu. Multi Channel Input Setup SC-68 only You can adjust the level of the subwoofer for a multi-channel input. Also, when the multi-channel input is selected as an input function, you can display the video images of other input functions. In the Multi Channel Input Setup, you can assign a video input to the multi-channel input. 1 Select 'Multi Ch In Setup' from the Other Setup menu. 2 Select the 'SW Input Gain' setting you want. ! 0dB - Outputs sound of the subwoofer at the level originally recorded on the source. ! +10dB - Outputs sound of the subwoofer at the level increased by 10 dB. 3 Select the 'Video Input' setting you want. When the multi-channel input is selected as an input function, you can display the video images of other input functions. The video input can be selected from the following: DVD, SAT/CBL, DVR/BDR, VIDEO, OFF. 4 When you're finished, press RETURN. You will return to the Other Setup menu. Maintenance Mode Only use this if so instructed by a Pioneer service engineer or custom installer. MHL Setup Select whether or not to switch the input automatically to the MHL input when an MHL-compatible device is connected. ! Default setting: ON 1 Press on the remote control, then press HOME MENU. A Graphical User Interface (GUI) screen appears on your TV. Use i/j/k/l and ENTER to navigate through the screens and select menu items. Press RETURN to exit the current menu. ! Press HOME MENU at any time to exit the Home Menu. 2 Select 'System Setup' from the Home Menu, then press ENTER. 3 Select 'MHL Setup' from the System Setup menu. 4 Select the 'Auto input switching' setting you want. Note ! This is only valid for MHL-compatible devices supporting this function. Note ! The on-screen display is not displayed for video outputs from the HDMI OUT 2 and VIDEO MONITOR OUT terminals. ! The on-screen display is not displayed when the video output resolution is 480i/576i or 4K. ! The size of the characters displayed differs according to the output resolution. 104
-
 1
1 -
2
-
3
-
4
-
5
-
6
-
7
-
8
-
9
-
10
-
11
-
12
-
13
-
14
-
15
-
16
-
17
-
18
-
19
-
20
-
21
-
22
-
23
-
24
-
25
-
26
-
27
-
28
-
29
-
30
-
31
-
32
-
33
-
34
-
35
-
36
-
37
-
38
-
39
-
40
-
41
-
42
-
43
-
44
-
45
-
46
-
47
-
48
-
49
-
50
-
51
-
52
-
53
-
54
-
55
-
56
-
57
-
58
-
59
-
60
-
61
-
62
-
63
-
64
-
65
-
66
-
67
-
68
-
69
-
70
-
71
-
72
-
73
-
74
-
75
-
76
-
77
-
78
-
79
-
80
-
81
-
82
-
83
-
84
-
85
-
86
-
87
-
88
-
89
-
90
-
91
-
92
-
93
-
94
-
95
-
96
-
97
-
98
-
 99
99 -
 100
100 -
 101
101 -
 102
102 -
 103
103 -
 104
104 -
 105
105 -
 106
106 -
 107
107 -
 108
108 -
 109
109 -
110
-
111
-
112
-
113
-
114
-
115
-
116
-
117
-
118
-
119
-
120
-
121
-
122
-
123
-
124
-
125
-
126
-
127
-
128
-
129
-
130
-
131
 |
 |