Ricoh Aficio MP C3500 General Settings Guide
Ricoh Aficio MP C3500 Manual
 |
View all Ricoh Aficio MP C3500 manuals
Add to My Manuals
Save this manual to your list of manuals |
Ricoh Aficio MP C3500 manual content summary:
- Ricoh Aficio MP C3500 | General Settings Guide - Page 1
Operating Instructions General Settings Guide 1 Connecting the Machine 2 System Settings 3 Copier / Document Server Features 4 Facsimile Features 5 Printer Features 6 Scanner Features 7 Registering Addresses and Users for Facsimile/Scanner Functions 8 Other User Tools 9 Appendix Read this manual - Ricoh Aficio MP C3500 | General Settings Guide - Page 2
appear in the following pages. Check the type of your machine before reading this manual. • Type 1: C3535/DSc535/LD435c/Aficio MP C3500 • Type 2: C4540/C4540g/DSc545/DSc545g/LD445c/Aficio MP C4500/Aficio MP C4500G Certain types might not be available in some countries. For details, please contact - Ricoh Aficio MP C3500 | General Settings Guide - Page 3
as registering fax numbers, e-mail addresses, and user codes. Also refer to this manual for explanations on how to connect the machine. ❖ Troubleshooting Provides a guide to solving common problems, and explains how to replace paper, toner, staples, and other consumables. ❖ Security Reference This - Ricoh Aficio MP C3500 | General Settings Guide - Page 4
DeskTopBinder Lite • DeskTopBinder Lite Setup Guide • DeskTopBinder Introduction Guide • Auto Document Link Guide Note ❒ Manuals provided are specific to machine types. ❒ Adobe Acrobat Reader/Adobe Reader must be installed in order to view the manuals as PDF files. ❒ For "UNIX Supplement", please - Ricoh Aficio MP C3500 | General Settings Guide - Page 5
Manual 1 Symbols ...1 Display Panel...2 Accessing User Tools 3 Changing Default Settings 3 Quitting User Printer/LAN-Fax Scan to Folder Function 25 Settings Required to Use the Network Delivery Scanner 28 Settings Required to Use Network TWAIN Scanner 31 Settings Required to Use Document Server - Ricoh Aficio MP C3500 | General Settings Guide - Page 6
3. Copier / Document Server Features General Features 91 Reproduction Ratio 96 Edit ...100 Stamp ...106 Background Numbering 106 Preset Stamp ...107 User Stamp ...110 Date Stamp ...111 Page Numbering ...113 Input/Output ...116 Adjust Color Image 119 Settings for the Document Server 120 4. - Ricoh Aficio MP C3500 | General Settings Guide - Page 7
Printer Features Test Print ...185 Printing the configuration page 186 Maintenance ...188 System ...189 Host Interface ...193 PCL Menu ...194 PS Menu...196 PDF Menu ...197 6. Scanner Features General Settings 199 Scan Settings ...201 Send Settings ...203 7. Registering Addresses and Users - Ricoh Aficio MP C3500 | General Settings Guide - Page 8
Another Group 263 Changing a Group Name 265 Deleting a Group ...266 Registering a Protection Code 267 Registering a Protection Code to a Single User 267 Registering a Protection Code to a Group User 269 Registering SMTP and LDAP Authentication 270 SMTP Authentication 270 LDAP Authentication - Ricoh Aficio MP C3500 | General Settings Guide - Page 9
How to Read This Manual Symbols This manual uses the following symbols: Indicates important safety to read these explanations. Indicates supplementary explanations of the machine's functions, and instructions on resolving user errors. This symbol is located at the end of sections. It indicates where - Ricoh Aficio MP C3500 | General Settings Guide - Page 10
Panel The display panel shows machine status, error messages, and function menus. The function ) will damage the display panel. To display the following screen, press the {User Tools/Counter} key to display the User Tools menu, and then press [System Settings]. Using the System Settings menu screen - Ricoh Aficio MP C3500 | General Settings Guide - Page 11
change the Copier / Document Server Features, press [Copier / Document Server Features]. To change the Facsimile Features, press [Facsimile Features]. To change the Printer Features, press [Printer Features]. To change the Scanner Features, press [Scanner Features]. To adjust color registration or - Ricoh Aficio MP C3500 | General Settings Guide - Page 12
by following instructions on the display, and then press [OK]. Note ❒ To cancel changes made to settings and return to the initial display, press the {User Tools/Counter} key. Reference p.47 "System Settings" p.91 "Copier / Document Server Features" p.121 "Facsimile Features" p.185 "Printer Features - Ricoh Aficio MP C3500 | General Settings Guide - Page 13
1. Connecting the Machine This chapter describes how to connect the machine to the network and specify the network settings. Connecting to the Interfaces This section explains how to identify the machine's interface and connect the machine according to the network environment. 1. IEEE 1394 ports ( - Ricoh Aficio MP C3500 | General Settings Guide - Page 14
Connecting the Machine Connecting to the Ethernet Interface Connect 10BASE-T or 100BASE-TX cable to the Ethernet interface. 1 Important ❒ If the main power switch is on, turn it off. A A ferrite core for the Ethernet cable is supplied with this machine. Make a loop in the cable about 3cm (1.2 - Ricoh Aficio MP C3500 | General Settings Guide - Page 15
(yellow) Lights up yellow when 100 BASE-TX is in operation. Goes off when 10 BASE-T is in operation. Note ❒ For details about installing the printer driver, see "Preparing the Machine", Printer Reference. Reference "Turning On the Power", About This Machine "Preparing the Machine - Ricoh Aficio MP C3500 | General Settings Guide - Page 16
for the machine and your computer. ❒ The USB2.0 interface board is supported by Windows Me / 2000 / XP, Win- dows Server 2003, Mac OS X 10.3.3 or higher. • For Windows Me: Make sure to install "USB Printing Support". When used with Windows Me, only a speed equal to that of USB1.1 is possible. • For - Ricoh Aficio MP C3500 | General Settings Guide - Page 17
interface board. ❒ Two interface ports are available for connecting the IEEE 1394 interface cable. Either is one can be used. ❒ For details about installing the printer driver, see "Preparing the Machine", Printer Reference. Reference "Turning On the Power", About This Machine "Preparing the Machine - Ricoh Aficio MP C3500 | General Settings Guide - Page 18
the cable firmly. E Turn on the main power switch of the machine. F Turn on the host computer. When using Windows 95/98/Me/2000/XP and Windows Server 2003, a printer driver installation screen might appear when the computer is turned on. If this happens, click [Cancel] on the screen. Note ❒ For - Ricoh Aficio MP C3500 | General Settings Guide - Page 19
Connecting to the Interfaces Connecting to the IEEE 802.11b (Wireless LAN) Interface Connect to the IEEE 802.11b (wireless LAN) interface. Note 1 ❒ Check the settings of the IPv4 address and subnet mask of this machine. ❒ For details about how to set the IPv4 address and subnet mask from the - Ricoh Aficio MP C3500 | General Settings Guide - Page 20
Connecting the Machine Note ❒ Select [802.11 Ad-hoc Mode] mode when connecting Windows XP as a wireless LAN client using Windows XP standard driver or utilities, or when not using the infrastructure mode. 1 ❒ You can specify either "WEP" or "WPA" to the Security Method. ❒ Specify "WPA", when - Ricoh Aficio MP C3500 | General Settings Guide - Page 21
]. D Press [Wireless LAN Signal]. The machine's radio wave status appears. E After checking radio wave status, press [Exit]. F Press the {User Tools/Counter} key to return to the User Tools / Counter / Inquiry menu. Note ❒ To check the radio wave status, press [IEEE 802.11b] under [LAN Type] in Net - Ricoh Aficio MP C3500 | General Settings Guide - Page 22
. Ethernet This section lists the settings required for using the printer or LAN-Fax function with an Ethernet connection. For details about how to specify the settings, see "Interface Settings". Menu User Tool Interface Settings/Network Machine IPv4 Address Interface Settings/Network IPv4 - Ricoh Aficio MP C3500 | General Settings Guide - Page 23
Network Settings Menu User Tool Interface Settings/Network Machine Name Setting Requirements As required Note ❒ IPv6 can be used only for the printer function. 1 ❒ For the Effective Protocol setting, check that the protocol you want to use is set to [Active]. ❒ [LAN Type] is displayed when - Ricoh Aficio MP C3500 | General Settings Guide - Page 24
) This section lists the settings required for using the printer or LAN-Fax function with an IEEE 802.11b (wireless LAN) connection. 1 For details about how to specify the settings, see "Interface Settings". Menu User Tool Setting Requirements Interface Settings/Network Machine IPv4 Address - Ricoh Aficio MP C3500 | General Settings Guide - Page 25
, see "Interface Settings" and "File Transfer". Menu User Tool Setting Requirements Interface Settings/Network Machine IPv4 Address Necessary Interface Settings/Network Host Name As required File Transfer SMTP Server Necessary File Transfer SMTP Authentication As required File Transfer - Ricoh Aficio MP C3500 | General Settings Guide - Page 26
Transfer File Transfer User Tool E-mail Reception Interval Max. Reception E-mail Size E-mail Storage in Server Program / Change LAN (IEEE 802.11b) are connected, the selected interface takes precedence. ❒ SMTP Server and Fax E-mail Account must be specified in order to send Internet Fax. ❒ When - Ricoh Aficio MP C3500 | General Settings Guide - Page 27
Network Settings Menu User Tool Setting Requirements Interface Settings/Network IPv4 Gateway Address Necessary Interface Settings/Network DNS Configuration As required Interface Settings/Network Effective Protocol File Transfer SMTP Server Necessary 1 Necessary File Transfer SMTP - Ricoh Aficio MP C3500 | General Settings Guide - Page 28
settings, see "Interface Settings" and "File Transfer". Menu User Tool Interface Settings/Network Machine IPv4 Address Interface Settings/Network IPv4 Max. Reception E-mail Size File Transfer E-mail Storage in Server Setting Requirements Necessary Necessary As required As required As required - Ricoh Aficio MP C3500 | General Settings Guide - Page 29
wireless LAN (IEEE 802.11b) are connected, the selected interface takes precedence. ❒ SMTP Server and Fax E-mail Account must be specified in order to use the send function. ❒ "Interface Settings" and "File Transfer". Menu User Tool Setting Requirements Interface Settings/Network Machine IPv4 - Ricoh Aficio MP C3500 | General Settings Guide - Page 30
Connecting the Machine Menu User Tool Setting Requirements Interface Settings/Network WINS Configuration As required required Interface Settings/Network Host Name As required File Transfer SMTP Server Necessary File Transfer SMTP Authentication As required File Transfer POP before - Ricoh Aficio MP C3500 | General Settings Guide - Page 31
the settings, see "Interface Settings" and "File 1 Transfer". Menu User Tool Interface Settings/IEEE 1394 IPv4 Address Interface Settings/IEEE 1394 DDNS Interface Settings/Network Effective Protocol File Transfer SMTP Server File Transfer SMTP Authentication File Transfer POP before - Ricoh Aficio MP C3500 | General Settings Guide - Page 32
settings, see "Interface Settings" and "File Transfer". Menu User Tool Interface Settings/Network Machine IPv4 Address Interface Settings/Network IPv4 Settings/ IEEE 802.11b Transmission Speed File Transfer SMTP Server File Transfer SMTP Authentication File Transfer POP before SMTP File - Ricoh Aficio MP C3500 | General Settings Guide - Page 33
p.59 "Interface Settings" p.69 "File Transfer" Settings Required to Use Scan to Folder Function This section lists the settings required for sending files. see "Interface Settings" and "File Transfer". Menu User Tool Setting Requirements Interface Settings/Network Machine IPv4 Address - Ricoh Aficio MP C3500 | General Settings Guide - Page 34
files with an IEEE 1394 connection. For details about how to specify the settings, see "Interface Settings" and "File Transfer". Menu User Tool Interface Settings/IEEE 1394 IPv4 Address Interface Settings/IEEE 1394 DDNS Configuration Interface Settings/IEEE 1394 Host Name Setting Requirements - Ricoh Aficio MP C3500 | General Settings Guide - Page 35
(wireless LAN) connection. For details about how to specify the settings, see "Interface Settings" and "File 1 Transfer". Menu User Tool Interface Settings/Network Machine IPv4 Address Interface Settings/Network IPv4 Gateway Address Interface Settings/Network DNS Configuration Interface - Ricoh Aficio MP C3500 | General Settings Guide - Page 36
with an Ethernet connection. For details about how to specify the settings, see "Interface Settings" and "File Transfer". Menu User Tool Interface Settings/Network Machine IPv4 Address Interface Settings/Network IPv4 Gateway Address Interface Settings/Network DNS Configuration Interface - Ricoh Aficio MP C3500 | General Settings Guide - Page 37
with an IEEE 1394 connection. For details about how to specify the settings, see "Interface Settings" and "File 1 Transfer". Menu User Tool Interface Settings/IEEE 1394 IPv4 Address Interface Settings/IEEE 1394 DDNS Configuration Interface Settings/IEEE 1394 Host Name Interface Settings - Ricoh Aficio MP C3500 | General Settings Guide - Page 38
11b (wireless LAN) connection. 1 For details about how to specify the settings, see "Interface Settings" and "File Transfer". Menu User Tool Interface Settings/Network Machine IPv4 Address Interface Settings/Network IPv4 Gateway Address Interface Settings/Network DNS Configuration Interface - Ricoh Aficio MP C3500 | General Settings Guide - Page 39
network TWAIN Scanner with an Ethernet connection. For details about how to specify the settings, see "Interface Settings". Menu User Tool Setting Requirements Interface Settings/Network Machine IPv4 Address Necessary Interface Settings/Network IPv4 Gateway Address As required Interface - Ricoh Aficio MP C3500 | General Settings Guide - Page 40
with an IEEE 1394 connection. 1 For details about how to specify the settings, see "Interface Settings" and "File Transfer". Menu User Tool Interface Settings/IEEE 1394 IPv4 Address Interface Settings/IEEE 1394 DDNS Configuration Interface Settings/IEEE 1394 Host Name Interface Settings - Ricoh Aficio MP C3500 | General Settings Guide - Page 41
environment. Ethernet This section lists the settings required for using Document Server function with an Ethernet connection. For details about how to specify the settings, see "Interface Settings". Menu User Tool Interface Settings/Network Machine IPv4 Address Interface Settings/Network - Ricoh Aficio MP C3500 | General Settings Guide - Page 42
1394 (IPv4 over 1394) This section lists the settings required for using Document Server function with an IEEE 1394 connection. For details about how to specify the settings, see "Interface Settings". Menu User Tool Interface Settings/IEEE 1394 IPv4 Address Interface Settings/IEEE 1394 DDNS - Ricoh Aficio MP C3500 | General Settings Guide - Page 43
LAN) This section lists the settings required for using Document Server function with an IEEE 802.11b (wireless LAN) connection. For details about how to specify the settings, see "Interface Settings". 1 Menu User Tool Setting Requirements Interface Settings/Network Machine IPv4 Address - Ricoh Aficio MP C3500 | General Settings Guide - Page 44
using SmartDeviceMonitor for Admin, see "Using SmartDeviceMonitor for Admin", Network Guide. ❒ For Details about using telnet, see "Remote Maintenance", Network Guide. Reference "Using Web Image Monitor", Network Guide "Using SmartDeviceMonitor for Admin", Network Guide "Remote Maintenance by - Ricoh Aficio MP C3500 | General Settings Guide - Page 45
Address] → [Manual Configuration Address] • Web Image Monitor: Can be used for specifying the setting. • SmartDeviceMonitor for Admin: Cannot be [On] → [Primary WINS Server] • Web Image Monitor: Can be used for specifying the setting. • SmartDeviceMonitor for Admin: Cannot be used for specifying - Ricoh Aficio MP C3500 | General Settings Guide - Page 46
Connecting the Machine ❖ [Network] → [WINS Configuration] → [On] → [Secondary WINS Server] • Web Image Monitor: Can be used for specifying the setting. • SmartDeviceMonitor for Admin: Cannot be used for specifying the setting. 1 • telnet: Can be used for specifying the setting. ❖ [Network] → [ - Ricoh Aficio MP C3500 | General Settings Guide - Page 47
be used for specifying the setting. ❖ [Network] → [SMB Computer Name] • Web Image Monitor: Can be used for specifying the setting. • SmartDeviceMonitor for Admin: Cannot be used for specifying the setting. • telnet: Can be used for specifying the setting. ❖ [Network] → [SMB Work Group] • Web Image - Ricoh Aficio MP C3500 | General Settings Guide - Page 48
Can be used for specifying the setting. ❖ [Network] → [Host Name] • Web Image Monitor: Can be used for specifying the setting. • SmartDeviceMonitor for Admin: Can be used for specifying the setting. • telnet: Can be used for specifying the setting. ❖ [Network] → [Machine Name] • Web Image Monitor - Ricoh Aficio MP C3500 | General Settings Guide - Page 49
Can be used for specifying the setting. 1 ❖ [IEEE 1394] → [WINS Configuration] → [On] → [Primary WINS Server] • Web Image Monitor: Can be used for specifying the setting. • SmartDeviceMonitor for Admin: Cannot be used for specifying the setting. • telnet: Can be used for specifying the setting - Ricoh Aficio MP C3500 | General Settings Guide - Page 50
for specifying the setting. • telnet: Can be used for specifying the setting. ❖ [File Transfer] → [SMTP Server] • Web Image Monitor: Can be used for specifying the setting. • SmartDeviceMonitor for Admin: Cannot be used for specifying the setting. • telnet: Cannot be used for specifying the setting - Ricoh Aficio MP C3500 | General Settings Guide - Page 51
Transfer] → [E-mail Storage in Server] • Web Image Monitor: Can be used for specifying the setting. • SmartDeviceMonitor for Admin: Cannot be used for specifying the setting. • telnet: Cannot be used for specifying the setting. ❖ [File Transfer] → [Default User Name / Password (Send)] • Web Image - Ricoh Aficio MP C3500 | General Settings Guide - Page 52
Connecting the Machine ❖ [File Transfer] → [Number of Scanner Resends] • Web Image Monitor: Cannot be used for specifying the setting. • SmartDeviceMonitor for Admin: Cannot be used for specifying the setting. 1 • telnet: Cannot be used for specifying the setting. 44 - Ricoh Aficio MP C3500 | General Settings Guide - Page 53
Connecting the Machine to a Telephone Line and Telephone Connecting the Machine to a Telephone Line and Telephone This section describes how to connect the machine to the telephone lines and se- 1 lect the line type. Connecting the Telephone Line To connect the machine to a telephone line, use - Ricoh Aficio MP C3500 | General Settings Guide - Page 54
Connecting the Machine 1 46 - Ricoh Aficio MP C3500 | General Settings Guide - Page 55
on how to access System Settings, see "Accessing User tools (System Settings)". General Features This section describes the user tools in the General Features menu under System Settings. Default settings are shown in bold type. ❖ Program / Change / Delete User Text You can register text phrases you - Ricoh Aficio MP C3500 | General Settings Guide - Page 56
on. • Copier • Document Server • Fax • Printer • Scanner ❖ Print Priority Print Priority is given to the mode selected. • Display Mode • Copier/Document Server • Facsimile • Printer • Interleave • 30 seconds, in 1 second increments) using the number keys. The default setting is 3 second(s). 48 - Ricoh Aficio MP C3500 | General Settings Guide - Page 57
❖ Output: Copier (copier) Specify a tray to which documents are delivered. General Features 2 AQT004S 1. Finisher Upper Tray 2. 8. Internal Tray 1 9. Internal Tray 2 ❖ Output: Document Server (Document Server) Specify a tray to which documents are delivered. • Internal Tray 1 • Internal Tray 2 - Ricoh Aficio MP C3500 | General Settings Guide - Page 58
Settings ❖ Output: Printer (printer) Specify a tray to which documents are delivered. The output trays set on the printer driver have priority over the Print Priority. Reference p.3 "Accessing User Tools" "Function Compatibility", Copy/Document Server Reference Output tray settings Important ❒ - Ricoh Aficio MP C3500 | General Settings Guide - Page 59
Default settings are shown in bold type. Important ❒ If the specified paper size differs from the actual size of the paper loaded in 2 the paper tray, a misfeed might occur because the correct paper size was not detected. ❖ Paper Tray Priority: Copier (copier/Document Server : Printer (printer) - Ricoh Aficio MP C3500 | General Settings Guide - Page 60
System Settings ❖ Tray Paper Size: Tray 2-4 Select the size of the paper loaded in the paper tray. The paper guide for the optional LCT is fixed for A4K, 81/2"×11"K size paper. Contact your service representative if you need to change the paper size. ❖ The paper sizes you can set for tray 2 are - Ricoh Aficio MP C3500 | General Settings Guide - Page 61
Tray Paper Settings ❖ Printer Bypass Paper Size Specify the size of the paper in what type of paper is loaded in the bypass tray. • Paper Type • No Display • Recycled Paper • Color Paper • Letterhead • Label Paper • OHP (Transparency) • Special Paper 1 • Special Paper 2 • Special Paper - Ricoh Aficio MP C3500 | General Settings Guide - Page 62
tray. The print functions use this information to automatically select the paper tray. • Paper Type • No Display 2 • Recycled Paper • Color Paper • Letterhead • Special Paper 1 • Special Paper 2 • Special Paper 3 • Cardstock • Preprinted Paper • Bond Paper • Paper Thickness • Thin Paper - Ricoh Aficio MP C3500 | General Settings Guide - Page 63
Tray Paper Settings ❖ Cover Sheet Tray Allows you to specify and display the paper tray that is setting cover sheets. After selecting the paper tray, you can also specify the display timing and copy method for two-sided copying. • Tray to Program • Off • Bypass Tray • Tray 1 2 • Tray 2 • Tray - Ricoh Aficio MP C3500 | General Settings Guide - Page 64
one of the trays is specified as the default in Paper Tray Priority, assign 2 Sided Copy [Auto Paper Select] can only be selected for the copier function if [No Display] and [Recycled Paper] are User Tools" "Covers", Copy/ Document Server Reference "Slip Sheets", Copy/ Document Server Reference 56 - Ricoh Aficio MP C3500 | General Settings Guide - Page 65
work when error messages appear. default setting is 60 second(s). ❖ Copier/Document Server Auto Reset Timer (copier/Document Server) Specifies the time to elapse before copier and Document Server modes reset. • On • Off If [Off] is selected, the machine does not automatically switch to the user code - Ricoh Aficio MP C3500 | General Settings Guide - Page 66
The default setting is 30 second(s). ❖ Printer Auto Reset Timer (printer) Specifies the time to elapse before the printer function user code entry screen. The time can be set from 10 to 999 seconds, using the number keys. The default setting is 60 second(s). ❖ Set Date Set the date for the copier - Ricoh Aficio MP C3500 | General Settings Guide - Page 67
user tools in the Interface Settings menu under System Settings. Default settings are shown in bold type. Network 2 This section describes the user on the network. The physical address (MAC address) also appears. If you are using • Manual Configuration Address The machine's manually configured - Ricoh Aficio MP C3500 | General Settings Guide - Page 68
settings. • Active • Inactive ❖ Domain Name Specify the domain name. The default domain name is blank. • Auto-Obtain (DHCP) • Specify ❖ WINS Configuration Specify the WINS server settings. If [On] is selected, enter the WINS Server IPv4 address as "xxx.xxx.xxx.xxx"("x" indicates a number). If DHCP - Ricoh Aficio MP C3500 | General Settings Guide - Page 69
Interface Settings ❖ Effective Protocol Select the protocol to use in the network. • IPv4: Active / Inactive • IPv6: Active / Inactive • NetWare: Active / Inactive • SMB: Active / Inactive • AppleTalk: Active / Inactive 2 ❖ NCP Delivery Protocol Select the protocol for NCP delivery. • IPX - Ricoh Aficio MP C3500 | General Settings Guide - Page 70
communication of SNMPv3. • Encryption Only • Encryption / Clear Text If you select to [Encryption Only], you need to set an encryption password for the machine. ❖ Permit SSL/TLS Communication Set the encrypted communication of SSL/TLS. • Ciphertext Only • Ciphertext Priority • Ciphertext / Clear - Ricoh Aficio MP C3500 | General Settings Guide - Page 71
Interface This section describes the user tools in the Parallel printer's response mode to a status acquisition request when using a parallel interface. • On • Off When set to [Off], the bidirectional communication function will be disabled, and the printer driver will not be installed under Windows - Ricoh Aficio MP C3500 | General Settings Guide - Page 72
Acceptance Priority • Printer Priority 2 IEEE 1394 This section describes the user tools in the other machines on the network. The physical address (MAC address) also appears. If you are using Ethernet and the domain name. The default domain name is blank. • Auto-Obtain (DHCP) • - Ricoh Aficio MP C3500 | General Settings Guide - Page 73
print (SBP-2) When you print using the SCSI print client function supported by Windows 2000/XP, or Windows Server 2003, you must set [SCSI print (SBP-2)]. • Active • Inactive ❖ Bidirectional SCSI print Specifies the printer's response mode etc. for status requests when using the IEEE 1394 interface - Ricoh Aficio MP C3500 | General Settings Guide - Page 74
describes the user tools in when you select 802.11b ad hoc mode or ad hoc mode. The default setting is 11. The following channels are available: • Metric version: 1-14 the pre-shared key (PSK) of 8- 63 characters in ASCII code. ❖ Wireless LAN Signal When using in infrastructure mode, you can check - Ricoh Aficio MP C3500 | General Settings Guide - Page 75
• Auto Select • 11Mbps Fixed • 5.5Mbps Fixed • 2Mbps Fixed • 1Mbps Fixed 2 ❖ Restore Factory Defaults You can return the IEEE 802.11b (wireless LAN) settings to their defaults. • No • Yes Reference p.3 "Accessing User Tools" Print List You can check items related to the network environment - Ricoh Aficio MP C3500 | General Settings Guide - Page 76
System Settings C Press [Print List]. 2 D Press the {Start} key. The configuration page is printed. E Press [Exit]. F Press the {User Tools/Counter} key. Note ❒ You can also exit by pressing [Exit] on the User Tools main menu. 68 - Ricoh Aficio MP C3500 | General Settings Guide - Page 77
This section describes the user tools in the File Transfer menu under System Settings. Default settings are shown in bold type. ❖ Delivery Option Enables or disables sending stored or scanned documents to the ScanRouter 2 delivery server. • On • Main Delivery Server IPv4 Address • Sub Delivery - Ricoh Aficio MP C3500 | General Settings Guide - Page 78
line. • Deliver to Server • Do not Deliver • Print at Delivery Specify whether or not received fax documents sent to the ScanRouter documents or only received fax documents that include delivery codes (ID or SUB/SEP codes) are sent to the ScanRouter delivery software. • File with Delivery Code - Ricoh Aficio MP C3500 | General Settings Guide - Page 79
Authentication Specify SMTP authentication (PLAIN, LOGIN, CRAMMD5, DIGEST-MD5). When sending e-mail to an SMTP server, you can enhance the SMTP server security level using authentication that requires entering the user name and password. If the SMTP server requires authentication, set [SMTP - Ricoh Aficio MP C3500 | General Settings Guide - Page 80
characters. Spaces cannot be entered. • Encryption • Auto Password encryption is automatically set according to the POP/IMAP server settings. • On Encrypt password. • Off Do not encrypt password. ❖ Administrator's E-mail Address On e-mailed scanned documents, if the sender is not specified this - Ricoh Aficio MP C3500 | General Settings Guide - Page 81
• Errors Only ❖ Default User Name / Password (Send) Specify the user name and password required when sending scan files directly to a shared folder on a computer running Windows, to an FTP server, or to a NetWare server. • SMB User Name • SMB Password • FTP User Name • FTP Password • NCP User Name - Ricoh Aficio MP C3500 | General Settings Guide - Page 82
/ Change / Delete E-mail Message You can program, change, or delete the e-mail message used when sending an Internet fax or scan file as an attachment. • Program / Change A Press [System Settings]. B Press [File Transfer]. 2 C Press [TNext]. D Press [Program / Change / Delete E-mail Message - Ricoh Aficio MP C3500 | General Settings Guide - Page 83
Enter a user name using up to 64 characters. • Password Enter a password using up to 64 characters. • Do not Receive ❖ Scanner Resend Interval Time Specifies the interval the machine waits before resending a scan file, if it cannot be sent to the delivery server or mail server. The default setting - Ricoh Aficio MP C3500 | General Settings Guide - Page 84
• Auth. Info You can register a user code, and specify the functions available to each user code. You can also register user names and passwords to be used when sending e-mail, sending files to folders, or accessing an LDAP server. • Protection You can register a protection code. • Fax Dest. You can - Ricoh Aficio MP C3500 | General Settings Guide - Page 85
. 2 • Programmed User/Group You can check the names or groups registered in each group. • Protection You can register a protection code. • Add to using Web Image Monitor or SmartDeviceMonitor for Admin. Use SmartDeviceMonitor for Admin provided with the printer scanner unit. ❖ Address Book: - Ricoh Aficio MP C3500 | General Settings Guide - Page 86
at the selected position is moved forward or backward. If you move the selected user key forward, the user key currently at the selected position is moved backward. If you move the selected user key backward, the user key currently at the selected position is moved forward. You can also select - Ricoh Aficio MP C3500 | General Settings Guide - Page 87
pages, select [Print on 2 Sides]. F Press the {Start} key. The list prints out. ❖ Address Book: Edit Title You can edit the title to easily find a user. A Press [System Settings]. B Press [Administrator Tools]. C Press [Address Book: Edit Title]. D Press the title key you want to change. 79 - Ricoh Aficio MP C3500 | General Settings Guide - Page 88
, Printer, A3 / DLT, Duplex, Fax Prints, Send / TX Total, Fax Transmission, Scanner Send). • Print Counter List Prints out a list of the number of prints made under each function. ❖ Display / Clear / Print Counter per User Allows you to view and print the numbers of prints accessed with user codes - Ricoh Aficio MP C3500 | General Settings Guide - Page 89
entered using the printer driver. If User Code Authentication has been specified, Auto Color Select cannot be used. 2 For details about Basic Authentication, Windows Authentication, LDAP Authentication, and Integration Server Authentication, consult your ad- ministrator. • Copier: Restrict All - Ricoh Aficio MP C3500 | General Settings Guide - Page 90
Address Book directly. This function is possible when sending scan files by email using the scanner or fax function. • Name • Server Name • Search Base • Port Number • Use Secure Connection (SSL) • Authentication • User Name • Password • Search Conditions • Search Options To start an LDAP - Ricoh Aficio MP C3500 | General Settings Guide - Page 91
❖ LDAP Search Specify whether or not to use the LDAP server for searching. • On • Off If you select [Off], LDAP server list will not appear on the searching display. ❖ AOF function, consult your administrator. Reference p.3 "Accessing User Tools" p.205 "Address Book" p.219 "Printing the Counter for - Ricoh Aficio MP C3500 | General Settings Guide - Page 92
] after setting each item. For details about LDAP server, see "Programming the LDAP server". H Press [Exit]. I Press the {User Tools/Counter} key. Reference p.85 "Programming the LDAP server" To delete the programmed LDAP server A Press [System Settings]. B Press [Administrator Tools]. C Press - Ricoh Aficio MP C3500 | General Settings Guide - Page 93
" is for the organization unit, and "o" is for the company.) Search base registration may be required depending on your server environment. When registration is required, unspecified searches will result in error. Check your server environment and enter any required specifications. C Press [OK]. 85 - Ricoh Aficio MP C3500 | General Settings Guide - Page 94
communicate with the LDAP server. To use SSL, the LDAP server must support SSL. When SSL is server's authentication settings. Check your server settings before setting this machine. [High Security] is available only with LDAP Version 3.0. When [High Security] is selected, the administrator password - Ricoh Aficio MP C3500 | General Settings Guide - Page 95
, CN=Name, OU=Department Name, DC=Server Name D Press [Change] under "Password". E Enter the password, and then press [OK]. The user name and password are required for administrator authentication to access the LDAP server. You can set the user name and password in this machine's Address Book to - Ricoh Aficio MP C3500 | General Settings Guide - Page 96
and [Depart- ment Name]. 2 You can enter an attribute as a typical search keyword. Using the entered at- tribute, the function searches the LDAP server's Address Book. C Enter the attribute you want to use when searching for e-mail addresses, and then press [OK]. The attribute value may change - Ricoh Aficio MP C3500 | General Settings Guide - Page 97
Administrator Tools E Enter the key display, and then press [OK]. The registered "key display" appears as a keyword for searching LDAP. • Without key display registration 2 • With key display registration The key does not appear on the search screen unless both "Attribute" and "Key Display" are - Ricoh Aficio MP C3500 | General Settings Guide - Page 98
System Settings 2 90 - Ricoh Aficio MP C3500 | General Settings Guide - Page 99
describes the user tools in the General Features menu under Copier / Document Server Features. Default settings are shown in bold type. ❖ Auto Image Density Priority You can set whether Auto Image Density is "On" or "Off" when the machine is turned on, reset, or modes are cleared. • Full Color • On - Ricoh Aficio MP C3500 | General Settings Guide - Page 100
Copier / Document Server Features ❖ Original Photo Type Priority When you select "Text / Photo" or "Photo" in "Original Type Priority", you can change the settings of the selected original - Ricoh Aficio MP C3500 | General Settings Guide - Page 101
Copy Quantity The maximum copy quantity can be set between 1 and 999. The default setting is 999 sheets. ❖ Auto Tray Switching If you load paper of the or not the beeper sounds when copying is complete. If Panel Tone of User Tools (System Settings) settings is [On], the machine beeps to notify you - Ricoh Aficio MP C3500 | General Settings Guide - Page 102
Copier / Document Server Features ❖ Customize Function: Copier You can assign up to six frequently-used functions to Copy Function keys. 3 94 • Off • 2 originals → 2 Sided: Top to Top • 2 originals → 2 Sided: Top to Bottom • 2 - Ricoh Aficio MP C3500 | General Settings Guide - Page 103
Orientation • Batch • Positive/Negative Reference p.3 "Accessing User Tools" p.47 "Panel key Sound" "Selecting the Original Type Setting", Copy/ Document Server Reference "Adjusting Copy Image Density", Copy/ Document Server Reference "Selecting Copy Paper", Copy/ Document Server Reference 95 - Ricoh Aficio MP C3500 | General Settings Guide - Page 104
Features Reproduction Ratio 3 96 This section describes the user tools in the Reproduction Ratio menu under Copier / Document Server Features. Default settings are shown in bold type. ❖ Shortcut R/E You can register up to three frequently used Reduce / Enlarge ratios other than the fixed Reduce - Ricoh Aficio MP C3500 | General Settings Guide - Page 105
" (155%) • 51/2"×81/2" → 11"×17" (200%) • 400% • User R / E Ratio (25-400%) • Off Default: • F1: 73% • F2: 155% • F3: 93% 3 ❖ R / E Ratio Specify the enlargement and reduction ratios that appear if [Reduce / Enlarge] is pressed on the copier screen. • Metric version • 25% • A3 → A5, 8"×13 - Ricoh Aficio MP C3500 | General Settings Guide - Page 106
Copier / Document Server Features • 11"×15" → 81/2"×11" (73%) • 81/2"×14" → 81/2"×11" (78%) • 81/2"×13" → 81/2"×11" (85%) • 93% • 81/2"×14" → 11"×17" (121%) • 81/2"×11" → 11"×17" (129%) • 51/2"×81/2" → 81/2"×14" (155%) • 51/2"×81/2" → 11"×17" (200%) 3 • 400% • User 81/2" (50%) 98 • 25% - Ricoh Aficio MP C3500 | General Settings Guide - Page 107
Reproduction Ratio ❖ Ratio for Create Margin You can set a Reduce / Enlarge ratio when registering Create Margin in a shortcut key. Enter a ratio using number keys (in the range of 90 to 99%). The default setting is 93%. Reference p.3 "Accessing User Tools" 3 99 - Ricoh Aficio MP C3500 | General Settings Guide - Page 108
Copier / Document Server Features Edit This section describes the user tools in the Edit menu under Copier / Document Server Features. Default margins on the front side of copies in Margin Adjustment mode. • Left • Right Default: • Metric version: Left 5 mm • Inch version: Left 0.2" ❖ Back Margin - Ricoh Aficio MP C3500 | General Settings Guide - Page 109
can specify the margins on the back side. 3 The margin is set to the same value of "Back Margin: Left/Right". • Left • Right Default: • Metric version: Right 5 mm • Inch version: Right 0.2" ❖ 1 Sided → 2 Sided Auto Margin: TtoB In 1 sided to 2 sided Duplex mode, you can specify the margins - Ricoh Aficio MP C3500 | General Settings Guide - Page 110
Copier / Document Server Features ❖ Front Cover Copy in Combine You can make a combined copy on the front cover sheet when you select Front Cover mode. GCST019E • Combine • Do - Ricoh Aficio MP C3500 | General Settings Guide - Page 111
• None • Solid 3 • Broken A • Broken B • Crop Marks Line color (Full Color): • Yellow • Red • Cyan • Magenta • Green • Blue • Black Separation lines cannot be specified when using [None]. In "Black and White", printing will be done in black. Selecting solid or broken lines might produce a blank area - Ricoh Aficio MP C3500 | General Settings Guide - Page 112
Copier / Document Server Features ❖ Double Copies Separation Line You can select a separation line using the Double Copies function from: None, Solid, Broken A, Broken B, or Crop Marks. • None • Solid 3 • Broken A • Broken B • Crop Marks Line color (Full Color): • Yellow • Red • Cyan • Magenta • - Ricoh Aficio MP C3500 | General Settings Guide - Page 113
when using [None]. In "Black and White", printing will be done in black. Selecting solid or broken lines might produce a blank area of approximately 1.5 mm (0.06") in width along the separation line. Reference p.3 "Accessing User Tools" "Booklet/Magazine", Copy/ Document Server Reference 105 - Ricoh Aficio MP C3500 | General Settings Guide - Page 114
user tools in the Stamp menu under Copier / Document Server Features. Default settings are shown in bold type. Background Numbering This section describes the user • Dark • Very Dark ❖ Stamp Color You can set the color of the numbers. • Yellow • Red • Cyan • Magenta • Green • Blue • Black 106 - Ricoh Aficio MP C3500 | General Settings Guide - Page 115
Stamp Preset Stamp This section describes the user tools in the Preset Stamp menu under Stamp. ❖ Stamp Language You can select the language of the message printed in Stamp mode. • English • German • French • Italian 3 • Spanish • Dutch • Portuguese • Polish • Czech • Swedish • Finnish - Ricoh Aficio MP C3500 | General Settings Guide - Page 116
Copier / Document Server Features ❖ Stamp Format Specify how each of stamp is printed. • Stamp Position Specify where to print the stamp. • Top Left • Top Center • Top Right • Center - Ricoh Aficio MP C3500 | General Settings Guide - Page 117
the Lighter setting. • Page to Stamp You can have the stamp printed on the first page or all pages. 3 • All Pages • 1st Page Only ❖ Stamp Color Sets the stamp print color. • Yellow • Red • Cyan • Magenta • Green • Blue • Black Reference "Preset Stamp", Copy/ Document Server Reference 109 - Ricoh Aficio MP C3500 | General Settings Guide - Page 118
Copier / Document Server Features User Stamp This section describes the user tools in the User Stamp menu under Stamp. ❖ Program/Delete Stamp You can register, change, or delete user stamps. You can register up to four custom stamps with your favorite designs. ❖ Stamp Format:1-4 Specify how - Ricoh Aficio MP C3500 | General Settings Guide - Page 119
All Pages • 1st Page Only ❖ Stamp Color:1-4 Sets the color registered in User Stamp color (1 to 4). • Yellow • Red • Cyan • Magenta 3 • Green • Blue • Black Reference "User Stamp", Copy/Document Server Reference Date Stamp This section describes the user tools in the Date Stamp menu under - Ricoh Aficio MP C3500 | General Settings Guide - Page 120
Copier / Document Server Features ❖ Size You can set the Date Stamp size. • Auto • Large • Middle • Small ❖ Superimpose You can have the Date Stamp printed in white when it overlaps black parts of 3 the image. • On • Off ❖ Stamp Color You can set the selected priority color when printing the - Ricoh Aficio MP C3500 | General Settings Guide - Page 121
whether to print the stamp on all pages or only the first page. • All Pages • 1st Page Only 3 Page Numbering This section describes the user tools in the Page Numbering menu under Stamp. ❖ Stamp Format You can select the page number format given priority when [Page Numbering] is pressed. • P1 - Ricoh Aficio MP C3500 | General Settings Guide - Page 122
Copier / Document Server Features ❖ Page Numbering in Combine You can set page numbering when using the Combine function L/R: 2.8"-2.8" "Bottom Right"...T/B: 0.1"-5.7", L/R: 0.1"-5.7" ❖ Superimpose You can have page numbers printed in white when they overlap black parts of the image. • On 114 • Off - Ricoh Aficio MP C3500 | General Settings Guide - Page 123
can set the selected priority color when printing the date. • Yellow • Red • Cyan • Magenta • Green • Blue • Black 3 ❖ Page Numbering Initial Letter You can select the page numbering initial letter between "P1, P2.../P.1, P.2..." and "S1, S2.../S.1, S.2...". • P1, P2.../P.1, P.2... • S1 - Ricoh Aficio MP C3500 | General Settings Guide - Page 124
This section describes the user tools in the Input/Output menu under Copier / Document Server Features. Default settings are shown in bold Scan Restart When memory becomes full while scanning originals, the machine can make copies of scanned originals first, and then automatically proceed scanning - Ricoh Aficio MP C3500 | General Settings Guide - Page 125
Input/Output ❖ Staple Position Specify which Top 2 staples or Bottom shown on the initial display with priority. The optional 1000-sheet finisher, 3000-sheet finisher, or booklet finisher is required to use this function. • Top 1 • Center • Left 2 • Top 2 • Bottom 1 3 • Slant • Off ❖ Punch - Ricoh Aficio MP C3500 | General Settings Guide - Page 126
Copier / Document Server Features Reference p.3 "Accessing User Tools" "Orientation-Fixed Paper or Two-Sided Paper", Troubleshooting "Batch mode", Copy/ Document Server Reference "Sort", Copy/ Document Server Reference 3 118 - Ricoh Aficio MP C3500 | General Settings Guide - Page 127
Image This section describes the user tools in the Adjust Color Image menu under Copier / Document Server Features. Default settings are shown in bold type. ❖ Background Density of ADS (Full Color) "The background density is adjusted to skip the texture and copy. You can ad- just the background - Ricoh Aficio MP C3500 | General Settings Guide - Page 128
Copier / Document Server Features Settings for the Document Server For details, see "System Settings", and "Copier / Document Server Features". ❖ Copier / Document Server Features Heading items Default General Features Customize Function: Document Server Storage 2 Sided Original: Top to Top - Ricoh Aficio MP C3500 | General Settings Guide - Page 129
User Tools (System Settings)". General Features This section describes the user can be programmed with the following items: • On • Manual E-mail RX • Send Later • Subject • Text • • Label Insertion • Closed Network • SUB Code TX • SEP Code Reception • Stamp • Print Memory Lock • TX - Ricoh Aficio MP C3500 | General Settings Guide - Page 130
from Address Book, or registered LDAP Server. ❖ Communication Page Count 4 display, press [Exit]. E Press the {User Tools/Counter} key. ❖ Adjust Sound Volume Adjust Setting The following functions are for delivery and transfer of documents: • Personal Box • Information Box • Transfer Box For - Ricoh Aficio MP C3500 | General Settings Guide - Page 131
after you transmit using On Hook dialing. • 1 minute • 3 minutes • 5 minutes • 10 minutes Reference p.3 "Accessing User Tools" p.172 "Box Settings" "Adjusting the Volume", Troubleshooting "Sending at a Specific Time (Send Later)", Facsimile Reference 4 "Fax Header Print", Facsimile Reference - Ricoh Aficio MP C3500 | General Settings Guide - Page 132
describes the user tools in the Scan Settings menu under Facsimile Features. ❖ Program / Change / Delete Scan Size You can program, change, or cancel frequently used scan sizes. For details about programming Scan Size, see "Program / Change / Delete Scan Size". Reference p.3 "Accessing User Tools - Ricoh Aficio MP C3500 | General Settings Guide - Page 133
When e-mail exceeds the maximum file size, an Error Report is output, and the e-mail is deleted. 4 Even when e-mail does not exceed the size limit, it may be rejected if it does not meet the requirements of the server settings. A Press [Facsimile Features]. B Press [Send Settings]. C Press - Ricoh Aficio MP C3500 | General Settings Guide - Page 134
]. F Enter a new message. For details about entering text, see "Entering Text", About This Machine. G Press [OK]. To cancel a registration, press [Cancel]. H Press [Exit]. I Press the {User Tools/Counter} key. 126 - Ricoh Aficio MP C3500 | General Settings Guide - Page 135
The backup file format will be the same as that specified for files sent by Scan to Folder. Using the parameter settings (switch: 21, bit: 3), select TIFF or ]. F Press [OK]. G Press the {User Tools/Counter} key. Reference p.3 "Accessing User Tools" p.152 "Parameter Settings" "Entering Text - Ricoh Aficio MP C3500 | General Settings Guide - Page 136
Facsimile Features Reception Settings This section describes the user tools in the Reception Settings menu under Facsimile Features. ❖ Switch Reception Mode Specify the method for receiving fax documents. • Manual Reception • Auto Reception ❖ Program Special Sender By programming particular - Ricoh Aficio MP C3500 | General Settings Guide - Page 137
cannot view received and saved documents using a Web Image Monitor. Select [Off] in step 4 or reprogram the user code. ❖ SMTP RX File Delivery not match the authorized address is discarded, and an error message is returned to the SMTP server. The authorized e-mail address is compared with the - Ricoh Aficio MP C3500 | General Settings Guide - Page 138
. C Press [OK] twice. ❖ 2 Sided Print Specify whether or not received fax documents are to be printed on both sides of the paper. • On • Off ❖ Checkered not a checkered mark is to be printed on the first page of received fax documents. • On • Off ❖ Center Mark Specify whether or not a center mark is - Ricoh Aficio MP C3500 | General Settings Guide - Page 139
be printed for each fax document received. • 1 to 10 set(s) ❖ Paper Tray Use this function to print fax documents received from programmed senders and fax documents from other senders, using different [TNext]. D Press [On]. If you select [Off], the received fax is delivered to a default tray. 131 - Ricoh Aficio MP C3500 | General Settings Guide - Page 140
specified e-mail address, when folders are programmed as the forwarding destinations to which documents are sent from all senders or Special Senders. You must first register the destination [OK]. H Check the selected destination, and then press [OK]. I Press the {User Tools/Counter} key. 132 - Ricoh Aficio MP C3500 | General Settings Guide - Page 141
in the Memory Lock mode, the Confidential File indicator blinks. To print this document, enter the Memory Lock ID. A user without the ID cannot print the document. This prevents unauthorized users from accessing the document. To use Memory Lock, program the Memory Lock ID, and then switch Memory - Ricoh Aficio MP C3500 | General Settings Guide - Page 142
printing a list before pressing the {Start} key, press [Cancel] or the {Clear/Stop} key. E Press the {User Tools/Counter} key. ❖ Program Closed Network Code Register an ID required for Closed Network communication. A Press [Facsimile Features]. B Press [Initial Settings]. C Press [Program Closed - Ricoh Aficio MP C3500 | General Settings Guide - Page 143
ID Program a Memory Lock ID to be entered before printing documents when the Memory Lock function is activated. A Press [Facsimile the {Clear/Stop} key before pressing [OK], and then try again. E Press the {User Tools/Counter} key. ❖ Internet Fax Settings You can select to display the Internet Fax - Ricoh Aficio MP C3500 | General Settings Guide - Page 144
Set the IPv4 address or host name, and alias telephone number of the gatekeeper. If you select [On] using the User Parameters, you can use the gatekeeper server. See "Parameter Settings" ( switch 34, bit 0). You can use numbers, and symbols ("#" and "*") for registration of the alias telephone - Ricoh Aficio MP C3500 | General Settings Guide - Page 145
server relays call requests and responses. A redirect server processes request destination inquiries. A register server registers location information of user SIP user name, and then press [OK]. F Specify whether to perform SIP digest authentication. If you select [On], enter the password using - Ricoh Aficio MP C3500 | General Settings Guide - Page 146
To change the existing prefix, press [Clear], and then enter a new prefix. For documents sent using a gateway to G3 Fax, prefixes can be used. If the first [No]. F Press [Exit]. G Press the {User Tools/Counter} key. Reference p.3 "Accessing User Tools" p.133 "Memory Lock Reception" p.144 " - Ricoh Aficio MP C3500 | General Settings Guide - Page 147
documents are to be saved on the hard disk or printed immediately without being saved. You can print stored documents repeatedly or download faxes distributed to the delivery server, the documents cannot be saved on the hard disk. Important ❒ The optional printer/scanner unit is required. A - Ricoh Aficio MP C3500 | General Settings Guide - Page 148
You cannot send received documents. ❒ You cannot manage stored documents from the Document Server display. ❒ It is recommended that you use Web Image Monitor running under the same network environment as this machine. Otherwise, the Web browser may not open and an error may occur. Reference p.152 - Ricoh Aficio MP C3500 | General Settings Guide - Page 149
, it is recommended that you make a record of the new size. When you select a scan size to scan a custom size original, two custom sizes are available (Program Size 1 and Program Size 2). Use these functions to program a custom size in advance. The procedure is - Ricoh Aficio MP C3500 | General Settings Guide - Page 150
press [Clear] or the {Clear/Stop} key, and then try again. To cancel a scan size, press [Cancel]. F Select a vertical size, and then press [OK]. The displayed inch], and [11.0 inch] are shown. To cancel a scan size, press [Cancel]. G Press [Exit]. H Press the {User Tools/Counter} key. 142 - Ricoh Aficio MP C3500 | General Settings Guide - Page 151
]. B Press [Scan Settings]. C Press [Program / Change / Delete Scan Size]. D Press [Delete], and then select [Program Size 1] or [Program Size 2]. 4 E Press [Delete]. To cancel deleting, press [Do not Delete]. The display returns to that of stepD. F Press [Exit]. G Press the {User Tools/Counter} key - Ricoh Aficio MP C3500 | General Settings Guide - Page 152
You can confirm programmed settings from the User Parameter List. It is recommended that you print and keep the User Parameter List when you program or change destination list, you can select which Fax Header is printed on the document received by the other party. You can register "Fax Header" using - Ricoh Aficio MP C3500 | General Settings Guide - Page 153
Fax Information]. D Select the Fax Information you want to register or change. 4 E Register the name and facsimile number. F Press [Exit]. G Press the {User tools/Counter} key. Registering a Fax Header A Check that [Fax Header] is selected. B Press [First Name] or [Second Name]. C Enter a fax header - Ricoh Aficio MP C3500 | General Settings Guide - Page 154
Facsimile Features Registering an Own Name A Press [Own Name]. B Press [Own Name]. 4 C Enter your own name, and then press [OK]. Registering an Own Fax Number A Press [Own Fax Number]. B Select line type to program. The display differs depending on the optional units installed on the machine. C - Ricoh Aficio MP C3500 | General Settings Guide - Page 155
Own Name, see "Registering an Own Name". To change Own Fax Number, "Registering an Own Fax Number". E Press [Exit]. 4 F Press the {User tools/Counter} key. Reference p.145 "Registering a Fax Header" p.146 "Registering an Own Name" p.146 "Registering an Own Fax Number" Deleting Fax Information - Ricoh Aficio MP C3500 | General Settings Guide - Page 156
from the destination list causes the settings of the forward destination to be deleted, so they must be registered again. When a destination is changed, a document is transmitted to the new destination. If there is no destination of the specified type, you can set which destination to be used as an - Ricoh Aficio MP C3500 | General Settings Guide - Page 157
Forwarding Programming an End Receiver Important ❒ One end receiver can be registered for each special sender. To register two or more end receivers, use group destination. However, a maximum of 500 destinations can be specified in a group. A Press [Facsimile Features]. B Press [Reception - Ricoh Aficio MP C3500 | General Settings Guide - Page 158
for forwarding. See "Parameter Settings" (switch 21, bit 3). If you make a mistake, press [Clear] before pressing [OK], and then try again. F Press [OK]. G Press the {User Tools/Counter} key. Reference p.152 "Parameter Settings" p.240 "Registering Folders" 150 - Ricoh Aficio MP C3500 | General Settings Guide - Page 159
[Reception Settings]. C Press [Forwarding]. D Press [Off], and then press [OK]. Forwarding 4 E Press the {User Tools/Counter} key. Forwarding Mark You can print a Forwarding Mark on receiver's documents that have been forwarded. The receiver can distinguish between forwarded and normally received - Ricoh Aficio MP C3500 | General Settings Guide - Page 160
function settings, set the User Parameter Switches. ❖ Switches and Bits Each User Parameter has a set SEP Code RX Reserve Off On Report automatically. 03 4 Whether or not to print the SEP Code RX Result Receive Service Call (SC) Condition (Substi- Possible tute Reception during service call - Ricoh Aficio MP C3500 | General Settings Guide - Page 161
all uncondi- paper trays have run out of paper, toner is tionally empty, or all paper trays are out Fax Number is received 10: Enabled for Closed Network Code match 11: Disabled 4 (Reception off) 05 5 Print forwarding Off On 14 0 Print documents received with Auto Power- Immediate - Ricoh Aficio MP C3500 | General Settings Guide - Page 162
3 Whether or not to reset the settings when On Off original is scanned. 17 7 Receive documents by pressing the {Start} key when originals are not set. Off (no documents received after pressing the {Start} key) On (documents received after pressing the {Start} key) 18 0 Print date with Fax - Ricoh Aficio MP C3500 | General Settings Guide - Page 163
21 7 22 0 Item 0 1 Reprinting time of stored documents in memory that could not be printed using LAN-Fax Driver 0000: - 0 minutes 0001: 1 minutes 0010: 2 minutes by E-mail Off On Display Network error Display (On) Not display (Off) Transmit Error Mail Notification On Off Detect a - Ricoh Aficio MP C3500 | General Settings Guide - Page 164
(On) 24 0 Store documents that could not be transmit- Off On ted in memory 24 1 Length of time documents that could not be 24 dress destination 4. Folder 4. Fax number 34 0 Use gatekeeper server with IP-Fax Off On 34 1 Use SIP server with IP-Fax Off On 35 7, 6, 5, Redial - Ricoh Aficio MP C3500 | General Settings Guide - Page 165
Parameter Settings Switch Bit Item 0 1 36 7, 6, 5, Maximum number of redials when sending a 00000000: 4, 3, 2, backup file 1, 0 1 time(s) 00000001: 2 time(s) 00000010: 3 time(s) . . 11000000: 195 time(s) . . 4 11111111: 254 time(s) 37 0 Whether to stop sending a backup file if - Ricoh Aficio MP C3500 | General Settings Guide - Page 166
Settings may require options, or other settings may need to be made beforehand. ❒ It is recommended that you print and keep a User Parameter list when you program or change a User Parameter. ❒ Do not change any bit switches other than those shown on the previous pages. A Press [Facsimile Features - Ricoh Aficio MP C3500 | General Settings Guide - Page 167
Special Senders to Treat Differently Special Senders to Treat Differently By programming particular senders in advance, you can set the following function for each sender: • Authorized RX • Forwarding • Reception File Print Qty • Print 2 Sided • Memory Lock • Paper Tray Use Own Name or Own - Ricoh Aficio MP C3500 | General Settings Guide - Page 168
this function to limit incoming senders. The machine only receives faxes from programmed Special Senders, and therefore, it helps you screen out unwanted documents, such as junk mail, and saves wasting fax paper. Note ❒ To use this function, program the Special Senders function, and then select "On - Ricoh Aficio MP C3500 | General Settings Guide - Page 169
to the receivers programmed in "Specify End Receiver.". ❒ If you do not program any Special Senders, the machine transfers all incom- ing documents to the other end receivers specified in "Specify End Receiver.". ❒ You can set the fax destination, Internet fax destination, IP-Fax destination - Ricoh Aficio MP C3500 | General Settings Guide - Page 170
all senders using the default paper tray. Note ❒ If the machine receives a document that has a different size from the paper in the specified tray, the machine prints it after splitting it or minimizing its size. ❒ Selection of the bypass tray enables you to specify the paper size in "Scan Ar- ea - Ricoh Aficio MP C3500 | General Settings Guide - Page 171
Special Senders to Treat Differently Programming/Changing Special Senders Program and change Special Senders. A Press [Facsimile Features]. B Press [Reception Settings]. C Press [Program Special Sender]. D Check [Program / Change] is selected. E Select the sender to program or change. 4 F Enter a - Ricoh Aficio MP C3500 | General Settings Guide - Page 172
Press [OK]. A Special Sender is programmed. To program another sender, repeat the procedure from stepE. J Press [Exit]. K Press the {User Tools/Counter} key. Reference p.159 "Full/Partial agreement" p.165 "Authorized RX (Authorized Reception)" p.166 "Forwarding" p.165 "Reception File Print Qty - Ricoh Aficio MP C3500 | General Settings Guide - Page 173
Authorized RX (Authorized Reception) Specify when programming a Special Sender. A Press [Authorized Reception per Sender]. B Press [On] or [Off], and then press [OK]. Special Senders to Treat Differently 4 Reception File Print Qty Specify when programming a Special Sender. A Press [RX File Print - Ricoh Aficio MP C3500 | General Settings Guide - Page 174
the destina- tion list causes the settings of the forward destination to be deleted, so they must be registered again. When a destination is changed, a document is transmitted to the new destination. If there is no destination of the specified type, you can set which destination to be used as an - Ricoh Aficio MP C3500 | General Settings Guide - Page 175
Special Senders to Treat Differently Print 2 Sided Specify when programming a Special Sender. A Press [2 Sided Print per Sender]. B Press [On] or [Off], and then press [OK]. Note ❒ Selecting [Same as Basic Settings] will result in the same setting made for "2 Sided Print" of "Reception Settings". - Ricoh Aficio MP C3500 | General Settings Guide - Page 176
Facsimile Features Programming Initial Set Up of a Special Sender Program the "Initial Set Up" of a Special Sender. You can also specify the Bypass Tray Paper Size. A Press [Facsimile Features]. B Press [Reception Settings]. C Press [Program Special Sender]. D Press [Initial Set Up]. 4 E Select the - Ricoh Aficio MP C3500 | General Settings Guide - Page 177
Special Senders to Treat Differently G Press [On] or [Off], and then press [OK]. The illustration shows the "Authorized RX" display as an example. H To program Bypass Tray Paper Size, press [Bypass Tray Paper Size]. 4 You can select a size from [Auto Detect], [Regular Size], or [Custom Size]. If - Ricoh Aficio MP C3500 | General Settings Guide - Page 178
the units by pressing [mm] or [inch], it is converted automatically (fractions are rounded off). N Press [OK]. O Press [Exit]. P Press the {User Tools/Counter} key. Note ❒ If you select [Auto Detect], the machine recognizes the paper size automati- cally. Reference "Reception Settings", Facsimile - Ricoh Aficio MP C3500 | General Settings Guide - Page 179
Sender you want to delete. E Press [Yes]. To cancel deleting a special sender, press [No]. The display returns to that of 4 stepD. F Press [Exit]. G Press the {User Tools/Counter} key. 171 - Ricoh Aficio MP C3500 | General Settings Guide - Page 180
and transfer of documents: • Personal Box • Information Box • Transfer Box ❖ SUB Code and SEP Code SUB Code and SEP Code are IDs consisting of "*", and spaces (the first character cannot be a space). When programming a password, a mark is displayed before the Box name. • Receiver (optional) You - Ricoh Aficio MP C3500 | General Settings Guide - Page 181
change a box already programmed, press it and proceed to stepH. F Press [Personal Box]. 4 G Enter a box name, and then press [OK]. H Enter a SUB Code. To change the SUB Code, press [Clear] or the {Clear/Stop} key, and then try again. To change a Box name, press [Box Name], and then repeat from - Ricoh Aficio MP C3500 | General Settings Guide - Page 182
, and then press [OK]. If you make a mistake, press [Clear] or the {Clear/Stop} key before pressing [OK], and then try again. 4 L Re-enter the password, and then press [OK]. If you make a mistake, press [Clear] or the {Clear/Stop} key before pressing [OK], and then try again. To change the - Ricoh Aficio MP C3500 | General Settings Guide - Page 183
the {User Tools/Counter} key. Note ❒ When programming a password, a mark is displayed before the Box name. ❒ Specify a fax number, Internet Fax destination and IP-Fax destination as the transmission destination. ❒ The Fax Header is not printed on delivered documents. ❒ If a document cannot be - Ricoh Aficio MP C3500 | General Settings Guide - Page 184
can store the following items: • Box name (required) Up to 20 characters long • SEP Code (required) Up to 20 characters long and can be composed of digits 0-9, "#", "*", and spaces (the first character cannot be a space). • Password (optional) Up to 20 characters long and can be composed of digits - Ricoh Aficio MP C3500 | General Settings Guide - Page 185
Box]. G Enter a box name, and then press [OK]. H Enter the SEP Code. To change the SEP Code, press [Clear] or the {Clear/Stop} key, and then try again. To change the box name, press [Box Name], and then repeat the proce- dure from stepG. I Press [Password]. If you do not want to program - Ricoh Aficio MP C3500 | General Settings Guide - Page 186
pressing [OK], and then try again. 4 K Re-enter the password, and then press [OK]. If you make a mistake, press . L Press [OK]. M Press [Exit]. N Press the {User Tools/Counter} key. Note ❒ You can edit boxes in the delivery destination is changed, a document is sent to the changed - Ricoh Aficio MP C3500 | General Settings Guide - Page 187
❒ If there are documents in the box, you cannot delete the box. A Press [Facsimile Features]. B Press [General Features]. C Press [Box Setting]. D Press [Delete], and then select the box you want to delete. Box Settings 4 E If the password is programmed, enter a password using the number keys - Ricoh Aficio MP C3500 | General Settings Guide - Page 188
destinations. 4 Inform the Requesting Party of the SUB Code assigned to the Transfer Box. When they want to have a document transferred by your machine, ask them to send the document using SUB Code Transmission and specifying this SUB Code. If a password has also been programmed, inform them of this - Ricoh Aficio MP C3500 | General Settings Guide - Page 189
box already programmed, press it, and then proceed to stepH. F Press [Transfer Box]. 4 G Enter a Box name, and then press [OK]. H Enter a SUB Code. To change the SUB Code, press [Clear] or the {Clear/Stop} key, and then try again. To change Box name, press [Box Name], and then repeat from stepG - Ricoh Aficio MP C3500 | General Settings Guide - Page 190
1-5 can be specified in a group. To register another End Receiver, repeat from stepI. K To program a password, press [Password]. If you do not want to program a password, proceed to stepN. L Enter a password, and then press [OK]. If you make a mistake, press [Clear] or the {Clear/Stop} key - Ricoh Aficio MP C3500 | General Settings Guide - Page 191
this function is set to on, the machine prints out the received documents it transfers and a Transfer Result Report after the transfer has finished. If you do not want it to print, contact your service representative. ❒ When the programmed receiver is a group destination for Multi-step Transfer - Ricoh Aficio MP C3500 | General Settings Guide - Page 192
a password using the number keys, and then press [OK]. If you make a mistake, press [Clear] or the {Clear/Stop} key, and then try again. 4 F Press [Delete]. To cancel deleting a special sender, press [Do not Delete]. The display returns to that of stepD. G Press [Exit]. H Press the {User Tools - Ricoh Aficio MP C3500 | General Settings Guide - Page 193
print jobs for error log information. • Sample Print • Locked Print • Hold Print • Stored Print The records of Auto Job Cancel and jobs canceled manually from the machine's function menus. ❖ PCL Config./Font Page You can print the current configuration and installed PCL font list. ❖ PS Config - Ricoh Aficio MP C3500 | General Settings Guide - Page 194
[Printer Features]. B Press [Configuration Page] on the [List / Test Print]. 5 The configuration page is printed. C Press the {User Tools . • HDD: Font / Macro Download Displays the capacity of the hard disk drive. • Printer Language Displays the version number of the printer driver language. 186 - Ricoh Aficio MP C3500 | General Settings Guide - Page 195
Paper Settings menu. ❖ System Displays settings made under the System menu. ❖ PCL Menu Displays settings made under PCL Menu. ❖ PS Menu Displays settings made under PS Menu. ❖ PDF Menu page. ❖ Interface Information Displays the interface information. Reference p.3 "Accessing User Tools" 187 - Ricoh Aficio MP C3500 | General Settings Guide - Page 196
describes the user tools in the Maintenance menu under Printer Features. Default settings are Color Graphic Mode • Text Priority Use the optimum CMYK toner combination for text printing. • Photo Priority Use the optimum CMYK toner combination for photo printing. Reference p.3 "Accessing User - Ricoh Aficio MP C3500 | General Settings Guide - Page 197
System System This section describes the user tools in the System menu under Printer Features. Default settings are shown in bold type. ❖ Print Error Report Select this to have an error report printed when a printer or memory error occurs. • On • Off ❖ Auto Continue You can select this to enable - Ricoh Aficio MP C3500 | General Settings Guide - Page 198
print has been specified with the printer driver or another command. The number of copies can be specified from 1 to 999 by increments of one. Default: 1 ❖ Blank Page Print job before allowing other functions such as the copier and scanner functions to interrupt it. • Long Wait • Medium Wait • - Ricoh Aficio MP C3500 | General Settings Guide - Page 199
Language Specify the printer language. • Auto • PCL • PS • PDF This menu appears only when the PostScript 3 unit is installed. ❖ Sub Paper Size You can enable the Auto Substitute Paper Size (A4, LT) feature. • Auto • Off ❖ Page Size You can select the default paper size. • The paper size you - Ricoh Aficio MP C3500 | General Settings Guide - Page 200
printer language if the machine cannot find the printer language automatically. • PCL • PS • PDF This menu appears only when the PostScript 3 unit is installed. ❖ Tray Switching You can set to switch the paper tray. • Off • On Reference p.3 "Accessing User Tools" "Loading paper", Troubleshooting - Ricoh Aficio MP C3500 | General Settings Guide - Page 201
Host Interface Host Interface This section describes the user tools in the Host Interface menu under Printer Features. Default settings are shown in bold type. ❖ I/O Buffer You can set the size 5 • 15 second(s) • 20 seconds • 25 seconds • 60 seconds Reference p.3 "Accessing User Tools" 193 - Ricoh Aficio MP C3500 | General Settings Guide - Page 202
Menu This section describes the user tools in the PCL Menu under Printer Features. Default settings are shown in bold default font. • Resident • RAM • HDD • SD RAM, HDD and SD can be selected only when fonts have been downloaded to the machine. ❖ Font Number You can set the ID of the default - Ricoh Aficio MP C3500 | General Settings Guide - Page 203
. • Regular • Dark ❖ Extend A4 Width You can extend the printing area width (when printing on A4 sheet with PCL). • Off • On 5 When the setting is On, the width will be 81/2 inches. ❖ Append CR to (Fast) • 600 dpi (Standard) • 600 dpi (High Quality) Reference p.3 "Accessing User Tools" 195 - Ricoh Aficio MP C3500 | General Settings Guide - Page 204
the user tools in the PS Menu under Printer Features. Default printer driver data format is binary, and the data format selected on the display panel is TBCP. ❖ Resolution You can set the print resolution in dots per inch. • 600 dpi (Fast) • 600 dpi (Standard) • 600 dpi (High Quality) ❖ Color - Ricoh Aficio MP C3500 | General Settings Guide - Page 205
Menu This section describes the user tools in the PDF Menu under Printer Features. Default settings are shown in bold type. ❖ Change PDF Password Set the password for the PDF file executing PDF Direct Print. • Current Password • New Password • Confirm New Password A password can be set using the - Ricoh Aficio MP C3500 | General Settings Guide - Page 206
Printer Features ❖ Color Profile You can set the color profile. • Auto • Presentation • Solid Color • Photographic • User Setting Reference p.3 "Accessing User Tools" 5 198 - Ricoh Aficio MP C3500 | General Settings Guide - Page 207
Search] to [On]. ❖ TWAIN Standby Time When the machine is being used to send e-mail or a file, or functioning as Document Server or a network delivery scanner, a scanning request to the machine as a TWAIN scanner will switch the machine to the network TWAIN scanner function. This setting determines - Ricoh Aficio MP C3500 | General Settings Guide - Page 208
Destination List Display Priority 2 In the machine's address book, select which address book appears by default. You can select either [E-mail Address] or [Folder]. • E-mail Address • Folder ❖ Journal The scanner journal is deleted without being printed. Reference p.3 "Accessing User Tools" 200 - Ricoh Aficio MP C3500 | General Settings Guide - Page 209
section describes the user tools in the Scan Settings menu under Scanner Features. Default settings are shown in bold type. ❖ A.C.S. Sensitivity Level Sets the sensitivity level for judging color/black and white for scanning originals when [Scan Type] is set to [Auto Color Select]. ❖ Wait Time - Ricoh Aficio MP C3500 | General Settings Guide - Page 210
activate the copy mode ❖ Background Density of ADS (Full Color) Characteristics due to the type of paper such as nonwhiteness like newspaper or transparent originals can be reduced by correcting the scanning density. Reference p.3 "Accessing User Tools" "Batch, SADF", Scanner Reference "Items for - Ricoh Aficio MP C3500 | General Settings Guide - Page 211
user tools in the Send Settings menu under Scanner Features. Default settings are shown in bold type. ❖ Compression (Black & White) Select whether or not to compress black and white scan Scale / Full Color) Specify whether or not to compress multi-level (grayscale / full color) scan files. • On - Ricoh Aficio MP C3500 | General Settings Guide - Page 212
error message appears. The scan file is discarded. Set the maximum e-mail size within the capacity of the SMTP server. ❖ E-mail Information Language Select the language in which e-mail information such as title, document locations are attached to emails. Reference p.3 "Accessing User Tools" 204 - Ricoh Aficio MP C3500 | General Settings Guide - Page 213
in advance. ❖ Auth. Info You can register user codes in order to restrict particular functions to certain users, and to check their use of each function. You can also register login user names and login passwords to be used when sending e-mail, sending to folders, or accessing an LDAP server. 205 - Ricoh Aficio MP C3500 | General Settings Guide - Page 214
Registering Addresses and Users for Facsimile/Scanner Functions ❖ Protection You can set protection codes to stop sender's name from being used or folders from being accessed without authorization. ❖ Fax Dest. You can register fax numbers, line, fax header and - Ricoh Aficio MP C3500 | General Settings Guide - Page 215
❖ Folder You can register the protocol, path name and server name. • SMB Address Book • FTP • NCP 7 ❖ Add to Group You can put registered e-mail and folder destinations into a group for easier management. 207 - Ricoh Aficio MP C3500 | General Settings Guide - Page 216
Users for Facsimile/Scanner Functions Note ❒ You can also use a Web Image Monitor to register names in the Address Book. With the SmartDeviceMonitor for Admin . For operating instructions, see SmartDeviceMonitor for Admin Help. Managing initial display when sending a document by Internet fax. You - Ricoh Aficio MP C3500 | General Settings Guide - Page 217
. Reference p.267 "Registering a Protection Code" Managing users and machine usage 7 Register user codes to limit users to the following functions and check their use of each function: • Copier • Document Server • Facsimile • Scanner • Printer Reference p.214 "Authentication Information" 209 - Ricoh Aficio MP C3500 | General Settings Guide - Page 218
Facsimile/Scanner Functions Registering Names Register user information including their names. The user name is useful for selecting a destination when sending faxes or e-mail. You can also use it as a folder destination. You can register up to 2000 - Ricoh Aficio MP C3500 | General Settings Guide - Page 219
for each title. I Press [OK] twice. J Press the {User Tools/Counter} key. Note ❒ The name can be used for documents in the Document Server. For details about the Document Server, see "Using the Document Server", Copy/ Doc- 7 ument Server Reference. Reference "Entering Text", About This Machine - Ricoh Aficio MP C3500 | General Settings Guide - Page 220
Registration No.. J Enter a new registration number using the number keys, and then press the {q} key. K Press [OK]. L Press [Exit]. M Press the {User Tools/Counter} key. Note ❒ You can search by the registered name, fax number, folder name, e-mail address, or IP-Fax destination. Reference - Ricoh Aficio MP C3500 | General Settings Guide - Page 221
the name you want to delete. Press the name key, or enter the registered number using the number keys. F Press [Yes]. 7 G Press [Exit]. H Press the {User Tools/Counter} key. 213 - Ricoh Aficio MP C3500 | General Settings Guide - Page 222
and check their use of each function: Copier Document Server Facsimile Scanner Printer Note ❒ You can register up to 500 user codes. ❒ The number of copies made of documents stored in the Document Server us- ing the facsimile function is counted for each user code. This allows you to check each - Ricoh Aficio MP C3500 | General Settings Guide - Page 223
key. You can search by the registered name, fax number, folder name, e-mail address, 7 or IP-Fax destination. F Press [Auth. Info]. G Enter the user code using the number keys, and then press {q} key. If you make a mistake, press [Clear] or the {Clear/Stop} key. H Press [TNext] twice. 215 - Ricoh Aficio MP C3500 | General Settings Guide - Page 224
. ❒ To register the name, see Registering Names". Reference p.210 "Registering Names" 7 Changing a User Code This section describes how to change a user code. Important ❒ Even if you change a user code, the counter value will not be cleared. A Press [System Settings]. B Press [Administrator Tools - Ricoh Aficio MP C3500 | General Settings Guide - Page 225
registered name, fax number, folder name, e-mail address, or IP-Fax destination. F Press [Auth. Info]. G Press [Change], and then enter the new user code using the number keys H Press {q} key. I To change the available functions, press [Auth. Info] and then press [TNext] twice. J Press the key - Ricoh Aficio MP C3500 | General Settings Guide - Page 226
Registering Addresses and Users for Facsimile/Scanner Functions Deleting a User Code This section describes how to delete a user code. Important ❒ After clearing the user code, the counter is automatically cleared. A Press [System Settings]. B Press [Administrator Tools]. C Press [Address Book - Ricoh Aficio MP C3500 | General Settings Guide - Page 227
[Display / Clear / Print Counter per User]. D Select the function usage you want to print from [Copier Counter], [Print Counter], [Fax Counter] or [Scanner Counter]. Counters for individual function usage under each user code appear. Printing the Counter for Each User This section describes how to - Ricoh Aficio MP C3500 | General Settings Guide - Page 228
[Select All on the Page] to select all user codes on the page. E Press [Print Counter List] under Per User. 7 Enter the user code, and then press {q} if the user code is registered. F Select the function usage you want to print from [Copier Counter], [Print Counter], [Fax Counter], and [Scanner - Ricoh Aficio MP C3500 | General Settings Guide - Page 229
Tools]. C Press [Display / Clear / Print Counter per User]. D Press [Print Counter List] under All Users. 7 Enter the user code, and then press {q} if the user code is registered. E Select the function usage you want to print from [Copier Counter], [Print Counter], [Fax Counter], and [Scanner - Ricoh Aficio MP C3500 | General Settings Guide - Page 230
from the left side of the display. 7 Press [Select All on the Page] to select all user codes on the page. F Press [Clear] under Per User. G Select the function usage you want to clear from [Copier Counter], [Print Counter],[Fax Counter], and [Scanner Counter]. H Press [OK]. I To clear the number of - Ricoh Aficio MP C3500 | General Settings Guide - Page 231
need to enter fax numbers each time, and can send documents that have been scanned in using the facsimile function. • It is easy to select which support a similar function called "SUB Code". See "SUB Code", Facsimile Reference. ❖ SEP Code Registering a SEP Code allows The default is "1st Name". 223 - Ricoh Aficio MP C3500 | General Settings Guide - Page 232
and Users for programming fax destinations and also press [Label Insertion] when sending fax documents. Fax header and label insertion are also printed when sending by which support a similar function called "SUB Code". See "SUB Code", Facsimile Reference. ❖ SEP Code Registering a SEP Code allows - Ricoh Aficio MP C3500 | General Settings Guide - Page 233
keys. F Press [Fax Dest.]. G Enter the fax number using the number keys, and then press [OK] under Facsimile No.. H Specify optional settings such as "SUB Code", "SEP Code", and "Interna- tional TX mode". 225 - Ricoh Aficio MP C3500 | General Settings Guide - Page 234
Registering Addresses and Users for Facsimile/Scanner Functions I Press [OK]. Note ❒ When a group a Fax Destination as a sender" p.227 "To change the line" p.228 "To change the SUB Code" p.228 "To change the SEP Code" p.228 "To set the International TX Mode" p.228 "To select the fax header" p.229 " - Ricoh Aficio MP C3500 | General Settings Guide - Page 235
Reference p.212 "Changing a Registered Name" p.227 "To change the fax number" p.227 "To change the line" p.228 "To change the SUB Code" p.228 "To change the SEP Code" p.228 "To set the International TX Mode" p.228 "To select the fax header" p.229 "To set label insertion" Using a Fax Destination as - Ricoh Aficio MP C3500 | General Settings Guide - Page 236
and Users for Facsimile/Scanner Functions To change the SUB Code A Press [Adv. Features], and then press [SUB Code]. B Press [Change] under TX SUB Code. C Enter the new SUB Code, and then press [OK]. D To change the password, press [Change] under Password (SID). E Enter the new password, and - Ricoh Aficio MP C3500 | General Settings Guide - Page 237
received at the other end. A Press [Change] under Label Insertion. B Press [On]. C Press [Change] under Line 2. D Select the new standard message or press [Manual Entry] to enter the new message. E Enter the new message, and then press [OK]. F Press [OK]. G Press [Change] under Line 3. H Select the - Ricoh Aficio MP C3500 | General Settings Guide - Page 238
, or IP-Fax destination. F Press [Fax Dest.]. G Press [Change] under Facsimile No.. H Press [Delete All]. 7 I Press [OK] twice. J Press the {User Tools/Counter} key. Note ❒ To delete the name, key display, and title, see "Deleting a Registered Name". Reference p.213 "Deleting a Registered Name - Ricoh Aficio MP C3500 | General Settings Guide - Page 239
Fax Destination IP-Fax Destination This section describes how to register a IP-Fax destination. Note ❒ For details about sending an IP-Fax, "Sending by IP-Fax", Facsimile Reference. Reference "Sending by IP-Fax", Facsimile Reference Registering an IP-Fax Destination A Press [System Settings]. 7 B - Ricoh Aficio MP C3500 | General Settings Guide - Page 240
IP-Fax destination. J Press [OK] twice. Note ❒ To register the name, see Registering Names". Reference p.210 "Registering Names" p.215 "Registering a User Code" p.257 "Registering Names to a Group" "Entering Text", About This Machine Changing a Registered IP-Fax Destination A Press [System Settings - Ricoh Aficio MP C3500 | General Settings Guide - Page 241
G Press [Change] under "Fax Destination". Fax Destination H Enter the new destination, and then press [OK]. I Press [OK]. J Press [OK]. Note ❒ To change the name, key display and title, see "Changing a Registered Name". Reference p.212 "Changing a Registered Name" "Entering Text", About This - Ricoh Aficio MP C3500 | General Settings Guide - Page 242
Addresses and Users for Facsimile/Scanner Functions To program the SUB Code A Press [Adv. Features], and then press [SUB Code]. B Press [Change] under TX SUB Code. C Enter the SUB Code, and then press [OK]. D To enter a password, press [Change] under Password (SID). E Enter a password using the - Ricoh Aficio MP C3500 | General Settings Guide - Page 243
or IP-Fax destination. F Press [Fax Dest.]. G Press [Change] under "Fax Destination". H Press [Delete All]. I Press [OK] twice. J Press the {User Tools/Counter} key. Note ❒ To change the name, key display and title, see "Changing a Registered Name". Reference p.212 "Changing a Registered Name - Ricoh Aficio MP C3500 | General Settings Guide - Page 244
in scanner mode. If you want to do this, set a protection code on the sender address to prevent unauthorized access. Note ❒ You can select an e-mail address from an LDAP server, and then register it in the Address Book. See "Sending Scan File by E-mail", Scanner Reference. ❒ You can set the machine - Ricoh Aficio MP C3500 | General Settings Guide - Page 245
Internet Fax Destination] or [Internet Fax Destination Only]. K If you want to use Internet fax, specify whether or not to use " Send via SMTP Server". L Press [OK]. Note ❒ You can enter up to 128 characters for the e-mail address. ❒ To register the name, see Registering Names". Reference p.210 - Ricoh Aficio MP C3500 | General Settings Guide - Page 246
Registering Addresses and Users for Facsimile/Scanner Functions Changing an E-mail Destination A Press [System Settings]. B Press [Administrator Tools]. C Press [Address Book Management]. D Check that [Program / Change] is selected. E Select - Ricoh Aficio MP C3500 | General Settings Guide - Page 247
address, or IP-Fax destination. F Press [E-mail]. G Press [Change] under E-mail Address. H Press [Delete All]. I Press [OK] twice. J Press the {User Tools/Counter} key. Note ❒ To delete the name, key display, and title, see "Deleting a Registered Name". Reference p.213 "Deleting a Registered - Ricoh Aficio MP C3500 | General Settings Guide - Page 248
Addresses and Users for Facsimile/Scanner Functions Registering Folders By registering a shared folder, you can send scan files to it directly. There are three types of protocol you can use: • SMB For sending files to shared Windows folders. • FTP Use when sending files to an FTP server. • NCP Use - Ricoh Aficio MP C3500 | General Settings Guide - Page 249
on the right side of Folder Authentication. H Press [Change] under Login User Name. I Enter the login user name, and then press [OK]. J Press [Change] under Login Password. 7 K Enter the password, and then press [OK]. L Enter the password again to confirm, and then press [OK]. M Press [Folder - Ricoh Aficio MP C3500 | General Settings Guide - Page 250
either enter the path manually or locate the folder by browsing the network. ❒ If the connection test fails, check the settings, and then try again. ❒ When [Do not Specify] is selected, the SMB User Name and SMB Password that you have specified in Default User Name / Password (Send) of File Transfer - Ricoh Aficio MP C3500 | General Settings Guide - Page 251
folder authentication, or if an incorrect user name or password has been entered for folder authentication, the login screen appears. A Enter the login user name, and then press [OK]. Enter the login user name specified for folder authentication. B Enter the password, and then press [OK]. The path - Ricoh Aficio MP C3500 | General Settings Guide - Page 252
Registering Addresses and Users for Facsimile/Scanner Functions Changing an SMB Folder A Press [System Settings]. or select it by referencing the network. For more information, see "To locate the folder manually" and "Using Browse Network to locate the folder". H Press [Connection Test] to check - Ricoh Aficio MP C3500 | General Settings Guide - Page 253
To change the protocol A Press [FTP] or [NCP]. Registering Folders B A confirmation message appears. Press [Yes]. Changing the protocol will clear all settings made under the previous protocol. C Enter each item again. Reference p.246 "Registering an FTP Folder" Deleting an SMB registered folder - Ricoh Aficio MP C3500 | General Settings Guide - Page 254
Registering Addresses and Users for Facsimile/Scanner Functions G Press the protocol which is not currently Connect Note ❒ To register a shared folder configured in Windows, see "Using SMB to Connect". ❒ To register a folder in an NetWare server, see "Using NCP to Connect". Reference p.240 - Ricoh Aficio MP C3500 | General Settings Guide - Page 255
Login User Name. I Enter the login user name, and then press [OK]. J Press [Change] under Login Password. K Enter the password, and then press [OK]. L Enter the password again to confirm, and then press [OK]. M Press [Folder]. N Press [FTP]. O Press [Change] under Server Name. P Enter the server - Ricoh Aficio MP C3500 | General Settings Guide - Page 256
64 characters for the password. ❒ You can enter a server name using up to 64 characters. ❒ You can enter an absolute path, using this format: "/user/ home/username"; or a relative path, using this format: "directory/sub-directory". ❒ If you leave the path blank, the login directory is assumed to - Ricoh Aficio MP C3500 | General Settings Guide - Page 257
Registering Folders D Check that [Program / Change] is selected. E Select the name whose folder you want to change, and then press [Folder]. Press the name key, or enter the registered number using the number keys. You can search by the registered name, fax number, folder name, e-mail address, or - Ricoh Aficio MP C3500 | General Settings Guide - Page 258
Registering Addresses and Users for Facsimile/Scanner Functions Changing items under FTP A Press [Change] under Port No. B Enter the new port number, and then press {q}. C Press [Change] under Server Name. D Enter the new server name, and then press [OK]. E Press [Change] under "Path". F Enter the - Ricoh Aficio MP C3500 | General Settings Guide - Page 259
NCP to Connect Note ❒ To register a shared folder configured in Windows, see "Using SMB to Connect" ❒ To register a folder in an FTP server, see "Using FTP to Connect" Reference p.240 "Using SMB to Auth. Info] on the right side of Folder Authentication. H Press [Change] under Login User Name. 251 - Ricoh Aficio MP C3500 | General Settings Guide - Page 260
" ❒ To specify a folder, you can either enter the path manually or locate the folder by browsing the network. ❒ When [Do not Specify] is selected, the NCP User Name and NCP Password that you have specified in Default User Name / Password (Send) of File Transfer settings applies. For details, see - Ricoh Aficio MP C3500 | General Settings Guide - Page 261
Registering Folders To locate the NCP folder manually A Press [Change] under Path. B Enter the path where Type" to [Bindery], a list of items on the NetWare server appears. C Search for the destination folder in the NDS tree or NetWare server. You can press [Up One Level] to switch between levels. - Ricoh Aficio MP C3500 | General Settings Guide - Page 262
D Check that [Program / Change] is selected. E Select the user of the registered folder you want to change. Press the name key specify a folder on a NetWare server, press [Bindery]. H Specify the folder. To specify a folder, you can either enter the path manually or locate the folder by browsing - Ricoh Aficio MP C3500 | General Settings Guide - Page 263
246 "Registering an FTP Folder" Deleting an NCP Folder A Press [System Settings]. 7 B Press [Administrator Tools]. C Press [Address Book Management]. D Press [Delete]. E Select a user of the folder you want to delete. Press the name key, or enter the registered number using the number keys. You can - Ricoh Aficio MP C3500 | General Settings Guide - Page 264
Registering Addresses and Users for Facsimile/Scanner Functions J [Exit]. Note ❒ To delete a name entirely, see Deleting a Registered Name". Reference p.213 "Deleting a Registered Name" 7 256 - Ricoh Aficio MP C3500 | General Settings Guide - Page 265
function, you cannot send scan files to a group with over 50 folders registered. ❒ The maximum number of destinations registerable to a group is 500. Note ❒ You can set a protection code to prevent unauthorized access to the folders registered in a group. For details, see "Registering a Protection - Ricoh Aficio MP C3500 | General Settings Guide - Page 266
Registering Addresses and Users for Facsimile/Scanner Functions F Press [Change] under Group Name. G Enter the group name, and then press [OK]. The Key Display name is set automatically. H Press - Ricoh Aficio MP C3500 | General Settings Guide - Page 267
Registering Names to a Group B Press [Administrator Tools]. C Press [Address Book Management]. D Check that [Program / Change] is selected. E Select the name to register in a group. Press the name key, or enter the registered number using the number keys. You can search by the registered name, fax - Ricoh Aficio MP C3500 | General Settings Guide - Page 268
Registering Addresses and Users for Facsimile/Scanner Functions Adding a Group to Another Group You can add a group to another group. A Press [System Settings]. B Press [Administrator Tools]. C Press [Address Book: - Ricoh Aficio MP C3500 | General Settings Guide - Page 269
G Select the group which you want to add to. Registering Names to a Group The group key that you have selected becomes highlighted, and the group is added to it. H Press [OK]. 7 Displaying Names Registered in a Group You can check the names or groups registered in each group. A Press [System - Ricoh Aficio MP C3500 | General Settings Guide - Page 270
is registered. You can search by the registered name, fax number, folder name, e-mail address, or IP-Fax destination. F Press [Programmed User/Group]. All the names registered will be displayed. G Press [OK]. Removing a Name from a Group A Press [System Settings]. 7 B Press [Administrator Tools - Ricoh Aficio MP C3500 | General Settings Guide - Page 271
Registering Names to a Group G Select the group from which you want to remove the name. The group key that you have selected becomes highlighted, and the name is added to it. H Press [OK]. 7 Deleting a Group Within Another Group A Press [System Settings]. B Press [Administrator Tools]. C Press [ - Ricoh Aficio MP C3500 | General Settings Guide - Page 272
Registering Addresses and Users for Facsimile/Scanner Functions E Select the group that you want to delete from. Press the group key, or enter the registered number during the number - Ricoh Aficio MP C3500 | General Settings Guide - Page 273
Changing a Group Name A Press [System Settings]. Registering Names to a Group B Press [Administrator Tools]. C Press [Address Book: Program / Change / Delete Group]. D Check that [Program / Change] is selected. E Press the group key you want to change. You can search by the registered name, - Ricoh Aficio MP C3500 | General Settings Guide - Page 274
Registering Addresses and Users for Facsimile/Scanner Functions Deleting a Group A Press [System Settings]. B Press [Administrator Tools]. C Press [Address Book: Program / Change / Delete Group]. D Press [Delete]. E Press [Yes]. F Press a group - Ricoh Aficio MP C3500 | General Settings Guide - Page 275
access to folders. • Sender's names You can prevent misuse of sender's names. Reference p.215 "Registering a User Code" Registering a Protection Code to a Single User A Press [System Settings]. 7 B Press [Administrator Tools]. C Press [Address Book Management]. D Check that [Program / Change] is - Ricoh Aficio MP C3500 | General Settings Guide - Page 276
Registering Addresses and Users for Facsimile/Scanner Functions F Press [Protection]. G Press [Destination] or [Sender] under Use Name as. 7 Both [Destination] and [Sender] can be selected at the same time. H Press [Change] under Protection Code. I Enter a protection code using the number keys, - Ricoh Aficio MP C3500 | General Settings Guide - Page 277
Registering a Protection Code Registering a Protection Code to a Group User A Press [System Settings]. B Press [Administrator Tools]. C Press [Address Book: Program / Change / Delete Group]. D Check that [Program / Change] is selected. E Press the group key you want - Ricoh Aficio MP C3500 | General Settings Guide - Page 278
Functions Registering SMTP and LDAP Authentication SMTP Authentication For each user registered in the Address Book, you can register a login user name and login password to be used when accessing an SMTP server. To use an SMTP server, you need to program it beforehand. Important ❒ When [Do not - Ricoh Aficio MP C3500 | General Settings Guide - Page 279
. Registering SMTP and LDAP Authentication I Enter the login user name, and then press [OK]. J Press [Change] under Login Password. K Enter the password, and then press [OK]. L Enter the password again to confirm, and then press [OK]. M [OK]. Note ❒ To register the name, see Registering Names - Ricoh Aficio MP C3500 | General Settings Guide - Page 280
registered in the Address Book, you can register a login user name and login password to be used when accessing an LDAP server. To use an LDAP server, you need to program it beforehand. For details, see "LDAP Server Settings", Network Guide. Important ❒ When [Do not Specify] is selected for LDAP - Ricoh Aficio MP C3500 | General Settings Guide - Page 281
login user name, and then press [OK]. J Press [Change] under Login Password. K Enter the password, and then press [OK]. L Enter the password selected for LDAP Authentication, the User Name and Password that you have specified in Program / Change LDAP Server 7 of Administrator Tools settings applies - Ricoh Aficio MP C3500 | General Settings Guide - Page 282
Registering Addresses and Users for Facsimile/Scanner Functions 7 274 - Ricoh Aficio MP C3500 | General Settings Guide - Page 283
, cyan and black balance. ❖ Color Registration If the color documents show registration shifting, perform automatic color registration. Note ❒ For details about "Auto Color Calibration" and "Color Registration", see "Maintenance", Troubleshooting. Reference p.3 "Accessing User Tools" "Maintenance - Ricoh Aficio MP C3500 | General Settings Guide - Page 284
Other User Tools Changing the Display Language You can change the language used on the display. English is set as default. A Press [Español]. The language is changed to Spanish. B Press [Salir]. 8 The menu appears in Spanish. Reference p.3 "Accessing User Tools" 276 - Ricoh Aficio MP C3500 | General Settings Guide - Page 285
check the telephone numbers to contact for repairs, or ordering consumables such as toner. Be sure to contact your service engineer to verify the following: ❖ Consumables • Telephone No. to order • Toner • Staple • Staple (Center) • TX Stamp Name ❖ Machine Maintenance/Repair • Telephone No. • Serial - Ricoh Aficio MP C3500 | General Settings Guide - Page 286
Other User Tools C Press the {Start} key. Inquiry information prints out. D Press [Exit] twice. Reference p.3 "Accessing User Tools" 8 278 - Ricoh Aficio MP C3500 | General Settings Guide - Page 287
Counter Displaying the Total Counter You can display the total counter value used for all functions. A Press [Counter]. Counter B To print a counter list, press [Print Counter List]. 8 C Press the {Start} key. A counter list prints out. Reference p.3 "Accessing User Tools" 279 - Ricoh Aficio MP C3500 | General Settings Guide - Page 288
Other User Tools 8 280 - Ricoh Aficio MP C3500 | General Settings Guide - Page 289
9. Appendix Specifications for the Main Unit ❖ Configuration: Desktop ❖ Photosensitivity type: OPC drum ❖ Original scanning: One-dimensional solid scanning system through CCD ❖ Copy process: Dry electrostatic transfer system ❖ Development: Dry two-component magnetic brush development system ❖ Fusing - Ricoh Aficio MP C3500 | General Settings Guide - Page 290
edge: 2±1mm • Right edge: 2±1mm ❖ First copy time: • Type 1: • Color: 8 seconds or less • B&W: 4.9 seconds or less • Type 2: • Color: 7 seconds or less 9 • B&W: 4.5 seconds or less ❖ Copying speed: (Type 1) Full Color / B&W • 35/35 copies/minute (A4K, 81/2"×11"K) ❖ Copying speed: (Type - Ricoh Aficio MP C3500 | General Settings Guide - Page 291
Specifications for the Main Unit ❖ Reproduction ratio: Preset reproduction ratios: • Enlargement Metric version 400% 200% 141% 122% 115% Inch version 400% 200% 155% 129% 121% • Full size Metric version 100% Inch version 100% • Reduction Metric version 93% 82% 75% 71% 65% 50% 25% Inch - Ricoh Aficio MP C3500 | General Settings Guide - Page 292
Appendix ❖ Power consumption: Warm-up Stand-by During printing Maximum Main unit only about 1.44 kW about 250W about 1.2 kW about 1.44 kW Complete system about 1.44 kW about 280 kW about 1.3 kW about 1.44 kW The complete system consists of the main unit, booklet finisher, large capacity tray, - Ricoh Aficio MP C3500 | General Settings Guide - Page 293
• The complete system consists of the main unit, auto document feeder, 2 tray paper unit, bridge unit, booklet finisher, and punch kit for the booklet finisher. ❖ Weight: Type 1, 2: Approx. 110 kg, 242lb. ❖ HDD: 80 GB or more • Capacity for Document Server 36 GB • Capacity for memory sorting 14-16 - Ricoh Aficio MP C3500 | General Settings Guide - Page 294
Appendix Specifications for Options ❖ Exposure Glass Cover Lower this over originals for copying. ❖ Auto Document Feeder Lower this over originals for copying. • Mode: ADF mode, Batch mode, SADF mode, Mixed Size mode, Custom Size Originals mode, Auto detect (A4, 81/2"× - Ricoh Aficio MP C3500 | General Settings Guide - Page 295
Specifications for Options Staple: • 2-9 sheets: 100 sets (A4K, 81/2"×11"K) (80g/m2, 20lb.) • 10-50 sheets:100-20 sets (A4K, 81/2"×11"K) (80g/m2, 20lb.) • 2-9 sheets: 100 sets (A4L, B5JISKL, 81/2"×11"L) (80g/m2, 20lb.) • 10-50 sheets: 50-10 sets (A4L, B5JISKL, 81/2"×11"L) (80g/m2, 20lb.) • 2-9 - Ricoh Aficio MP C3500 | General Settings Guide - Page 296
Appendix 9 288 Finisher Shift Tray: • Paper size: A3L, B4JISL, A4KL, B5JISKL, A5KL, B6JISL, A6L, 12"×18"L, 11"×17"L, 81/2"×14"L, 81/2"×11"KL, 81/2"×51/2"L • Paper weight: 52-256g/m2, 14-68lb. • Stack capacity: No Staple: • 3,000 sheets: A4K, 81/2"×11"K (80g/m2, 20lb.) • 1,500 sheets: A3L, B4JISL, - Ricoh Aficio MP C3500 | General Settings Guide - Page 297
Specifications for Options • Weight: Approx. 54kg, 119lb. ❖ Booklet Finisher Finisher Upper Tray: • Paper siez: A3L, B4JISL, A4KL, B5JISKL, A5KL, B6JISL, A6L, 12"×18"L, 11"×17"L, 81/2"×14"L, 81/2"×11"KL, 81/2"×51/2"L • Paper weight: 52-163g/m2, 14-43lb. • Stack capacity: • 250 sheets: A4KL, - Ricoh Aficio MP C3500 | General Settings Guide - Page 298
Appendix • Staple capacity: Without Mixed Size: • 50 sheets: A4KL, B5JISKL, 81/2"×11"KL (80g/m2, 20lb.) • 30 sheets: A3L B4JISL, 12"×18"L, 11"×17"L, 81/2"×14"L (80g/m2, 20lb.) With Mixed Size: • 30 sheets (A3L / A4K, B4JISL / B5JISK, 11"×17"L / 81/2"×11"K) (80g/m2, 20lb.) • Staple paper size: - Ricoh Aficio MP C3500 | General Settings Guide - Page 299
Specifications for Options ❖ Punch Kit (3000-sheet Finisher / Booklet Finisher) • Paper size: A3L, B4JISL, A4KL, B5JISKL, A5KL, 11"×17"L, 81/2"×14"L, 81/2"×11"KL, 81/2"×51/2"KL • Paper weight: 52-163g/m2, 14-43.4lb. • Weight: Approx. 2kg, 4.4lb. ❖ 2 Tray Paper Unit • Paper size: A3L, B4JISL, A4KL, - Ricoh Aficio MP C3500 | General Settings Guide - Page 300
provides warranty and support to the this software and associated documentation files (the "Software Copyright Notice of NetBSD For all users to use this product: This code. For exact copyright notice applicable for each of the files/binaries, the source code tree must be consulted. A full source code - Ricoh Aficio MP C3500 | General Settings Guide - Page 301
conditions are met: A Redistributions of source code must retain the above copyright notice, this conditions and the following disclaimer in the documentation and/or other materials provided with the BUT NOT LIMITED TO, PROCUREMENT OF SUBSTITUTE GOODS OR SERVICES; LOSS OF USE, DATA, OR PROFITS; OR - Ricoh Aficio MP C3500 | General Settings Guide - Page 302
by Ginger Alliance Ltd., the initial developer, and the modified code of the Sablotron 0.82 has been derived from such original code provided by Ginger Alliance Ltd. b) The product manufacturer provides warranty and support to the application software of this product including the Sablotron 0.82 - Ricoh Aficio MP C3500 | General Settings Guide - Page 303
source code of the modified code of the Sablotron 0.82 is available at: http://support-download.com/services/device/sablot/notice082.html e) The source code , this list of conditions and the following disclaimer in the documentation and/or other materials provided with the distribution. C The name - Ricoh Aficio MP C3500 | General Settings Guide - Page 304
is provided "as is" without express or implied warranty of any kind. These notices must be retained in any copies of any part of this documentation 9 and/or software. MD5 Copyright (C) 1991-2, RSA Data Security, Inc. Created 1991. All rights reserved. License to copy and use this software is - Ricoh Aficio MP C3500 | General Settings Guide - Page 305
must be retained in any copies of any part of this documentation and/or software. Samba(Ver 3.0.4) For SMB transmission, this machine Note ❒ The source code for SMB transmission by this machine can be downloaded from the following website: http://support-download.com/services/scbs RSA BSAFE® - Ricoh Aficio MP C3500 | General Settings Guide - Page 306
conditions are met: 1. Redistributions of source code must retain the above copyright notice, this conditions and the following disclaimer in the documentation and/or other materials provided with the BUT NOT LIMITED TO, PROCUREMENT OF SUBSTITUTE GOODS OR SERVICES; LOSS OF USE, DATA, OR PROFITS; OR - Ricoh Aficio MP C3500 | General Settings Guide - Page 307
. The following conditions apply to all code found in this distribution, be it the RC4, RSA, lhash, DES, etc., code; not just the SSL code. The SSL documentation included with this distribution is covered by PROVE DEFECTIVE, YOU ASSUME THE COST OF ALL NECESSARY SERVICING, REPAIR OR CORRECTION. 299 - Ricoh Aficio MP C3500 | General Settings Guide - Page 308
are permitted provided that the following conditions are met: 1. Redistributions of source code must retain the above copyright notice, this list of conditions and the following of conditions and the following disclaimer in the documentation and/or other materials provided with the distribution. 300 - Ricoh Aficio MP C3500 | General Settings Guide - Page 309
, BUT NOT LIMITED TO, PROCUREMENT OF SUBSTITUTE GOODS OR SERVICES; LOSS OF USE, DATA, OR PROFITS; OR BUSINESS following conditions are met: 1. Redistributions of source code must retain the above copyright notice, this list documentation and/or other materials provided with the distribution - Ricoh Aficio MP C3500 | General Settings Guide - Page 310
BUT NOT LIMITED TO, PROCUREMENT OF SUBSTITUTE GOODS OR SERVICES; LOSS OF USE, DATA, OR PROFITS; OR conditions are met: 1. Redistributions of source code must retain the above copyright notice, conditions and the following disclaimer in the documentation and/or other materials provided with the - Ricoh Aficio MP C3500 | General Settings Guide - Page 311
(INCLUDING, BUT NOT LIMITED TO, PROCUREMENT OF SUBSTITUTE GOODS OR SERVICES; LOSS OF USE, DATA, OR PROFITS; OR BUSINESS INTERRUPTION) HOWEVER not under my direct control. As far as I know, all included source code is used in accordance with the relevant license agreements and can be used freely - Ricoh Aficio MP C3500 | General Settings Guide - Page 312
code from OpenSSL - Zlib is now external, in a library - The make-ssh-known-hosts script is no longer included - TSS has been removed - MD5 is now external, in the OpenSSL library - RC4 support has been replaced with ARC4 support THE COST OF ALL NECESSARY SERVICING, RE- PAIR OR CORRECTION. 304 - Ricoh Aficio MP C3500 | General Settings Guide - Page 313
are permitted provided that the following conditions are met: 1. Redistributions of source code must retain the above copyright notice, this list of conditions and the following of conditions and the following disclaimer in the documentation and/or other materials provided with the distribution. 305 - Ricoh Aficio MP C3500 | General Settings Guide - Page 314
, BUT NOT LIMITED TO, PROCUREMENT OF SUBSTITUTE GOODS OR SERVICES; LOSS OF USE, DATA, OR PROFITS; OR BUSINESS following conditions are met: 1. Redistributions of source code must retain the above copyright notice, this list documentation and/or other materials provided with the distribution - Ricoh Aficio MP C3500 | General Settings Guide - Page 315
BUT NOT LIMITED TO, PROCUREMENT OF SUBSTITUTE GOODS OR SERVICES; LOSS OF USE, DATA, OR PROFITS; OR conditions are met: 1. Redistributions of source code must retain the above copyright notice, conditions and the following disclaimer in the documentation and/or other materials provided with the - Ricoh Aficio MP C3500 | General Settings Guide - Page 316
DAMAGES (INCLUDING, BUT NOT LIMITED TO, PROCUREMENT OF SUBSTITUTE GOODS OR SERVICES; LOSS OF USE, DATA, OR PROFITS; OR BUSINESS INTERRUPTION) HOWEVER August 2003 Redistribution and use of this software and associated documentation ("Software"), with or without modification, are permitted provided - Ricoh Aficio MP C3500 | General Settings Guide - Page 317
, EXEMPLARY, OR CONSEQUENTIAL DAMAGES (INCLUDING, BUT NOT LIMITED TO, PROCUREMENT OF SUBSTITUTE GOODS OR SERVICES; LOSS OF USE, DATA, OR PROFITS; OR BUSINESS INTERRUPTION) HOWEVER CAUSED AND ON ANY Rights Reserved. Permission to copy and distribute verbatim copies of this document is granted. 9 309 - Ricoh Aficio MP C3500 | General Settings Guide - Page 318
Book Management, 76 Adjust Color Image / Copier / Document Server Features, 119 Adjust Sound Password, 197 Changing a Fax Destination, 226 Changing a Group Name, 265 Changing an E-mail Destination, 238 Changing an FTP Folder Destination, 248 Changing a Registered Name, 212 Changing a User Code - Ricoh Aficio MP C3500 | General Settings Guide - Page 319
Sheet Tray, 51 Customize Function: Copier, 91 Customize Function: Document Server Storage, 91 D Data Format, 196 Data Security for Copying, 76 Date Stamp, 111 DDNS Configuration, 59 DDNS Configuration (IEEE 1394), 64 Default Printer Language, 189 Default User Name / Password (Send), 69 Delete All - Ricoh Aficio MP C3500 | General Settings Guide - Page 320
Level, 203 Host Interface / Printer Features, 193 Host Name, 59 Host Name (IEEE 1394), 64 I IEEE 1394, 64 IEEE 802.11b, 13, 66 Image Repeat Separation Line, 100 Initial Print Job List, 189 Initial Settings / Facsimile Features, 134 Input/Output / Copier / Document Server Features, 116 Input Prime - Ricoh Aficio MP C3500 | General Settings Guide - Page 321
Program / Change / Delete LDAP Server, 84 Program / Change/Delete LDAP Server, 76 Program / Change / Delete Scan Size, 124, 141 Program / Change / Delete Standard Message, 125 Program / Change / Delete User Text, 47 Program Closed Network Code, 134 Program/Delete Stamp (User Stamp), 110 Program Fax - Ricoh Aficio MP C3500 | General Settings Guide - Page 322
Authentication, 270 Registering user names and destination names, 210 Removing a Name from a Group, 262 Reproduction Ratio / Copier / Document Server Features, 96 R / E Ratio, 96 R/E Ratio Priority, 96 Reserved Job Waiting Time, 189 Resolution, 194, 196, 197 Restore Factory Defaults, 66 Rotate Sort - Ricoh Aficio MP C3500 | General Settings Guide - Page 323
Lines, 128 SSID Setting, 66 Stamp Color:1-4 (User Stamp), 110 Stamp Color (Background Numbering), 106 Stamp Color (Date Stamp), 111 Stamp Color (Page Numbering), 113 Stamp Color (Preset Stamp), 107 Stamp / Copier / Document Server Features, 106 Stamp Format:1-4 (User Stamp), 110 Stamp Format (Page - Ricoh Aficio MP C3500 | General Settings Guide - Page 324
® Windows® 98 The product name of Windows® Me is Microsoft® Windows® Millennium Edition (Windows Me) The product names of Windows® 2000 are as follows: Microsoft® Windows® 2000 Advanced Server Microsoft® Windows® 2000 Server Microsoft® Windows® 2000 Professional The product names of Windows® XP are - Ricoh Aficio MP C3500 | General Settings Guide - Page 325
Operating Instructions General Settings Guide Type for C3535/DSc535/LD435c/Aficio MP C3500 Type for C4540/DSc545/LD445c/Aficio MP C4500 Type for C4540g/DSc545g/Aficio MP C4500G EN USA B222-7857
-
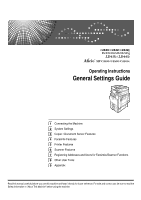 1
1 -
 2
2 -
 3
3 -
 4
4 -
 5
5 -
 6
6 -
 7
7 -
8
-
9
-
10
-
11
-
12
-
13
-
14
-
15
-
16
-
17
-
18
-
19
-
20
-
21
-
22
-
23
-
24
-
25
-
26
-
27
-
28
-
29
-
30
-
31
-
32
-
33
-
34
-
35
-
36
-
37
-
38
-
39
-
40
-
41
-
42
-
43
-
44
-
45
-
46
-
47
-
48
-
49
-
50
-
51
-
52
-
53
-
54
-
55
-
56
-
57
-
58
-
59
-
60
-
61
-
62
-
63
-
64
-
65
-
66
-
67
-
68
-
69
-
70
-
71
-
72
-
73
-
74
-
75
-
76
-
77
-
78
-
79
-
80
-
81
-
82
-
83
-
84
-
85
-
86
-
87
-
88
-
89
-
90
-
91
-
92
-
93
-
94
-
95
-
96
-
97
-
98
-
99
-
100
-
101
-
102
-
103
-
104
-
105
-
106
-
107
-
108
-
109
-
110
-
111
-
112
-
113
-
114
-
115
-
116
-
117
-
118
-
119
-
120
-
121
-
122
-
123
-
124
-
125
-
126
-
127
-
128
-
129
-
130
-
131
-
132
-
133
-
134
-
135
-
136
-
137
-
138
-
139
-
140
-
141
-
142
-
143
-
144
-
145
-
146
-
147
-
148
-
149
-
150
-
151
-
152
-
153
-
154
-
155
-
156
-
157
-
158
-
159
-
160
-
161
-
162
-
163
-
164
-
165
-
166
-
167
-
168
-
169
-
170
-
171
-
172
-
173
-
174
-
175
-
176
-
177
-
178
-
179
-
180
-
181
-
182
-
183
-
184
-
185
-
186
-
187
-
188
-
189
-
190
-
191
-
192
-
193
-
194
-
195
-
196
-
197
-
198
-
199
-
200
-
201
-
202
-
203
-
204
-
205
-
206
-
207
-
208
-
209
-
210
-
211
-
212
-
213
-
214
-
215
-
216
-
217
-
218
-
219
-
220
-
221
-
222
-
223
-
224
-
225
-
226
-
227
-
228
-
229
-
230
-
231
-
232
-
233
-
234
-
235
-
236
-
237
-
238
-
239
-
240
-
241
-
242
-
243
-
244
-
245
-
246
-
247
-
248
-
249
-
250
-
251
-
252
-
253
-
254
-
255
-
256
-
257
-
258
-
259
-
260
-
261
-
262
-
263
-
264
-
265
-
266
-
267
-
268
-
269
-
270
-
271
-
272
-
273
-
274
-
275
-
276
-
277
-
278
-
279
-
280
-
281
-
282
-
283
-
284
-
285
-
286
-
287
-
288
-
289
-
290
-
291
-
292
-
293
-
294
-
295
-
296
-
297
-
298
-
299
-
300
-
301
-
302
-
303
-
304
-
305
-
306
-
307
-
308
-
309
-
310
-
311
-
312
-
313
-
314
-
315
-
316
-
317
-
318
-
319
-
320
-
321
-
322
-
323
-
324
-
325
 |
 |

Operating Instructions
General Settings Guide
Read this manual carefully before you use this machine and keep it handy for future reference. For safe and correct use, be sure to read the
Safety Information in "About This Machine" before using the machine.
Connecting the Machine
System Settings
Copier / Document Server Features
Facsimile Features
Printer Features
Scanner Features
Registering Addresses and Users for Facsimile/Scanner Functions
Other User Tools
Appendix
1
2
3
4
5
6
7
8
9