Samsung NX1000 User Manual - Page 141
Disconnecting the camera (for Windows XP), Transferring files to your Mac computer
 |
View all Samsung NX1000 manuals
Add to My Manuals
Save this manual to your list of manuals |
Page 141 highlights
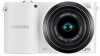
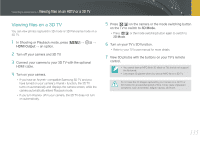
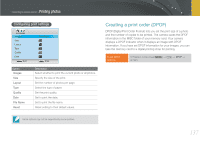
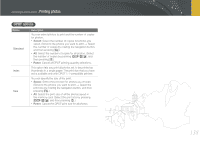
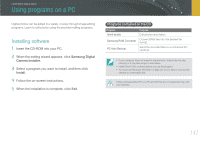
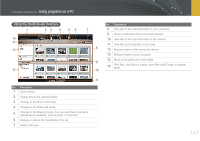
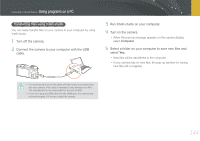
Connecting to external devices > Transferring files to your computer Disconnecting the camera (for Windows XP) With Windows Vista and Windows 7, the methods for disconnecting the camera are similar. 1 Ensure that no data is being transferred between the camera and the computer. • If the status lamp on your camera is blinking, it means the data transfer is in progress. Please wait until the status lamp stops blinking. 2 Click on the tool bar at the bottom right of your computer screen. Transferring files to your Mac computer 1 Turn off the camera. 2 Connect your camera to a Macintosh computer with the USB cable. Mac OS 10.4 or later is supported. • You must plug the small end of the USB cable into your camera. If the cable is reversed, it may damage your files. The manufacturer is not responsible for any loss of data. • If you try to plug the USB cable into the HDMI port, the camera may not work properly. If it occurs, restart the camera. 3 Click the pop-up message. 4 Click the message box indicating safely removed. 5 Remove the USB cable. 3 Turn on the camera. • When the pop-up message appears on the camera display, select Computer. 4 Open the removable disk. 5 Transfer photos or videos to the computer. 140
-
 1
1 -
2
-
3
-
4
-
5
-
6
-
7
-
8
-
9
-
10
-
11
-
12
-
13
-
14
-
15
-
16
-
17
-
18
-
19
-
20
-
21
-
22
-
23
-
24
-
25
-
26
-
27
-
28
-
29
-
30
-
31
-
32
-
33
-
34
-
35
-
36
-
37
-
38
-
39
-
40
-
41
-
42
-
43
-
44
-
45
-
46
-
47
-
48
-
49
-
50
-
51
-
52
-
53
-
54
-
55
-
56
-
57
-
58
-
59
-
60
-
61
-
62
-
63
-
64
-
65
-
66
-
67
-
68
-
69
-
70
-
71
-
72
-
73
-
74
-
75
-
76
-
77
-
78
-
79
-
80
-
81
-
82
-
83
-
84
-
85
-
86
-
87
-
88
-
89
-
90
-
91
-
92
-
93
-
94
-
95
-
96
-
97
-
98
-
99
-
100
-
101
-
102
-
103
-
104
-
105
-
106
-
107
-
108
-
109
-
110
-
111
-
112
-
113
-
114
-
115
-
116
-
117
-
118
-
119
-
120
-
121
-
122
-
123
-
124
-
125
-
126
-
127
-
128
-
129
-
130
-
131
-
132
-
133
-
134
-
135
-
 136
136 -
 137
137 -
 138
138 -
 139
139 -
 140
140 -
 141
141 -
 142
142 -
 143
143 -
 144
144 -
 145
145 -
 146
146 -
147
-
148
-
149
-
150
-
151
-
152
-
153
-
154
-
155
-
156
-
157
-
158
-
159
-
160
-
161
-
162
-
163
-
164
-
165
-
166
-
167
-
168
-
169
-
170
-
171
-
172
-
173
-
174
-
175
-
176
-
177
-
178
-
179
-
180
-
181
-
182
-
183
 |
 |