Samsung SGH-P207 User Manual (user Manual) (ver.f5) (English) - Page 121
Time & Date, Settings, Select
 |
View all Samsung SGH-P207 manuals
Add to My Manuals
Save this manual to your list of manuals |
Page 121 highlights
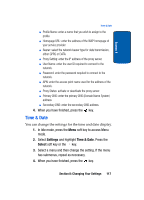
Section 8 Time & Date ⅷ Profile Name: enter a name that you wish to assign to the profile. ⅷ Homepage URL: enter the address of the WAP homepage of your service provider. ⅷ Bearer: select the network bearer type for data transmission, either GPRS or DATA. ⅷ Proxy Setting: enter the IP address of the proxy server. ⅷ User Name: enter the user ID required to connect to the network. ⅷ Password: enter the password required to connect to the network. ⅷ APN: enter the access point name used for the address of the network. ⅷ Proxy Status: activate or deactivate the proxy server. ⅷ Primary DNS: enter the primary DNS (Domain Name System) address. ⅷ Secondary DNS: enter the secondary DNS address. 4. When you have finished, press the key. Time & Date You can change the settings for the time and date display. 1. In Idle mode, press the Menu soft key to access Menu mode. 2. Select Settings and highlight Time & Date. Press the Select soft key or the key. 3. Select a menu and then change the setting. If the menu has submenus, repeat as necessary. 4. When you have finished, press the key. Section 8: Changing Your Settings 117
-
 1
1 -
2
-
3
-
4
-
5
-
6
-
7
-
8
-
9
-
10
-
11
-
12
-
13
-
14
-
15
-
16
-
17
-
18
-
19
-
20
-
21
-
22
-
23
-
24
-
25
-
26
-
27
-
28
-
29
-
30
-
31
-
32
-
33
-
34
-
35
-
36
-
37
-
38
-
39
-
40
-
41
-
42
-
43
-
44
-
45
-
46
-
47
-
48
-
49
-
50
-
51
-
52
-
53
-
54
-
55
-
56
-
57
-
58
-
59
-
60
-
61
-
62
-
63
-
64
-
65
-
66
-
67
-
68
-
69
-
70
-
71
-
72
-
73
-
74
-
75
-
76
-
77
-
78
-
79
-
80
-
81
-
82
-
83
-
84
-
85
-
86
-
87
-
88
-
89
-
90
-
91
-
92
-
93
-
94
-
95
-
96
-
97
-
98
-
99
-
100
-
101
-
102
-
103
-
104
-
105
-
106
-
107
-
108
-
109
-
110
-
111
-
112
-
113
-
114
-
115
-
 116
116 -
 117
117 -
 118
118 -
 119
119 -
 120
120 -
 121
121 -
 122
122 -
 123
123 -
 124
124 -
 125
125 -
 126
126 -
127
-
128
-
129
-
130
-
131
-
132
-
133
-
134
-
135
-
136
-
137
-
138
-
139
-
140
-
141
-
142
-
143
-
144
-
145
-
146
-
147
-
148
-
149
-
150
-
151
-
152
-
153
-
154
-
155
-
156
-
157
-
158
-
159
-
160
-
161
-
162
-
163
-
164
-
165
-
166
-
167
-
168
-
169
-
170
-
171
-
172
-
173
-
174
-
175
-
176
-
177
-
178
-
179
-
180
-
181
-
182
-
183
-
184
-
185
-
186
-
187
-
188
-
189
-
190
-
191
-
192
-
193
-
194
-
195
-
196
-
197
-
198
-
199
-
200
-
201
-
202
-
203
-
204
-
205
-
206
-
207
-
208
-
209
 |
 |
