Seagate Personal Storage 5000DV Installation Guide (Windows) - Page 15
Step 3. Setting Up the Maxtor, OneTouch Feature
 |
View all Seagate Personal Storage 5000DV manuals
Add to My Manuals
Save this manual to your list of manuals |
Page 15 highlights
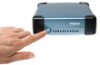
Mac OS 9: Maxtor requires that you re-format your drive Step 3. Setting Up the Maxtor with the Mac OS Extended format (also called HFS Plus) for proper operation with Retrospect Express software and M the OneTouch button. Further information is provided in OneTouch Feature Once the drive is recognized by your computer, you can set up "Formatting Your Drive" on page 14. the Maxtor OneTouch feature to automatically make a backup Mac OS 9:Your new drive appears on your desktop with copy of your selected files each time you press the button. 2 the name untitled. If you receive a message: "This disk is Windows XP: you may see an alert box regarding a unreadable by this computer. Do you want to initialize the requirement for administrator privileges. Proceed with disk?", refer to the section titled: "My computer reports the drive is "unreadable" (Mac OS 9)" on page 30. W your installation. For further information, refer to "Administrator Privilege for Windows" on page 32. Mac OS X:An Alert box will appear saying the drive is unreadable. See "To format the drive for Mac OS X" on page 16 page. To set up the Maxtor OneTouch button feature 1. Push the button on the front of your drive. M Proceed to #2 W The Retrospect License Code screen appears. A license code is automatically entered for you, do not change this code. Click OK to proceed. The next screen will ask you to personalize your copy. Enter your name and a company name if appropriate. Click OK to continue. A confirmation box will appear. If your entries are correct, click OK. 2. You are now asked to register Retrospect Express, click Register Now. The Retrospect Express Registration screen appears. Installing the Drive 11
-
 1
1 -
2
-
3
-
4
-
5
-
6
-
7
-
8
-
9
-
 10
10 -
 11
11 -
 12
12 -
 13
13 -
 14
14 -
 15
15 -
 16
16 -
 17
17 -
 18
18 -
 19
19 -
 20
20 -
21
-
22
-
23
-
24
-
25
-
26
-
27
-
28
-
29
-
30
-
31
-
32
-
33
-
34
-
35
-
36
-
37
-
38
-
39
-
40
 |
 |