Seagate Personal Storage 5000DV Installation Guide (Windows) - Page 22
Install D, Install E, Install F, To Install Retrospect at a Later Time
 |
View all Seagate Personal Storage 5000DV manuals
Add to My Manuals
Save this manual to your list of manuals |
Page 22 highlights
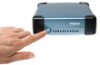
Install D The next screen will tell you it cannot install the hardware. 1. Install your drive as described in "Step 2. Connecting the Drive" on page 7.When you connect the drive to your computer, the Add New Hardware wizard appears, click Next. 3. Select the Don't prompt again option and click Finish. 4. Disregard the warning message that appears. 2 2. The Install Hardware Device Drivers screen appears. Select the option to search for a driver, click Next. 5. If a window appears "Help & Support Center," disregard this screen and close the window. 3. The Locate Driver Files screen appears. Clear all options and click Next. You are asked if you want to disable this device.This option is referring to the Maxtor OneTouch feature. Select the Disable Device option and click Next or Finish. 4. Finish the driver install. Your drive is now ready to use. Install F 1. Install your drive as described in "Step 2. Connecting the Drive" on page 7.When you connect the drive to your computer, the Add New Hardware wizard appears. Select the option Automatic search. Your drive is now ready to use. When using the unplug/eject icon on the taskbar, a reference to the Maxtor 1394 Storage Front Panel will appear under hardware devices.You can ignore this reference when you disconnect your drive from the Windows operating system. 2. Insert the Maxtor Install CD into your computer's CD-ROM drive. 3. The wizard will locate the proper driver. Click Finish. Your drive is now ready to use. Install E 1. Install your drive as described in "Step 2. Connecting the Drive" on page 7. When you connect the drive to your computer, the Add New Hardware wizard appears. 2. Select the option to Install software automatically and click Next. To Install Retrospect at a Later Time If you wish to install a complete copy of Retrospect Express software and the Maxtor OneTouch feature at a later time, you can do so by following the original installation instructions provided in this guide - Steps 1 - 3 on pages 5 - 13. You may see a message "Connect and search for the software on the Internet." Select No, do not connect to the Internet now.Then click Next. 18 Installing the Drive
-
 1
1 -
2
-
3
-
4
-
5
-
6
-
7
-
8
-
9
-
10
-
11
-
12
-
13
-
14
-
15
-
16
-
 17
17 -
 18
18 -
 19
19 -
 20
20 -
 21
21 -
 22
22 -
 23
23 -
 24
24 -
 25
25 -
 26
26 -
 27
27 -
28
-
29
-
30
-
31
-
32
-
33
-
34
-
35
-
36
-
37
-
38
-
39
-
40
 |
 |
