Sony CCD-TRV138 Camera Operations Guide - Page 16
Step 4: Adjusting the LCD panel and viewfinder, Adjusting the LCD panel, Adjusting the viewfinder
 |
UPC - 027242666597
View all Sony CCD-TRV138 manuals
Add to My Manuals
Save this manual to your list of manuals |
Page 16 highlights
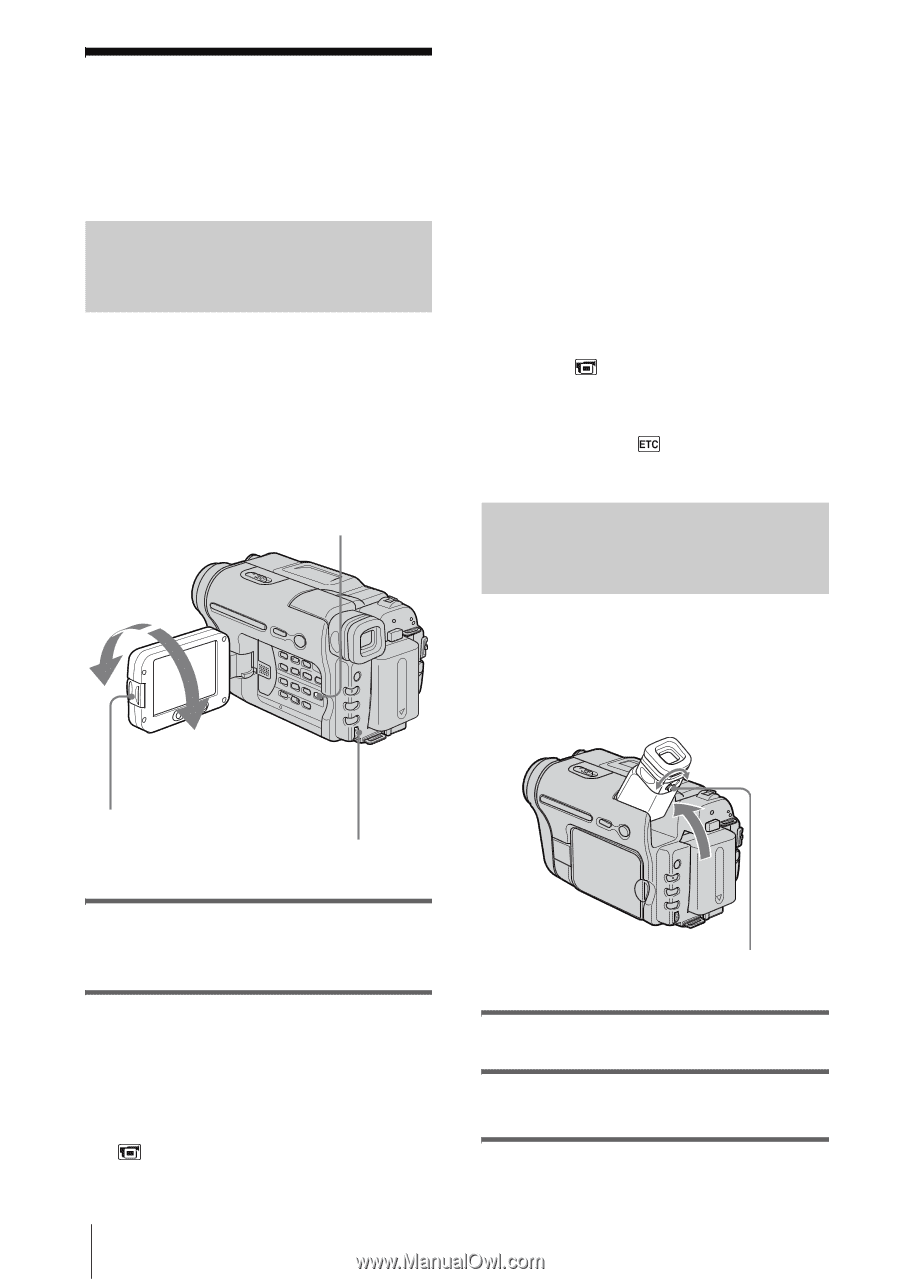
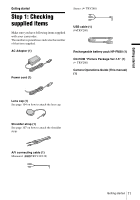
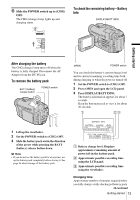
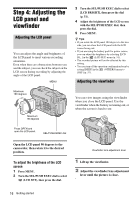
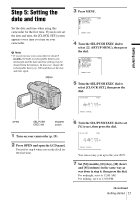
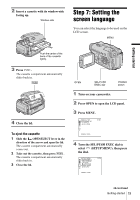
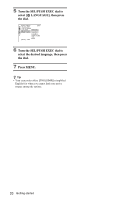
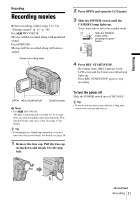
Step 4: Adjusting the LCD panel and viewfinder Adjusting the LCD panel You can adjust the angle and brightness of the LCD panel to meet various recording situations. Even when there are obstructions between you and the subject, you can check the subject on the LCD screen during recording by adjusting the angle of the LCD panel. MENU 3 Turn the SEL/PUSH EXEC dial to select [LCD BRIGHT], then press the dial (p. 51). 4 Adjust the brightness of the LCD screen with the SEL/PUSH EXEC dial, then press the dial. 5 Press MENU. z Tips • If you rotate the LCD panel 180 degrees to the lens side, you can close the LCD panel with the LCD screen facing out. • If you are using the battery pack for power source, you can adjust the brightness by selecting [LCD B.L.] in the (LCD SET) menu (p. 51). • The recorded picture will not be affected by this setting. • You can turn off the operation confirmation beep by setting [BEEP] in the (OTHERS) menu to [OFF] (p. 57). Adjusting the viewfinder Maximum 180 degrees Maximum 90 degrees You can view images using the viewfinder when you close the LCD panel. Use the viewfinder when the battery is running out, or when the screen is hard to see. Press OPEN and open the LCD panel. SEL/PUSH EXEC dial Open the LCD panel 90 degrees to the camcorder, then rotate it to the desired position. To adjust the brightness of the LCD screen 1 Press MENU. 2 Turn the SEL/PUSH EXEC dial to select (LCD SET), then press the dial. Viewfinder lens adjustment lever 1 Lift up the viewfinder. 2 Adjust the viewfinder lens adjustment lever until the picture is clear. 16 Getting started
-
 1
1 -
2
-
3
-
4
-
5
-
6
-
7
-
8
-
9
-
10
-
 11
11 -
 12
12 -
 13
13 -
 14
14 -
 15
15 -
 16
16 -
 17
17 -
 18
18 -
 19
19 -
 20
20 -
 21
21 -
22
-
23
-
24
-
25
-
26
-
27
-
28
-
29
-
30
-
31
-
32
-
33
-
34
-
35
-
36
-
37
-
38
-
39
-
40
-
41
-
42
-
43
-
44
-
45
-
46
-
47
-
48
-
49
-
50
-
51
-
52
-
53
-
54
-
55
-
56
-
57
-
58
-
59
-
60
-
61
-
62
-
63
-
64
-
65
-
66
-
67
-
68
-
69
-
70
-
71
-
72
-
73
-
74
-
75
-
76
-
77
-
78
-
79
-
80
-
81
-
82
-
83
-
84
-
85
-
86
-
87
-
88
-
89
-
90
-
91
-
92
-
93
-
94
-
95
-
96
-
97
-
98
-
99
-
100
-
101
-
102
-
103
-
104
-
105
-
106
-
107
-
108
-
109
-
110
-
111
-
112
 |
 |