Sony CCD-TRV138 Camera Operations Guide - Page 69
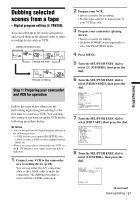
Recording the selected scenes as, programs
 |
UPC - 027242666597
View all Sony CCD-TRV138 manuals
Add to My Manuals
Save this manual to your list of manuals |
Page 69 highlights
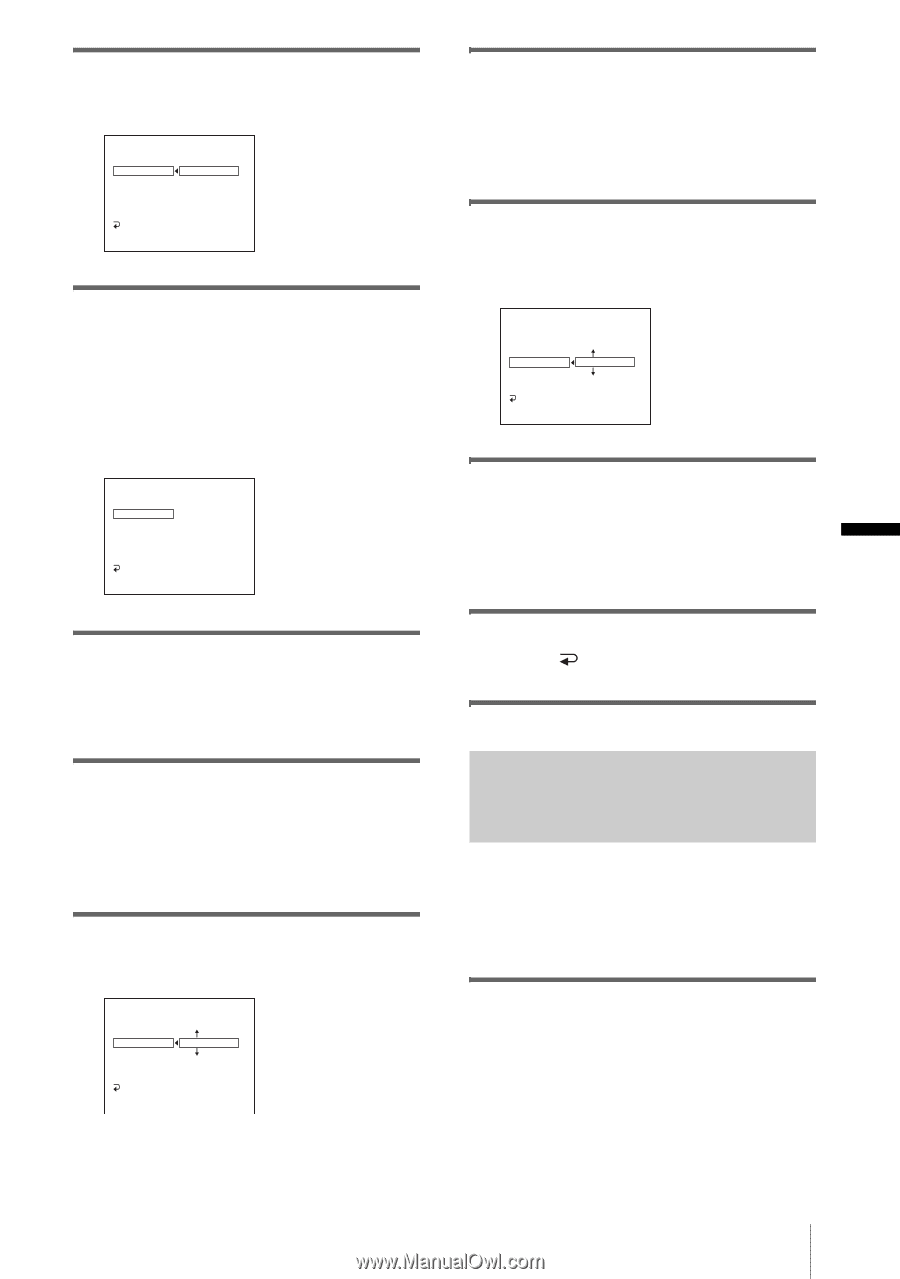
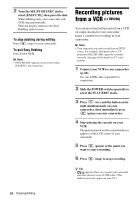
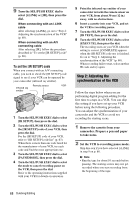
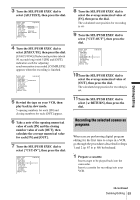
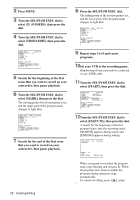
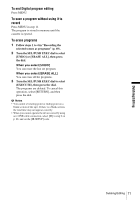
Dubbing/Editing 3 Turn the SEL/PUSH EXEC dial to select [ADJ TEST], then press the dial. VIDEO EDIT 0:08:55:06 EDIT SET CONTROL ADJ TEST RETURN "CUT-IN" EXECUTE "CUT-OUT" IR SETUP ENGAGE PAUSEMODE REC PAUSE IR TEST RETURN [MENU] : END 4 Turn the SEL/PUSH EXEC dial to select [EXECUTE], then press the dial. [EXECUTING] flashes and a picture (about 50 seconds long) with 5 [IN] and [OUT] indicators each for adjusting synchronization is recorded. [COMPLETE] appears when the recording is finished. VIDEO EDIT 0:08:55:06 EDIT SET CONTROL ADJ TEST COMPLETE "CUT-IN" "CUT-OUT" IR SETUP PAUSEMODE IR TEST RETURN [MENU] : END 5 Rewind the tape on your VCR, then play back in slow mode. 5 opening numbers for each [IN] and closing numbers for each [OUT] appear. 6 Take a note of the opening numerical value of each [IN] and the closing number value of each [OUT], then calculate the average numerical value for each [IN] and [OUT]. 7 Turn the SEL/PUSH EXEC dial to select ["CUT-IN"], then press the dial. VIDEO EDIT EDIT SET CONTROL ADJ TEST "CUT-IN" "CUT-OUT" IR SETUP PAUSEMODE IR TEST RETURN [MENU] : END 0:08:55:06 0 8 Turn the SEL/PUSH EXEC dial to select the average numerical value of [IN], then press the dial. The calculated start position for recording is set. 9 Turn the SEL/PUSH EXEC dial to select ["CUT-OUT"], then press the dial. VIDEO EDIT EDIT SET CONTROL ADJ TEST "CUT-IN" "CUT-OUT" IR SETUP PAUSEMODE IR TEST RETURN [MENU] : END 0:08:55:06 0 10Turn the SEL/PUSH EXEC dial to select the average numerical value of [OUT], then press the dial. The calculated stop position for recording is set. 11Turn the SEL/PUSH EXEC dial to select [ RETURN], then press the dial. Recording the selected scenes as programs When you are performing digital program editing for the first time to a tape in a VCR, go through the procedures described in Steps 1 and 2 (p. 67 to p. 68) beforehand. 1 Prepare a cassette. Insert a tape to be played back into the camcorder. Insert a cassette for recording into your VCR. ,continued Dubbing/Editing 69
-
 1
1 -
2
-
3
-
4
-
5
-
6
-
7
-
8
-
9
-
10
-
11
-
12
-
13
-
14
-
15
-
16
-
17
-
18
-
19
-
20
-
21
-
22
-
23
-
24
-
25
-
26
-
27
-
28
-
29
-
30
-
31
-
32
-
33
-
34
-
35
-
36
-
37
-
38
-
39
-
40
-
41
-
42
-
43
-
44
-
45
-
46
-
47
-
48
-
49
-
50
-
51
-
52
-
53
-
54
-
55
-
56
-
57
-
58
-
59
-
60
-
61
-
62
-
63
-
 64
64 -
 65
65 -
 66
66 -
 67
67 -
 68
68 -
 69
69 -
 70
70 -
 71
71 -
 72
72 -
 73
73 -
 74
74 -
75
-
76
-
77
-
78
-
79
-
80
-
81
-
82
-
83
-
84
-
85
-
86
-
87
-
88
-
89
-
90
-
91
-
92
-
93
-
94
-
95
-
96
-
97
-
98
-
99
-
100
-
101
-
102
-
103
-
104
-
105
-
106
-
107
-
108
-
109
-
110
-
111
-
112
 |
 |