Sony HCD-FL7D Operating Instructions - Page 28
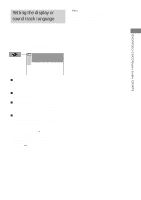
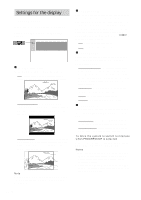
Settings for the display
 |
View all Sony HCD-FL7D manuals
Add to My Manuals
Save this manual to your list of manuals |
Page 28 highlights
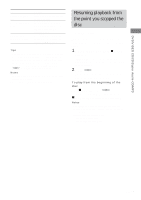
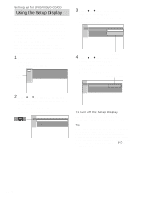
Settings for the display - SCREEN SETUP Select settings according to the connected TV. Select "SCREEN SETUP" in the Setup Display. SCREEN SETUP TV TYPE: 16:9 SCREEN SAVER: ON BACKGROUND: JACKET PICTURE COMPONENT OUT: INTERLACE x TV TYPE (DVD only) Select the aspect ratio of the connected TV. • 16:9: Select this when you connect a widescreen TV or a TV with a wide mode function. • 4:3 LETTER BOX: Select this when you connect a 4:3 screen TV. This setting displays a wide picture with bands displayed on the upper and lower portions of the screen. • 4:3 PAN SCAN: Select this when you connect a 4:3 screen TV. This setting displays the wide picture on the entire screen and cuts off the portions that do not fit. Note Depending on the DVD, "4:3 LETTER BOX" may be selected automatically instead of "4:3 PAN SCAN" or vice versa. 28GB x SCREEN SAVER Turn on and off the screen saver. If you turn on the screen saver, the screen saver image appears when you leave the player in pause or stop mode for 15 minutes or when you play a CD for more than 15 minutes. The screen saver will help prevent your display device from becoming damaged (ghosting). Press hH to turn off the screen saver. • ON: Turns on the screen saver. • OFF: Turns off the screen saver. x BACKGROUND Select the background color or picture on the TV screen when the playback is stopped or while playing a CD. • JACKET PICTURE: The jacket picture (still picture) appears in the background, but only when the jacket picture is already recorded on the disc (CD-EXTRA, etc). If the disc does not contain a jacket picture, the "GRAPHICS" picture appears. • GRAPHICS: The preset picture stored in the system appears in the background. • BLUE: The background color is blue. • BLACK: The background color is black. x COMPONENT OUT This will change the type of signal output from the COMPONENT VIDEO OUT jacks on the player. • INTERLACE: Select this setting when you are connected to a standard (interlace format) TV. • PROGRESSIVE: Select this when you have a TV that can accept progressive signals. To force the system to switch to interlace when PROGRESSIVE is selected Make sure the function is set to DVD, then hold down DVD FUNCTION and press DVD MENU. Notes • When "PROGRESSIVE" is selected in "SCREEN SETUP" and the color system of the TV is PAL, the signal is changed into the interlace format signal automaticaly. • When "PROGRESSIVE" is selected in "SCREEN SETUP," no signal is output from the VIDEO OUT or S VIDEO OUT jacks.
-
 1
1 -
2
-
3
-
4
-
5
-
6
-
7
-
8
-
9
-
10
-
11
-
12
-
13
-
14
-
15
-
16
-
17
-
18
-
19
-
20
-
21
-
22
-
 23
23 -
 24
24 -
 25
25 -
 26
26 -
 27
27 -
 28
28 -
 29
29 -
 30
30 -
 31
31 -
 32
32 -
 33
33 -
34
-
35
-
36
-
37
-
38
-
39
-
40
-
41
-
42
-
43
-
44
-
45
-
46
-
47
-
48
-
49
-
50
-
51
-
52
-
53
-
54
-
55
-
56
-
57
-
58
-
59
-
60
-
61
-
62
-
63
-
64
-
65
-
66
-
67
-
68
-
69
-
70
-
71
-
72
-
73
-
74
-
75
-
76
 |
 |
