Sony HDWM2100/20 Operation Manual - Page 72
Setup Menu Operations
 |
View all Sony HDWM2100/20 manuals
Add to My Manuals
Save this manual to your list of manuals |
Page 72 highlights
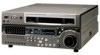
9-2 Setup Menu Operations To display setup menus MULTI CONTROL CHANNEL CONDITION 59.94 CTL/TC MENU TC PUSH/ SHIFT ALARM KEY INHI RESET HOME F1 F2 F3 F4 F5 F6 HOME button Function menu HOME page F5 (MENU) button With the function menu HOME page showing in the menu display, press the F5 (MENU) button. The currently selected setup menu item is displayed in the menu display, with the menu item number flashing. For basic operations in the menu display, see page 2-5. To display menus on the monitor Setting F4 (CHARA) to ON in function menu page 4 allows you to display setup menus on the monitor connected to the COMPOSITE VIDEO OUTPUT 3(SUPER) connector, HDSDI OUTPUT 3(SUPER) connector or SDI OUTPUT 3(SUPER) connector of this unit. When a setup menu appears on the monitor, a cursor indicates the currently selected menu item. Group name for the currently selected item Cursor indicating the currently selected item 59.94 SET H01 : OPE HOURS UP SELECT O SET EXIT Setup menu item H01 displayed Displaying a desired menu item CHANNEL CONDITION 59.94 SET 001:P-ROLL TIME - 5S UP SELECT HOME F1 F2 F3 F4 SET F5 EXIT F6 MULTI CONTROL PUSH/ SHIFT ALARM KEY INHI RESET v and V buttons MULTI CONTROL knob SHIFT indicator When the menu item number displayed in the menu display is flashing, you can change the menu item by turning the MULTI CONTROL knob. To skip from one item group to the next, press the v button or V button. Chapter 9 Setup Menus 9-2 Chapter 9 Setup Menus
-
 1
1 -
2
-
3
-
4
-
5
-
6
-
7
-
8
-
9
-
10
-
11
-
12
-
13
-
14
-
15
-
16
-
17
-
18
-
19
-
20
-
21
-
22
-
23
-
24
-
25
-
26
-
27
-
28
-
29
-
30
-
31
-
32
-
33
-
34
-
35
-
36
-
37
-
38
-
39
-
40
-
41
-
42
-
43
-
44
-
45
-
46
-
47
-
48
-
49
-
50
-
51
-
52
-
53
-
54
-
55
-
56
-
57
-
58
-
59
-
60
-
61
-
62
-
63
-
64
-
65
-
66
-
 67
67 -
 68
68 -
 69
69 -
 70
70 -
 71
71 -
 72
72 -
 73
73 -
 74
74 -
 75
75 -
 76
76 -
 77
77 -
78
-
79
-
80
-
81
-
82
-
83
-
84
-
85
-
86
-
87
-
88
-
89
-
90
-
91
-
92
-
93
-
94
-
95
-
96
-
97
-
98
-
99
-
100
-
101
-
102
-
103
-
104
-
105
-
106
-
107
-
108
-
109
-
110
-
111
-
112
-
113
-
114
-
115
 |
 |
