Sony ICD-SX712 Operating Instructions (Large File - 11.69 MB) - Page 34
Selecting a recording scene for each situation, Notes
 |
UPC - 027242807723
View all Sony ICD-SX712 manuals
Add to My Manuals
Save this manual to your list of manuals |
Page 34 highlights
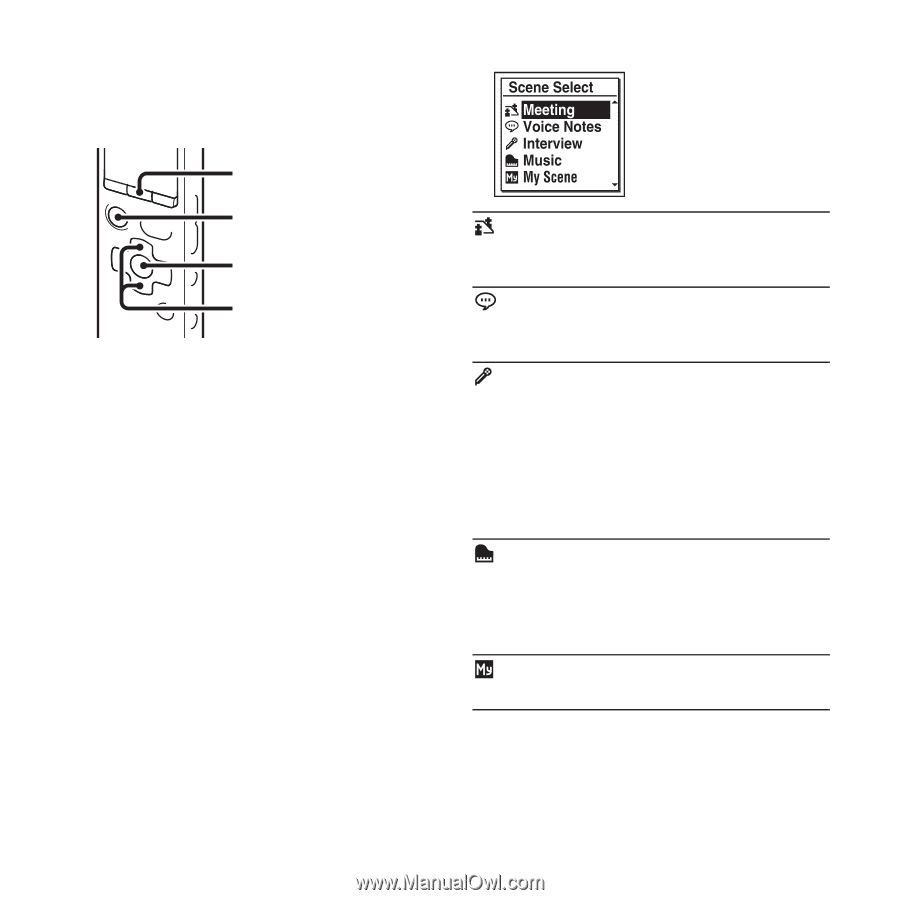
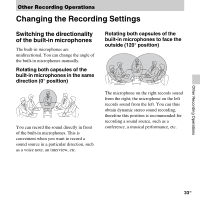
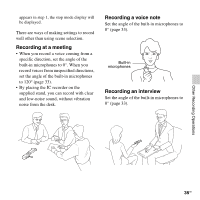
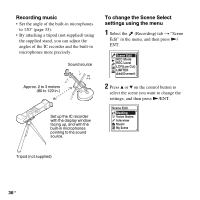
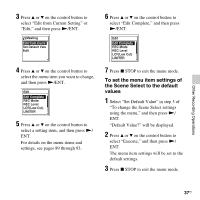
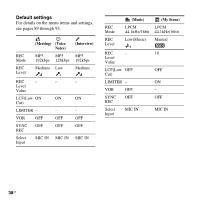
Selecting a recording scene for each situation SCENE x STOP N/ENT v, V According to various recording scene, you can change the items for recording, such as REC Mode (page 89), REC Level (page 90), etc., to the recommended settings in bulk. You can change the settings for each item. 1 Press SCENE in the stop mode. The Scene Select window will be displayed. 2 Press v or V on the control button to select the scene you want, and then press N/ENT. (Meeting) To record in a variety of situations, such as recording in a spacious conference room. To record dictation with a (Voice Notes) microphone in front of your mouth. (Interview) To record human voice at a distance of 1 to 2 meters (40 to 80 in.). When you rotate both capsules of the built-in microphones in the same direction (0° position), the directionality effect of the microphones will be improved. (Music) To record acoustic guitar, piano, violin, or other instrumental sounds at a distance of 2 to 3 meters (80 to 120 in.). Use to store your favorite (My Scene) settings. P Notes • You cannot set a scene during recording. • When 60 seconds have passed without any operation after the Scene Select window 34 GB
-
 1
1 -
2
-
3
-
4
-
5
-
6
-
7
-
8
-
9
-
10
-
11
-
12
-
13
-
14
-
15
-
16
-
17
-
18
-
19
-
20
-
21
-
22
-
23
-
24
-
25
-
26
-
27
-
28
-
 29
29 -
 30
30 -
 31
31 -
 32
32 -
 33
33 -
 34
34 -
 35
35 -
 36
36 -
 37
37 -
 38
38 -
 39
39 -
40
-
41
-
42
-
43
-
44
-
45
-
46
-
47
-
48
-
49
-
50
-
51
-
52
-
53
-
54
-
55
-
56
-
57
-
58
-
59
-
60
-
61
-
62
-
63
-
64
-
65
-
66
-
67
-
68
-
69
-
70
-
71
-
72
-
73
-
74
-
75
-
76
-
77
-
78
-
79
-
80
-
81
-
82
-
83
-
84
-
85
-
86
-
87
-
88
-
89
-
90
-
91
-
92
-
93
-
94
-
95
-
96
-
97
-
98
-
99
-
100
-
101
-
102
-
103
-
104
-
105
-
106
-
107
-
108
-
109
-
110
-
111
-
112
-
113
-
114
-
115
-
116
-
117
-
118
-
119
-
120
-
121
-
122
-
123
-
124
-
125
-
126
-
127
-
128
-
129
-
130
-
131
-
132
-
133
-
134
-
135
-
136
-
137
-
138
-
139
-
140
-
141
-
142
-
143
-
144
-
145
-
146
-
147
-
148
-
149
-
150
-
151
-
152
-
153
-
154
-
155
 |
 |