Sony ICD-SX712 Operating Instructions (Large File - 11.69 MB) - Page 65
To set your favorite sound level, CLEAR BASS, press
 |
UPC - 027242807723
View all Sony ICD-SX712 manuals
Add to My Manuals
Save this manual to your list of manuals |
Page 65 highlights
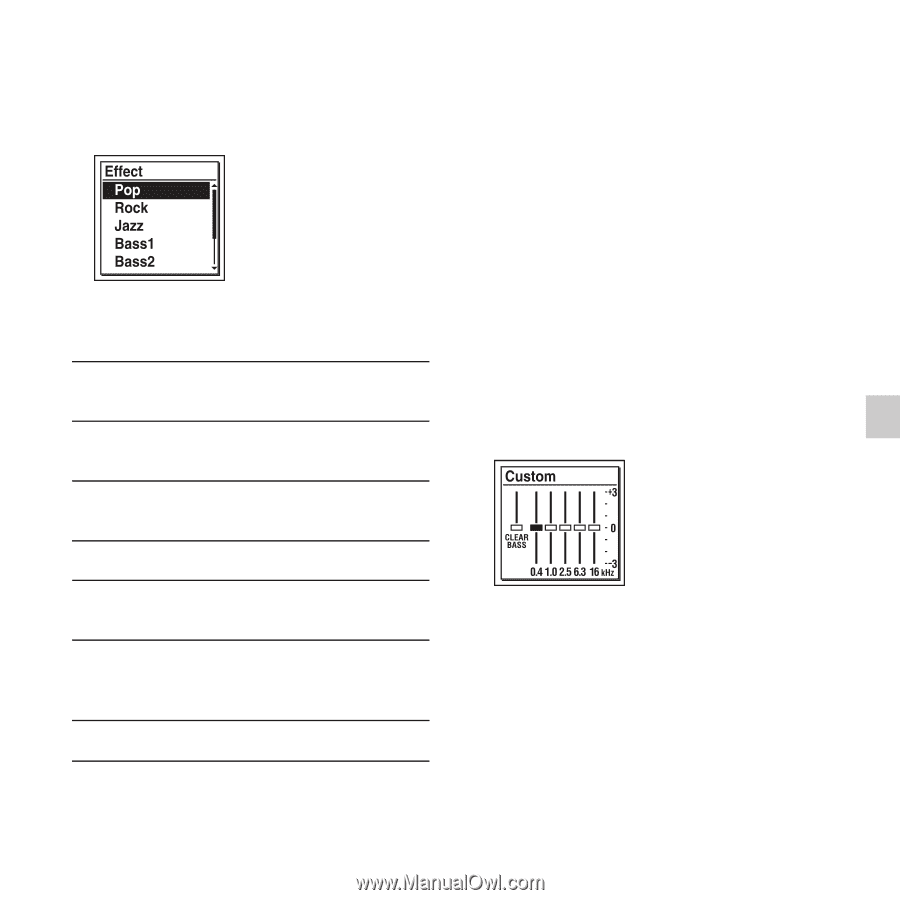
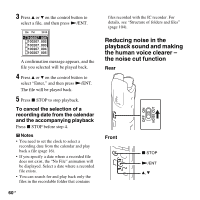
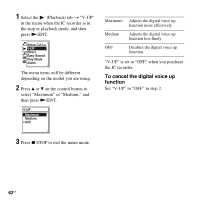
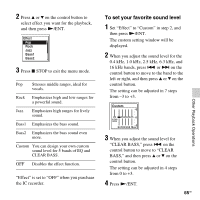
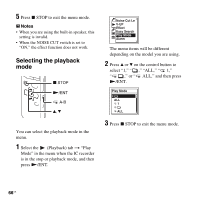
2 Press v or V on the control button to select effect you want for the playback, and then press N/ENT. 3 Press x STOP to exit the menu mode. Pop Stresses middle ranges, ideal for vocals. Rock Emphasizes high and low ranges for a powerful sound. Jazz Emphasizes high ranges for lively sound. Bass1 Emphasizes the bass sound. Bass2 Emphasizes the bass sound even more. Custom You can design your own custom sound level for 5 bands of EQ and CLEAR BASS. OFF Disables the effect function. "Effect" is set to "OFF" when you purchase the IC recorder. To set your favorite sound level 1 Set "Effect" to "Custom" in step 2, and then press N/ENT. The custom setting window will be displayed. 2 When you adjust the sound level for the 0.4 kHz, 1.0 kHz, 2.5 kHz, 6.3 kHz, and 16 kHz bands, press . or > on the control button to move to the band to the left or right, and then press v or V on the control button. The setting can be adjusted in 7 steps from -3 to +3. 3 When you adjust the sound level for "CLEAR BASS," press . on the control button to move to "CLEAR BASS," and then press v or V on the control button. The setting can be adjusted in 4 steps from 0 to +3. 4 Press N/ENT. 65GB Other Playback Operations
-
 1
1 -
2
-
3
-
4
-
5
-
6
-
7
-
8
-
9
-
10
-
11
-
12
-
13
-
14
-
15
-
16
-
17
-
18
-
19
-
20
-
21
-
22
-
23
-
24
-
25
-
26
-
27
-
28
-
29
-
30
-
31
-
32
-
33
-
34
-
35
-
36
-
37
-
38
-
39
-
40
-
41
-
42
-
43
-
44
-
45
-
46
-
47
-
48
-
49
-
50
-
51
-
52
-
53
-
54
-
55
-
56
-
57
-
58
-
59
-
 60
60 -
 61
61 -
 62
62 -
 63
63 -
 64
64 -
 65
65 -
 66
66 -
 67
67 -
 68
68 -
 69
69 -
 70
70 -
71
-
72
-
73
-
74
-
75
-
76
-
77
-
78
-
79
-
80
-
81
-
82
-
83
-
84
-
85
-
86
-
87
-
88
-
89
-
90
-
91
-
92
-
93
-
94
-
95
-
96
-
97
-
98
-
99
-
100
-
101
-
102
-
103
-
104
-
105
-
106
-
107
-
108
-
109
-
110
-
111
-
112
-
113
-
114
-
115
-
116
-
117
-
118
-
119
-
120
-
121
-
122
-
123
-
124
-
125
-
126
-
127
-
128
-
129
-
130
-
131
-
132
-
133
-
134
-
135
-
136
-
137
-
138
-
139
-
140
-
141
-
142
-
143
-
144
-
145
-
146
-
147
-
148
-
149
-
150
-
151
-
152
-
153
-
154
-
155
 |
 |