Sony STRDA3500ES Operating Instructions
Sony STRDA3500ES - Home Theater Receiver Manual
 |
UPC - 027242754355
View all Sony STRDA3500ES manuals
Add to My Manuals
Save this manual to your list of manuals |
Sony STRDA3500ES manual content summary:
- Sony STRDA3500ES | Operating Instructions - Page 1
4-144-907-11(1) Multi Channel AV Receiver Operating Instructions STR-DA3500ES ©2009 Sony Corporation - Sony STRDA3500ES | Operating Instructions - Page 2
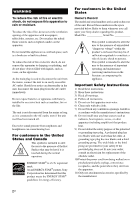
States Owner's call upon your Sony dealer regarding this servicing) instructions in the literature accompanying the appliance. Important Safety Instructions 1) Read these instructions. 2) Keep these instructions. 3) Heed all warnings. 4) Follow all instructions outlet. 10)Protect the power cord - Sony STRDA3500ES | Operating Instructions - Page 3
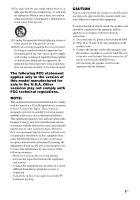
or modifications not expressly approved in this manual could void your authority to operate this equipment. To reduce the risk of electric shock, the speaker cord should be connected to the apparatus and the speakers in accordance with the following instructions. 1) Disconnect the AC power cord from - Sony STRDA3500ES | Operating Instructions - Page 4
About This Manual • The instructions in this manual are for model STR-DA3500ES. Check your model number by looking at the lower right corner of the front panel. • The instructions in this manual describe the controls on the supplied remote. You can also use the controls on the receiver if they have - Sony STRDA3500ES | Operating Instructions - Page 5
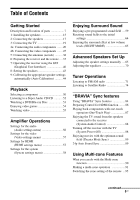
levels (NIGHT MODE 65 Advanced Speakers Set Up Adjusting the speaker settings manually ....65 Adjusting the equalizer 70 speakers connected to the receiver (System Audio Control 88 Turning off the receiver with the TV (System Power-Off 88 Enjoying movies with the optimum sound field (Theater - Sony STRDA3500ES | Operating Instructions - Page 6
several commands in sequence automatically (Macro Play 128 Setting remote control codes that are not stored in the remote 130 Clearing all the contents of the remote's memory 131 Additional Information Glossary 132 Precautions 135 Troubleshooting 136 Specifications 141 Index 144 6US - Sony STRDA3500ES | Operating Instructions - Page 7
lamp lights off) (initial setting). Press POWER to turn the receiver on. You cannot turn the receiver on using the remote. On/Standby Press ?/1 on the remote to - turn the receiver on (the ON/ STANDBY lamp lights up in green). - set the receiver to standby mode (the ON/STANDBY lamp lights up in red - Sony STRDA3500ES | Operating Instructions - Page 8
Remote sensor Receives signals from remote commander. E Display window The current status of the selected component or a list of selectable items appears here (page 106). F MULTI CHANNEL DECODING lamp Lights up when multi channel adjust the volume level of all speakers at the same time. J INPUT - Sony STRDA3500ES | Operating Instructions - Page 9
a projector while the sound can be output from a TV or/and speakers connected to this receiver (page 19, 26). B ANTENNA section FM ANTENNA Connects to the to the XM Mini Tuner and Home Dock (not supplied) (page 75). SIRIUS jack Connects to a SiriusConnect Home tuner (not supplied) (page 75 - Sony STRDA3500ES | Operating Instructions - Page 10
D Control jacks for Sony equipment and other external components IR REMOTE Connect to an IR IN/OUT jacks repeater (page 91). TRIGGER OUT jack Connects to an interlock on/off of the power supply of other 12V TRIGGER compliant components, or the amplifier/receiver of zone 2 or zone 3 (page 94). E - Sony STRDA3500ES | Operating Instructions - Page 11
commander You can use the supplied remote commander to operate the receiver and to control the Sony audio/video components that the remote is assigned to operate (page 124). Multi function remote commander (RM-AAL026) Name A AV ?/1 (on/ standby) B ?/1 (on/ standby) C ZONE D AMP E Input buttons - Sony STRDA3500ES | Operating Instructions - Page 12
picture mode. D.TUNING Press SHIFT (Y), then press D.TUNING to enter direct tuning mode (page 119, 121). -/-- Press SHIFT (Y), then press -/-- to select the channel Sony TV. L MENU HOME M m/M a) x a) X a) N a) b) ./> a) Press AMP (4), then press MENU to display the menu to operate the receiver - Sony STRDA3500ES | Operating Instructions - Page 13
level of all speakers at the same time on-screen guide of the receiver to products featuring "BRAVIA" Sync. Note This button will only function if your TV is compatible with Theater Mode. Refer to the operating instructions supplied with the TV for details. wk RM SET UP Press to set up the remote - Sony STRDA3500ES | Operating Instructions - Page 14
. You can control the main functions of the receiver with simple operations using this remote. SLEEP DISPLAY GUI MODE Name A ?/1 (on/ standby) B A.F.D. MOVIE MUSIC C GUI MODE D V/v/B/b E OPTIONS F MENU Function Press to turn a receiver on or off. Press to select a sound field (page 119). Press - Sony STRDA3500ES | Operating Instructions - Page 15
This receiver allows you to use a 7.1 channel system (7 speakers and one subwoofer). Enjoying a 5.1/7.1 channel system To fully enjoy theater-like multi channel surround sound requires five speakers (two front speakers, a center speaker, and two surround speakers) and a subwoofer (5.1 channel system - Sony STRDA3500ES | Operating Instructions - Page 16
Tips • The angle A should be the same. • When you connect a 6.1 channel speaker system, place the surround back speaker behind the seating position. • Since the subwoofer does not emit highly directional signals, you can place it wherever you want. 16US - Sony STRDA3500ES | Operating Instructions - Page 17
B A C A Monaural audio cord (not supplied) B Speaker cords (not supplied) AFront speaker A (Left) BFront speaker A (Right) CCenter speaker DSurround speaker (Left) ESurround speaker (Right) FSurround back speaker (Left)b) GSurround back speaker (Right)b) HSubwooferc) a) If you have an additional - Sony STRDA3500ES | Operating Instructions - Page 18
" (page 43). • Before connecting the AC power cord (mains lead), make sure that metallic wires of the speaker cords are not touching each other between the SPEAKERS terminals. Tip To connect certain speakers to another power amplifier, use the PRE OUT jacks. The same signal is output from both the - Sony STRDA3500ES | Operating Instructions - Page 19
MONITOR OUT or HDMI OUT jack to a TV. You can operate this receiver using a GUI (Graphical User Interface). It is not necessary to connect all (not supplied) C HDMI cable (not supplied) Sony recommends that you use an HDMI-authorized cable or Sony HDMI cable. D Component video cord (not supplied) - Sony STRDA3500ES | Operating Instructions - Page 20
is output from the speakers connected to the receiver if you connect the audio output jack of the TV and the TV IN jacks of the receiver. In this configuration, CD player, CD player With digital audio output With multi channel audio output With analog audio output only MD deck With digital - Sony STRDA3500ES | Operating Instructions - Page 21
Getting Started Connecting components with digital audio input/output jacks The following illustration shows how to connect a Super Audio CD player, CD player, an MD deck and DIGITAL MEDIA PORT adapter. DIGITAL MEDIA PORT adapter MD deck Super Audio CD player, CD player A B B C A Optical - Sony STRDA3500ES | Operating Instructions - Page 22
connected to only the COAXIAL SA-CD/ CD IN jack on this receiver. When you play a Super Audio CD, connect the player to the MULTI CHANNEL INPUT or SA-CD/CD IN jacks on this receiver. Refer to the operating instructions supplied with the Super Audio CD player. • You cannot make digital recordings - Sony STRDA3500ES | Operating Instructions - Page 23
channel output jacks, you can connect them to the MULTI CHANNEL INPUT jacks of this receiver to enjoy multi channel sound. Alternatively, the multi channel ZONE2" in the Speaker settings menu, the input to the SUR BACK jacks is invalid. • Audio signals input from the MULTI CHANNEL INPUT jacks are not - Sony STRDA3500ES | Operating Instructions - Page 24
Connecting components with analog audio jacks The following illustration shows how to connect a component with analog jacks, such as a tape deck, turntable, etc. Super Audio CD player, CD player A A MD deck, Tape deck A Turntable A Audio cord (not supplied) Note If your turntable has a ground ( - Sony STRDA3500ES | Operating Instructions - Page 25
Started 4b: Connecting the video components How to hook up your components This section describes how to hook up your components to this receiver. Before you begin, see "Component to be connected" below for the pages which describe how to connect each component. Before connecting cords, be - Sony STRDA3500ES | Operating Instructions - Page 26
HDMI can be output from the speakers and the PRE OUT jacks on this receiver. This signal supports Dolby Digital, DTS, and Linear PCM. • Linear PCM (sampling frequency less than 192 kHz) with digital audio signals of up to 8 channels can be received with this receiver using the HDMI IN jack. • Analog - Sony STRDA3500ES | Operating Instructions - Page 27
Getting Started Satellite tuner, set-top box Audio/video signals Blu-ray disc player, PS3™, hard disk recorder Audio/video signals A A DVD player Audio/video signals A A HDMI cable (not supplied) A Audio/video signals TV, projector, etc. continued 27US - Sony STRDA3500ES | Operating Instructions - Page 28
output from the HDMI OUT jack while the receiver menu is displayed. • When you want to listen to the sound from the TV speaker, set "Audio Out" to "TV+AMP enjoy multi channel Linear PCM. Refer to the operating instructions of the playback component. • Not every HDMI component supports all functions - Sony STRDA3500ES | Operating Instructions - Page 29
the audio and video cords according to the jacks of your components. Note To output multi channel digital audio from the DVD player, set the digital audio output setting on the DVD player. Refer to the operating instructions supplied with the DVD player. Audio signals DVD player Video signals - Sony STRDA3500ES | Operating Instructions - Page 30
video cords according to the jacks of your components. Note To output multi channel digital audio from the Blu-ray disc player, set the digital audio output setting on the Blu-ray disc player. Refer to the operating instructions supplied with the Blu-ray disc player. Audio signals Blu-ray disc - Sony STRDA3500ES | Operating Instructions - Page 31
Getting Started Connecting a satellite tuner, set-top box The following illustration shows how to connect a satellite tuner or set-top box. It is not necessary to connect all the cords. Connect the audio and video cords according to the jacks of your components. Audio signals Satellite tuner, set - Sony STRDA3500ES | Operating Instructions - Page 32
Connecting components with analog video and audio jack The following illustration shows how to connect a component which has analog jacks such as a DVD recorder, VCR, etc. It is not necessary to connect all the cords. Connect the audio and video cords according to the jacks of your components. - Sony STRDA3500ES | Operating Instructions - Page 33
see "In the video input/output conversion table classified by the menu settings" (page 35). In the video input/output conversion table of the receiver Output Signals Input Signals OUTPUT jack INPUT jack HDMI IN 1/2/3/4 A COMPONENT VIDEO IN B VIDEO IN C HDMI OUT f a a COMPONENT VIDEO MONITOR OUT - Sony STRDA3500ES | Operating Instructions - Page 34
OUT jacks have restrictions on resolution when the resolution of video signals protected by copyright technology is converted. Resolution of up to 480p can be Resolution" to "DIRECT" in the Video settings menu when receiving a signal that supports Closed Captions. Use the same kind of cords for the - Sony STRDA3500ES | Operating Instructions - Page 35
signals with copyright protection are output as 480p. Notes • Video signals are not output from the COMPONENT VIDEO MONITOR OUT or MONITOR VIDEO OUT jacks when the TV, etc., is connected to the HDMI OUT jack. • If you select a resolution that the connected TV does not support in the "Resolution - Sony STRDA3500ES | Operating Instructions - Page 36
wire antenna (aerial) (supplied) AM loop antenna (aerial) (supplied) Notes • To prevent noise pickup, keep the AM loop antenna (aerial) away from the receiver and other components. • Be sure to fully extend the FM wire antenna (aerial). • After connecting the FM wire antenna (aerial), keep it as - Sony STRDA3500ES | Operating Instructions - Page 37
the supplied AC power cord (mains lead) to the AC INLET terminal on the receiver, then connect the AC power cord (mains lead) to a wall outlet (mains). Notes • Before connecting the AC power cord (mains lead), make sure that metallic wires of the speaker cords are not touching each other between the - Sony STRDA3500ES | Operating Instructions - Page 38
reset them. You can switch the command mode (AV SYSTEM 1 or AV SYSTEM 2) of the receiver and the remote. If both the receiver and the other Sony component respond to the same remote command, switch the command mode of either the component or the receiver to another command mode so that the component - Sony STRDA3500ES | Operating Instructions - Page 39
2 ?/1 AMP To switch the command mode of the simple remote commander SLEEP DISPLAY DISPLAY GUI MODE ENT/MEM 1 While holding flashing. When you press 1, the command mode is set to AV SYSTEM 1. When you press 2, the command mode is set to AV SYSTEM 2. The AMP button lights up. 4 Press ENT/MEM - Sony STRDA3500ES | Operating Instructions - Page 40
if you are not going to use a GUI menu. 3 Press AMP to enable receiver operation. 4 Press GUI MODE repeatedly to select "GUI ON". The GUI menu appears items are available in each settings menu. Input Selects the input to the receiver. For details on each input, see "Selecting a component" (page 50 - Sony STRDA3500ES | Operating Instructions - Page 41
receiver. Auto Calibration You can use the Auto Calibration settings menu to adjust the speakers automatically. For details, see "9: Calibrating the appropriate speaker settings automatically (Auto Calibration)" (page 44). Speaker You can use the Speaker settings menu to adjust the speakers manually - Sony STRDA3500ES | Operating Instructions - Page 42
2 Press V/v repeatedly to select a menu you want. 6 Press V/v repeatedly to select the parameter you want. 3 Press or b to enter the menu. The menu item list appears on the TV screen. 7 Press to enter the parameter. 4 Press V/v repeatedly to select the menu item you want to adjust. 5 Press or b - Sony STRDA3500ES | Operating Instructions - Page 43
Notes • If you are not sure of the impedances of the speakers, refer to the operating instructions supplied with your speakers. (This information is often found on the back of the speaker.) • When you connect all speakers with a normal impedance of 8 ohms or higher, set "Impedance" to "8 :". When - Sony STRDA3500ES | Operating Instructions - Page 44
a sampling frequency of 176.4 kHz and higher are being received. The DCAC is designed to obtain proper sound balance in your room. However, you can adjust the speaker levels and balance manually according to your preference. For details, see "Making settings with the Test Tone menu" (page 68). 44US - Sony STRDA3500ES | Operating Instructions - Page 45
is used for the supplied optimizer microphone only. Do not connect other microphones. Doing so may damage the receiver and the microphone. • During the measurement, the sound that comes out of the speakers is very loud. The volume of the sound cannot be adjusted. Pay attention to the presence of - Sony STRDA3500ES | Operating Instructions - Page 46
. In this case, the distance value shown on the display may differ from the actual distance value. However, there will be no problems even if you continue to use the receiver with that value. 1 Press GUI MODE repeatedly to select "GUI ON". The GUI menu appears on the TV screen. Press MENU - Sony STRDA3500ES | Operating Instructions - Page 47
the other way around. However, depending on the speakers, "Out Phase" appears on the TV screen even though the speakers are connected properly. This is because of the speakers' specifications. In this case, you can continue to use the receiver. Tip The displayed unit of distance is feet. You - Sony STRDA3500ES | Operating Instructions - Page 48
. - The multi channel input is selected. - "2ch Analog Direct" is being used. - Dolby TrueHD signals with a sampling frequency of 176.4 kHz and higher are being received. - PCM signals with a sampling frequency of 176.4 kHz and higher are being received. Tip The size of a speaker (LARGE/SMALL) is - Sony STRDA3500ES | Operating Instructions - Page 49
• The volume may be too loud when you use the receiver as a pre-amplifier. Code: 42 [W-xxx: 42]* Warning There is no warning information. * xxx represent a speaker channel. F Front FL Front Left FR Front Right CNT instructions from step 7 of "Performing Auto Calibration". continued 49US - Sony STRDA3500ES | Operating Instructions - Page 50
). Tip Depending on the position of the subwoofer, the measurement results for polarity may vary. However, there will be no problems even if you continue to use the receiver with that value. To set Auto Calibration items more precisely (Enhanced Setup) On the Auto Calibration menu, select "Enhanced - Sony STRDA3500ES | Operating Instructions - Page 51
and release it immediately. To activate the muting function Press MUTING on the remote. To cancel, press MUTING on the remote again or turn MASTER VOLUME clockwise to raise the volume. To avoid damaging your speakers Before you turn off the receiver, be sure to turn down the volume level. 51US - Sony STRDA3500ES | Operating Instructions - Page 52
5 3 • The operation is described for a Sony Super Audio CD player. • Refer to the operating instructions supplied with the Super Audio CD player or CD tray. 2 Turn on the receiver. 3 Press INPUT SELECTOR U/u to select "SA- CD/CD". You can also use INPUT SELECTOR on this receiver to select "SA-CD/CD - Sony STRDA3500ES | Operating Instructions - Page 53
. • Check the following if you cannot listen to the multi channel sound. - Be sure the sound source corresponds to the multi channel format (the MULTI CHANNEL DECODING lamp on the front panel lights up during playback). - Be sure this receiver is connected to the DVD player or Blu-ray disc player - Sony STRDA3500ES | Operating Instructions - Page 54
Enjoying video games SLEEP DISPLAY GUI MODE 2 6 3 6 3 VIDEO 2 IN Refer to the operating instructions supplied with the TV and video game. 1 Turn on the TV and video game. 2 Turn on the receiver. 3 Press INPUT SELECTOR U/u to select "VIDEO 2"*. You can also use INPUT SELECTOR on this - Sony STRDA3500ES | Operating Instructions - Page 55
SLEEP DISPLAY GUI MODE 2 6 3 6 3 Refer to the operating instructions supplied with the TV and VCR. 1 Turn on the VCR. 2 Turn on the receiver. 3 Press INPUT SELECTOR U/u to select "VIDEO 1"*. You can also use INPUT SELECTOR on this receiver to select "VIDEO 1"*. * When you connect VCR to the - Sony STRDA3500ES | Operating Instructions - Page 56
does not work in the following cases. - The multi channel input is selected. - "2ch Analog Direct" is front left speaker, and sound of the sub language will be output through the front right speaker simultaneously. to "PCM". When signals in other format are received, set this item to "AUTO". • AUTO - Sony STRDA3500ES | Operating Instructions - Page 57
sound quality, such as the number of channels, the sampling frequency, etc. When the TV has stereo speakers, the sound output from the receiver is also stereo as that of the TV, even if you play multi channel source. • When you connect the receiver to a video component (projector, etc.), sound may - Sony STRDA3500ES | Operating Instructions - Page 58
only output to speakers connected to the receiver. The multi channel sound can be played back as it is. Note Audio signals are not output from the TV's speakers when "Audio Mode) Lets you select the control mode for maintenance and service. • OFF • RS232C x Language (Language) Lets you select the - Sony STRDA3500ES | Operating Instructions - Page 59
Enjoying Surround Sound Enjoying Surround Sound Enjoying a preprogrammed sound field 6 Press V/v repeatedly to select the sound field you want. GUI MODE , V/v/B/b MENU 1 Start playing a sound source you want to listen to (CD, DVD, etc.). 2 Press GUI MODE repeatedly to select "GUI ON". The GUI - Sony STRDA3500ES | Operating Instructions - Page 60
providing a great theater experience. This type provides the accuracy of the original recording. 4 Press RETURN/EXIT O. Types of 2CH mode x 2ch Stereo The receiver outputs the sound from the front left/right speakers only. There is no sound from the subwoofer. Standard 2 channel stereo sources - Sony STRDA3500ES | Operating Instructions - Page 61
Blu-ray disc players and other next generation HD players This receiver supports the following audio formats. Audio format Connection of the playback component and Maximum number the receiver of channels COAXIAL/OPTICAL HDMI Dolby Digital 5.1ch a a Dolby Digital EX 6.1ch a a Dolby - Sony STRDA3500ES | Operating Instructions - Page 62
* Depending on the speaker pattern setting, the appropriate Enhanced Surround mode appears. Notes • This function does not work in the following cases. - The multi channel input is selected. - DTS-HD signals with a sampling frequency of 88.2 kHz and higher are being received. - Dolby TrueHD signals - Sony STRDA3500ES | Operating Instructions - Page 63
receiver's preprogrammed sound fields. They bring the exciting and powerful sound of movie theaters and concert halls into your home channel stereo sources completely bypass the sound field processing and multi channel surround formats are downmixed to 2 channels front or surround speakers are set to - Sony STRDA3500ES | Operating Instructions - Page 64
the Surround settings menu. Resetting sound fields to the initial settings Be sure to use the buttons on the receiver for this operation. POWER MUSIC 1 Press POWER to turn off the receiver. 2 While holding down MUSIC, press POWER. "S.F. CLEAR" appears on the display window and all sound fields are - Sony STRDA3500ES | Operating Instructions - Page 65
to retain a theater like environment at low volume levels. This function can be used with other sound fields. When watching a movie late at night, you will be able to hear the dialog clearly even at a low volume level. Advanced Speakers Set Up Adjusting the speaker settings manually You can adjust - Sony STRDA3500ES | Operating Instructions - Page 66
setting. Manual Setup menu parameters x Level (Level of speaker) You can adjust each speaker's level speakers that will effectively reproduce bass frequencies, select "LARGE". Normally, select "LARGE". • SMALL If the sound is distorted, or you feel a lack of surround effects when using multi channel - Sony STRDA3500ES | Operating Instructions - Page 67
the internal sound processor will cut the bass signal from that channel. When the bass is cut from a channel, the bass redirection circuitry sends the corresponding bass frequencies to the subwoofer or other "LARGE" speakers. However, since bass sound has a certain amount of directionality, it is - Sony STRDA3500ES | Operating Instructions - Page 68
at the same time, press MASTER VOL +/-. • The adjusted value is shown on the display during adjustment. When a test tone is not output from the speakers • The speaker cords may not be connected securely. Check to see if they are connected securely and cannot be disconnected by pulling on them - Sony STRDA3500ES | Operating Instructions - Page 69
/L, L/SR Lets you output the test tone sequentially from adjacent speakers. Some items may not be displayed, depending on the setting of the speaker pattern. x Phase Audio (Phase CHANNEL INPUT is invalid. Note Set "Sur Back Assign" to "OFF", then connect the surround back speakers to this receiver - Sony STRDA3500ES | Operating Instructions - Page 70
of all speakers. Bass Treble Level (dB) Frequency (Hz) Note This function does not work in the following cases. - The multi channel input is selected. - "2ch Analog Direct" is being used. - Dolby TrueHD signals with a sampling frequency of 176.4 kHz and higher are being received - Sony STRDA3500ES | Operating Instructions - Page 71
. 5 Press B/b repeatedly to select "Bass" or "Treble", then press V/v to adjust the parameter. Tip You can adjust the front speaker bass and treble level with TONE MODE and TONE +/- on the receiver. 6 Press to enter the setting. Tuner Operations Listening to FM/AM radio You can listen to FM and AM - Sony STRDA3500ES | Operating Instructions - Page 72
by using the numeric buttons. 4 Press V/v. Press V to scan from low to high, press v to scan from high to low. The receiver stops scanning whenever a station is received. In case of poor FM stereo reception 1 Press OPTIONS. 2 Press V/v to select "FM Mode", then press or b. 3 Press V/v to select - Sony STRDA3500ES | Operating Instructions - Page 73
Tuner Operations 4 Press SHIFT, then press the numeric buttons to enter the frequency, then press . Example 1: FM 102.50 MHz Select 1 b 0 b 2 b 5 Example 2: AM 1,350 kHz Select 1 b 3 b 5 b 0 Presetting radio stations You can preset up to 30 FM and 30 AM stations. Then you can easily tune in the - Sony STRDA3500ES | Operating Instructions - Page 74
(sold separately) to your satellite-ready receiver. Satellite Radio is available to residents service. Easy to follow installation and setup instructions are provided with the satellite tuners. Whichever service are also available to restrict channels featuring content that may be inappropriate - Sony STRDA3500ES | Operating Instructions - Page 75
property of their respective owners. All rights reserved. SIRIUS and XM subscriptions sold separately. Taxes and a one-time activation fee may apply. XM tuners and home docks or SIRIUS tuners (each sold separately) are required to receive the SIRIUS or XM satellite radio service. All programming and - Sony STRDA3500ES | Operating Instructions - Page 76
or SIRIUS antenna MENU GUI MODE , V/v/B/b OPTIONS 4 While checking the parameter on the TV screen, aim your antenna to where the best reception will be received. XM 1 Press GUI MODE repeatedly to select "GUI ON". The GUI menu appears on the TV screen. Press MENU if the GUI menu does not - Sony STRDA3500ES | Operating Instructions - Page 77
. XM Radio ID SIRIUS ID You can also check the XM Radio ID and SIRIUS ID using the display on the receiver. Selecting a channel by Category Mode You can select a channel from one category or all the categories. 3 Press OPTIONS, then press V/v repeatedly to select "Radio ID" or "Sirius ID", then - Sony STRDA3500ES | Operating Instructions - Page 78
repeatedly to select "Category Mode". 4 Press V/v to select the channel, then press . The selected channel is being received. The channel information is displayed on the TV screen. Note When you select a channel in the "Category Mode", the channel you selected may not be the one in the category you - Sony STRDA3500ES | Operating Instructions - Page 79
you want to use as the preset channel, then press . Preset channels from 1 to 30 are available, and a default channel is preset for all the preset channels when you purchase the receiver. The selected channel is registered as the preset channel you selected in step 3. 7 Repeat steps 3 to 6 to - Sony STRDA3500ES | Operating Instructions - Page 80
Restricting access to specific channels (Parental Lock) (SIRIUS only) You can restrict access to certain channels using your function for the first time (see "To change the lock code" (page 81)). 3 Select a channel you want to lock using Category Tuning (page 77) or Direct Tuning (page 78). 4 Press - Sony STRDA3500ES | Operating Instructions - Page 81
press the numeric buttons to enter your 4-digit lock code. "The channel has been unlocked." appears and the channel is unlocked. Notes • When you select a channel using Category Tuning, locked channels are skipped. • When the receiver is reset to the factory settings, the lock code returns to the - Sony STRDA3500ES | Operating Instructions - Page 82
-Tuner and Home Dock securely and check the antenna cable for damage. Replace the XM antenna if the cable is damaged. CH Unauthorized You have selected an XM channel that [UNAUTH] is blocked or cannot be received with your XM subscription package. Consult the latest channel guide at www.xmradio - Sony STRDA3500ES | Operating Instructions - Page 83
the SiriusConnect Home tuner is connected to a wall socket. Invalid Channel You have entered an invalid channel [INVALID] number. The channel to be tuned-in is void due to the change by the broadcast service, or the receiving condition is not good. Locked Channel The selected channel is locked - Sony STRDA3500ES | Operating Instructions - Page 84
with a Sony TV, Blu-ray Disc/DVD player, AV amplifier, etc., that is equipped with the Control for HDMI function. By connecting Sony components that connect the receiver to a component which does not correspond with Sony Control for HDMI function. • When you connect the receiver and components - Sony STRDA3500ES | Operating Instructions - Page 85
multi channel surround sound broadcasting You can listen to TV multi channel surround sound broadcasting from the speakers connected to the receiver. /video signals A HDMI cable (not supplied) Sony recommends that you use an HDMI-authorized cable or Sony HDMI cable. B Optical digital cord (not - Sony STRDA3500ES | Operating Instructions - Page 86
flashes in the display window. This receiver will automatically change the input to HDMI input. When the setting is completed, "COMPLETE" appears on the display window. For details, refer to the operating instructions of the TV. If your TV does not support the Control for HDMI-Easy Setting function - Sony STRDA3500ES | Operating Instructions - Page 87
is activated. Playing back components with one-touch operation (One-Touch Play) With a simple operation (one-touch), components connected to the receiver via HDMI connections will start automatically. You can enjoy the sound and image from the connected components. Play back a connected component - Sony STRDA3500ES | Operating Instructions - Page 88
use the receiver's remote to turn off the TV. AV ?/1 TV Press TV, then press AV ?/1. The TV, receiver and the components connected via HDMI are turned off. Notes • Set the TV Standby Synchro to "ON" before using the System Power Off function. For details, refer to the operating instructions of the - Sony STRDA3500ES | Operating Instructions - Page 89
with the optimum sound field (Theater Mode Sync) Press the THEATER button on the remote of the receiver, TV, or the Blu-ray Disc Player, while pointing the remote toward the TV. The sound field switches to HD-D.C.S. To return to the previous sound field, press the THEATER button again. Note The - Sony STRDA3500ES | Operating Instructions - Page 90
can operate the receiver without pointing the remote toward the remote sensor of the receiver if you connect an IR repeater (not supplied) to the IR REMOTE jack. Use an IR repeater when you install the receiver in a place where signals from the remote cannot reach. STR-DA3500ES IR repeater (not - Sony STRDA3500ES | Operating Instructions - Page 91
and another amplifier. Main zone Zone 2 D TV D A IR REMOTE IN B E STR-DA3500ES C ZONE 2 VIDEO OUT* ZONE 2 AUDIO OUT Multi function remote A Audio component B Video component C IR repeater (not supplied) D Speakers E Sony Amplifier/Receiver * You can also connect to the COMPONENT VIDEO - Sony STRDA3500ES | Operating Instructions - Page 92
2: Zone 3 connections Main zone IR REMOTE IN STR-DA3500ES ZONE 3 AUDIO OUT A IR repeater (not supplied) B Speakers C Sony Amplifier/Receiver Zone 3 B B C A Multi function remote 92US - Sony STRDA3500ES | Operating Instructions - Page 93
in zone 2 When the speakers in zone 2 are connected to the SPEAKERS SURROUND BACK terminals of the receiver (page 91), make the setting so that the sound selected in zone 2 is output from the speakers connected to the SPEAKERS SURROUND BACK terminals. RETURN/ EXIT O GUI MODE , V/v/B/b MENU - Sony STRDA3500ES | Operating Instructions - Page 94
SIRIUS/DMPORT in zone 3. Tips • Even when this receiver is in standby mode (press ?/1 on the remote to turned off this receiver), the receiver in zone 2 or zone 3 remains turned on. To turn off all receivers, press ?/1 and AV ?/1 on the multi function remote at the same time (SYSTEM STANDBY). • Only - Sony STRDA3500ES | Operating Instructions - Page 95
in zone 3, switch the zone setting of the remote. RM SET UP SHIFT ?/1 AMP ZONE 2, 3 ENT/ MEM Operating the receiver from another zone (ZONE 2/ZONE 3 operations) For an IR repeater and operating the receiver in zone 2 and zone 3. When an IR repeater is not connected, use this receiver in the - Sony STRDA3500ES | Operating Instructions - Page 96
adjust the volume using the receiver of zone 3. Tips • Even when this receiver is in standby mode (press ?/1 on the remote to turned off this receiver), the receiver in zone 2 and zone 3 remains turned on. To turn off all receivers, press ?/1 and AV ?/1 on the multi function remote at the same time - Sony STRDA3500ES | Operating Instructions - Page 97
"Connecting components with digital audio input/output jacks" (page 21). Sony offers the following DIGITAL MEDIA PORT adapters: • TDM-BT1/BT10 Bluetooth to turn the receiver off using the remote. • Do not connect or disconnect the DIGITAL MEDIA PORT adapter to/from the receiver while the system is - Sony STRDA3500ES | Operating Instructions - Page 98
will be displayed on the GUI screen of the receiver. You can select a track you want and not displayed, refer to the operating instructions supplied with component for details on M-crew Server is connected. b)Displayed only when a DLNA server other than M-crew Server is connected. c)Displayed - Sony STRDA3500ES | Operating Instructions - Page 99
97). For details on operating the iPod, refer to the operating instruction supplied with the iPod. Playing back the track selected During playback adapter using the following play mode buttons on the remote of the receiver. Press DMPORT on the remote to enable DMPORT operation. To Do the following - Sony STRDA3500ES | Operating Instructions - Page 100
x Shuffle (TDM-iP50 only) Plays all the tracks in random order. • Off Deactivates the shuffle play mode. • Albums Plays all the tracks on an album in random order. • Songs Plays all the tracks in "Songs" in random order. x Audiobook Speed (TDM-iP50 only) Selects the display speed of the Audiobook. • - Sony STRDA3500ES | Operating Instructions - Page 101
components. , V/v/B/b OPTIONS Switching between digital and analog audio (INPUT MODE) When you connect components to both digital and analog audio input jacks on the receiver, you can fix the audio input mode to either of them, or switch from one to the other, depending on the type of material you - Sony STRDA3500ES | Operating Instructions - Page 102
input mode. • When "2ch Analog Direct" is being used, or the multi channel input is selected, audio input mode is set to "ANALOG". You cannot select other of the DVD player to the COMPONENT VIDEO COMPO 1 IN jack of this receiver when you want to input the video signals from the DVD player. Assign - Sony STRDA3500ES | Operating Instructions - Page 103
2 Press V/v repeatedly to select "Input", then press or b. 3 Press V/v to select the input name you want to assign. 4 Press OPTIONS, then select "Input Assign" and then press . 5 Select the audio and/or video signals you want to assign to the input which you selected in step 3 using V/v/B/b, then - Sony STRDA3500ES | Operating Instructions - Page 104
cannot assign optical signals from an input source to the optical input jacks on the receiver, and you cannot assign coaxial signals from the input source to the coaxial input jacks on the receiver. • When you assign the digital audio input, the INPUT MODE setting may change automatically. 104US - Sony STRDA3500ES | Operating Instructions - Page 105
the sound field, etc., by changing the information on the display window. DISPLAY GUI MODE XM Radio and SIRIUS Satellite Radio Channel name t Channel number t Category name t Artist name/Feature t Song/Program title t Composer name (SIRIUS only) t Signal strength t Sound field type t Volume level - Sony STRDA3500ES | Operating Instructions - Page 106
channels. Lights up when the disc being played back contains an LFE (Low Frequency Effect) channel and the LFE channel ES/ DTS 96/24 "DTS" lights up when the receiver is decoding DTS signals. "DTS-ES" lights up when the receiver is decoding DTS-ES signals. "DTS 96/24" lights up when the receiver - Sony STRDA3500ES | Operating Instructions - Page 107
etc., is activated. Lights up when XM Mini Tuner and Home Dock are connected and "XM RADIO" is selected. "; PL" lights up when the receiver applies Dolby Pro Logic processing to 2 channel signals in order to output the center and surround channel signals. "; PL II" lights up when the Dolby Pro Logic - Sony STRDA3500ES | Operating Instructions - Page 108
C SL SR S SB L SB R SB Function The letters (L, C, R, etc.) indicate the channels being played back. The boxes around the letters vary to show how the receiver downmixes the source sound (based on the speaker settings). Front Left Front Right Center (monaural) Surround Left Surround Right Surround - Sony STRDA3500ES | Operating Instructions - Page 109
You can record onto a MiniDisc or audio tape using the receiver. Refer to the operating instructions supplied with your MD deck or tape deck. 1 Press the MD/TAPE OUT jacks. • The audio input signals from the MULTI CHANNEL INPUT jacks are not output. To record digital sound Connect a component for - Sony STRDA3500ES | Operating Instructions - Page 110
MULTI CHANNEL INPUT SPEAKERS FRONT A terminals, and connect the jacks on the Hi (or Lo) side of the front speakers to the SPEAKERS SURROUND BACK terminals. Make sure that the metal fittings of Hi/Lo attached to the speakers have been removed from the speakers. Otherwise, it may cause the receiver - Sony STRDA3500ES | Operating Instructions - Page 111
terminals. • If you set "Speaker Pattern" to a setting with surround back speakers, you cannot set "Sur Back Assign" to "BI-AMP". Operating without connecting to the TV You can operate this receiver using the display window if you do not use a GUI when a TV is not connected. Press GUI MODE to - Sony STRDA3500ES | Operating Instructions - Page 112
4 Press or b to enter the menu. 5 Press V/v repeatedly to select the parameter you want to adjust. 6 Press or b to enter the parameter. 7 Press V/v repeatedly to select the setting you want. 8 Press to enter the setting. To return to the previous display Press B. To exit the menu Press MENU. Note - Sony STRDA3500ES | Operating Instructions - Page 113
POS 2, POS 1 Level Settings [] Naming Inputs [NAME IN] Test tone [TEST TONE] For details, see "Naming inputs" (page 101). OFF, FIX (0.5 dB step) Surround back left speaker levelc) SBL -20.0 dB to SBL +10.0 dB [SBL LEVEL] (0.5 dB step) Surround back right speaker levelc) SBR -20.0 dB to - Sony STRDA3500ES | Operating Instructions - Page 114
distance SBL 3'3" to SBL 32'9" (SBL 1.00 m to SBL 9'10" [SBL DIST.] SBL 10.00 m) (1 inch (0.01 m) step) (3.00 m) Surround back right speaker distance [SBR DIST.] SBR 3'3" to SBR 32'9" (SBR 1.00 m SBR 9'10" to SBR 10.00 m) (1 inch (0.01 m) step) (3.00 m) Subwoofer distance [SW DIST.] SW 3'3" to - Sony STRDA3500ES | Operating Instructions - Page 115
speakers treble level [FRT TREBLE] Center speaker bass level [CNT BASS] Center speaker treble level [CNT TREBLE] Surround speakers bass level [SUR BASS] Surround speakers treble level [SUR TREBLE] Tuner Settings FM station receiving DYNAMIC, THEATER, STUDIO PLIIx THEATER FRT specific channels - Sony STRDA3500ES | Operating Instructions - Page 116
[INSTALLER] a) xxx represent a speaker channel (FL, FR, CNT, SL, SR, SB, SBL, SBR, SW). b) You cannot select this setting if your speaker is set to "LARGE". c) This parameter is only available if the XM Mini-Tuner and Home Dock is connected to the XM jack on the receiver d) This parameter is only - Sony STRDA3500ES | Operating Instructions - Page 117
completes. To cancel Auto Calibration The measurement will be canceled when you do the following: - Press ?/1, input buttons or MUTING. - Press SPEAKERS (OFF/A/B/A+B) on the receiver. - Change the volume level. - Connect the headphones. - Press GUI MODE. Tips • Operations other than turning the - Sony STRDA3500ES | Operating Instructions - Page 118
, "OUT" appears on the display window even though the speakers are connected properly. This is because of the speakers' specifications. In this case, you can continue to use the receiver. No speakers are connected. * xxx represent a speaker channel. FL Front Left FR Front Right CNT Center SL - Sony STRDA3500ES | Operating Instructions - Page 119
"Tuner Operations" (page 71). Tuning radio stations 1 Press TUNER repeatedly to select the FM or AM band. You can also use INPUT SELECTOR on the receiver. 2 Press TUNING + or TUNING -. Press TUNING + to scan from low to high frequencies, press TUNING - to scan from high to low frequencies. The - Sony STRDA3500ES | Operating Instructions - Page 120
to enter the selection. You can also press TUNING MODE on the receiver repeatedly to select "PRESET", then turn TUNING +/- to select the preset stations you want. Listening to satellite tuner For details on XM/SIRIUS Radio service, see "Listening to Satellite Radio" (page 74) in "Tuner Operations". - Sony STRDA3500ES | Operating Instructions - Page 121
select "XM RADIO" or "SIRIUS". You can also use INPUT SELECTOR on the receiver. 2 Press TUNING + or TUNING - to select channel 0. You can also press TUNING MODE on the receiver to select "AUTO", then turn TUNING +/- to select channel 0. 3 Check the XM ID or SIRIUS ID on the display window and write - Sony STRDA3500ES | Operating Instructions - Page 122
+/- to select the preset channel you want. Using the Remote Operating each component using the multi function remote You can control Sony or non-Sony components you are using with the multi function remote supplied with the receiver. The remote is initially set to control Sony components. When you - Sony STRDA3500ES | Operating Instructions - Page 123
CATV A/B deck MD deck MEDIA combo player terminal PORT Button device AV ?/1 zz z z zz z zz zz Numeric buttons zz z z z z zz z zz z TOOLS/OPTIONS z z z zz zz V/v/B/b, , z z z MENU, HOME ./> zz z z zz z zz z zz z z zd) z z z B•/•b z z z zz Remote 123US - Sony STRDA3500ES | Operating Instructions - Page 124
. You can even program the remote to control nonSony components and also Sony components that the remote is normally unable to control. The procedure below uses an example in which a VCR made by a company other than Sony is connected to the VIDEO 1 IN jacks on the receiver. AV ?/1 RM SET UP SHIFT - Sony STRDA3500ES | Operating Instructions - Page 125
, 749 751, 752 747, 756 754 * If an AIWA VCR does not work even though you enter the code for AIWA, enter the code for Sony instead. Using the Remote continued 125US - Sony STRDA3500ES | Operating Instructions - Page 126
, 423 419 417 406, 408, 425 407 409, 410 414 416, 422 404, 421 418, 420 To control a DVD recorder Maker SONY Code(s) 401, 402, 403 To control a TV Maker SONY AIWA AKAI AOC CENTURION CORONADO CURTIS-MATHES DAYTRON DAEWOO FISHER FUNAI FUJITSU GOLDSTAR/LG GRUNDIG HITACHI ITT/NOKIA J.C.PENNY JVC KMC - Sony STRDA3500ES | Operating Instructions - Page 127
831 826, 827 To control a Blu-ray disc player Maker SONY Code(s) 310, 311, 312 To control a PSX Maker SONY Code(s) 313, 314, 315 To control a DVD/VIDEO COMBO (recorder) Maker SONY Code(s) 411 To control a HDD/DVD COMBO (recorder) Maker SONY Code(s) 401, 402, 403 127US Using the Remote - Sony STRDA3500ES | Operating Instructions - Page 128
several commands in sequence automatically (Macro Play) The Macro Play function lets you link several commands in a sequential order as a single command. The remote provides 2 macro lists (MACRO 1 and MACRO 2). You can specify up to 20 commands for each macro list. Note When setting up Macro Play - Sony STRDA3500ES | Operating Instructions - Page 129
than 1 second to clear the stored macro. The RM SET UP button flashes. 2 Press RM SET UP. Settings stored as macro are cleared. Using the Remote 129US - Sony STRDA3500ES | Operating Instructions - Page 130
is not one of the presets stored in the remote, it is possible for the remote to learn the code using the learning function. Note When setting up the receiver to learn the remote command modes, replace the batteries with new ones. RM SET UP THEATER ?/1 SHIFT TV Input buttons Buttons used to - Sony STRDA3500ES | Operating Instructions - Page 131
function. To erase the learned code 1 While holding down RM SET UP, press THEATER. 2 Press the input button (VIDEO 1 in the example) for which you want all the contents of the remote's memory AV ?/1 ?/1 MASTER VOL - 1 Press and hold MASTER VOL - first, then press ?/1, then press AV ?/1. The RM SET - Sony STRDA3500ES | Operating Instructions - Page 132
quality pictures, such as DVD video or HDTV pictures, frequency at which two speaker's frequencies intersect. x pixel will be 36, etc., bits when the receiver corresponds to Deep Color (Deep Colour). Since the technology converts 2 channels stereo recorded audio into 5.1 channels for playback. There - Sony STRDA3500ES | Operating Instructions - Page 133
audio for 7 channels playback. There are two modes to select according to the playback source or your preference, CINEMA for movies, and MUSIC for stereo sources such as music. x HD Digital Cinema Sound HD Digital Cinema Sound (HD-D.C.S.) is Sony's new innovative home theater technology using the - Sony STRDA3500ES | Operating Instructions - Page 134
picture and sound. The HDMI specification supports HDCP (High-bandwidth Digital Contents Protection), a copy protection multi channel surround presentations, and enables 7.1-channel support for for the xvYCC standard proposed by Sony, and is a trademark of Sony. xvYCC is an international standard for - Sony STRDA3500ES | Operating Instructions - Page 135
at a qualified service shop. On heat buildup Although the receiver heats up during operation, this is not a malfunction. If you continuously use this receiver at a large volume any questions or problems concerning your receiver, please consult your nearest Sony dealer. Additional Information 135US - Sony STRDA3500ES | Operating Instructions - Page 136
If you experience any of the following difficulties while using the receiver, use this troubleshooting guide to help you remedy the problem. Should any problem persist, consult your nearest Sony dealer. Audio There is no sound, no matter which component is selected, or only a very low - Sony STRDA3500ES | Operating Instructions - Page 137
connected correctly and securely. • Make sure you have turned on your speaker. • When all speakers are set to "LARGE" and "Neo:6 Cinema" or "Neo:6 selected properly on this receiver. • Check whether the input source of the software being played back corresponds to the multi channel format. • Check - Sony STRDA3500ES | Operating Instructions - Page 138
picture or an unclear picture appears on the TV screen. • Select the appropriate input on the receiver the HDMI jack is not output from the receiver or the TV speaker. • Check the HDMI connection (page up the component. Refer to the operating instructions supplied with each component. • Be sure to - Sony STRDA3500ES | Operating Instructions - Page 139
for HDMI function" (page 86). No sound is output from the receiver and TV speaker while using the System Audio Control function. • Make sure the TV instructions supplied with each component and TV. - Change the input of the receiver to the HDMI input connected to the component. The TV's remote - Sony STRDA3500ES | Operating Instructions - Page 140
channels at all. • The receiving condition is not good. Move the antenna to the place where the condition is good. • Check that you subscribed to the desired satellite radio service (see page 74). Remote control The remote does not function. • Point the remote at the remote sensor on the receiver - Sony STRDA3500ES | Operating Instructions - Page 141
Reference sections for clearing the receiver's memory To clear See All memorized settings Customized sound fields page 37 page 64 Specifications AUDIO POWER SPECIFICATIONS POWER OUTPUT AND TOTAL HARMONIC DISTORTION: With 8 ohms loads, both channels driven, from 20 Hz - 20,000 Hz; rated 100 - Sony STRDA3500ES | Operating Instructions - Page 142
in any AM station, turn off the receiver. While holding down TUNING MODE, press POWER on the receiver. All preset stations will be erased when you are set to "OFF", and the power for zone 2/ zone 3 is turned off.) Dimensions (width/height/depth) (Approx.) 17 × 6 1/4 × 15 3/8 inches (430 x - Sony STRDA3500ES | Operating Instructions - Page 143
(this manual) Quick Setup Guide (1) GUI Menu List (1) Optimizer microphone (ECM-AC2) (1) FM wire antenna (aerial) (1) AM loop antenna (aerial) (1) AC power cord (mains lead) (1) Multi function remote commander (1) Simple remote commander (1) R6 (size-AA) batteries (4) Design and specifications are - Sony STRDA3500ES | Operating Instructions - Page 144
58 2ch Analog Direct 60, 119 2ch Stereo Mode 60 4 : 43 5.1 channel 15 7.1 channel 15 8 : 43 A A.F.D. (mode) 62 A/V Sync 56, 116 AC Changing the display 105 Clear memory 37 remote 131 Command mode 38 Connections antennas (aerials) 36 audio components 20 speakers 17 video components 25 Control for HDMI - Sony STRDA3500ES | Operating Instructions - Page 145
Effect) 106 List Mode 100 Lock Code 81, 115 M Manual Setup 65, 66 MASTER VOLUME 8, 52, 53, 54, error 140 SIRIUS 83 XM 82 Movie 63 MULTI CHANNEL DECODING lamp 53 Music 63 Muting 51 N Name Position (Auto Calibration) 50, 113 Preset channels 79, 122 Preset Mode 79 Preset stations 73, 120 PROTECTOR - Sony STRDA3500ES | Operating Instructions - Page 146
(Settings) 43, 69, 114 Speaker Impedance 43, 114 Speaker Pattern 67, 114 SPEAKERS (OFF/A/B/A+B) 8, 44 Super Audio CD player 21, 23, 24, 52 Sur Back Assign 69 Surround Settings 115 System (Settings) 58, 116 System Audio Control 88 System Power Off 88 T Test Tone 68, 69, 113 Tuner 71 Tuner (Settings - Sony STRDA3500ES | Operating Instructions - Page 147
- Sony STRDA3500ES | Operating Instructions - Page 148
Sony Corporation Printed in Malaysia
-
 1
1 -
 2
2 -
 3
3 -
 4
4 -
 5
5 -
 6
6 -
 7
7 -
8
-
9
-
10
-
11
-
12
-
13
-
14
-
15
-
16
-
17
-
18
-
19
-
20
-
21
-
22
-
23
-
24
-
25
-
26
-
27
-
28
-
29
-
30
-
31
-
32
-
33
-
34
-
35
-
36
-
37
-
38
-
39
-
40
-
41
-
42
-
43
-
44
-
45
-
46
-
47
-
48
-
49
-
50
-
51
-
52
-
53
-
54
-
55
-
56
-
57
-
58
-
59
-
60
-
61
-
62
-
63
-
64
-
65
-
66
-
67
-
68
-
69
-
70
-
71
-
72
-
73
-
74
-
75
-
76
-
77
-
78
-
79
-
80
-
81
-
82
-
83
-
84
-
85
-
86
-
87
-
88
-
89
-
90
-
91
-
92
-
93
-
94
-
95
-
96
-
97
-
98
-
99
-
100
-
101
-
102
-
103
-
104
-
105
-
106
-
107
-
108
-
109
-
110
-
111
-
112
-
113
-
114
-
115
-
116
-
117
-
118
-
119
-
120
-
121
-
122
-
123
-
124
-
125
-
126
-
127
-
128
-
129
-
130
-
131
-
132
-
133
-
134
-
135
-
136
-
137
-
138
-
139
-
140
-
141
-
142
-
143
-
144
-
145
-
146
-
147
-
148
 |
 |

©2009 Sony Corporation
4-144-907-
11
(1)
Multi Channel AV
Receiver
Operating Instructions
STR-DA3500ES