Toshiba 56HM66 Owner's Manual - English - Page 48
How to replace the lamp unit - lamp replacement
 |
UPC - 022265251454
View all Toshiba 56HM66 manuals
Add to My Manuals
Save this manual to your list of manuals |
Page 48 highlights
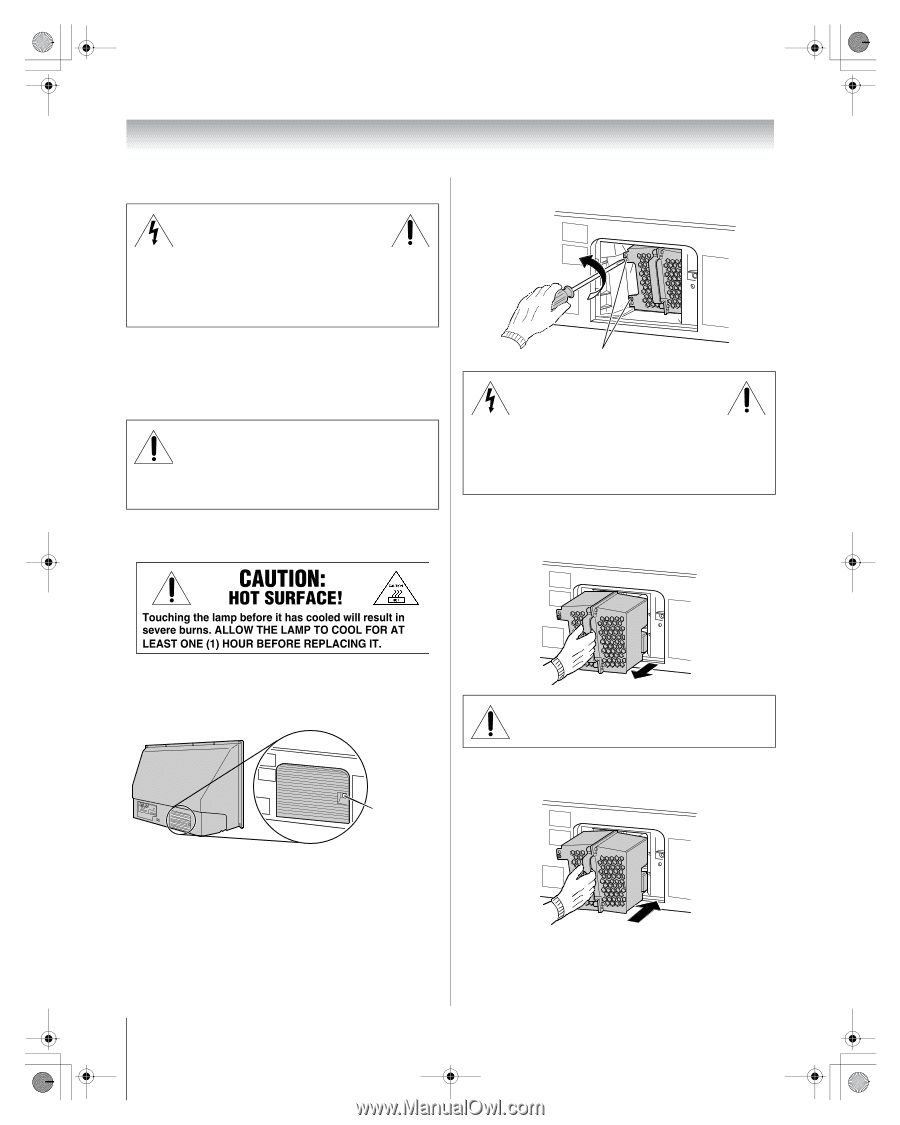
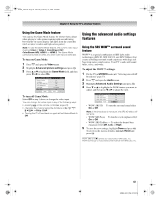
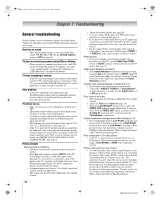
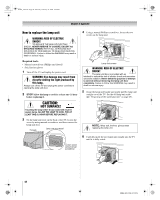
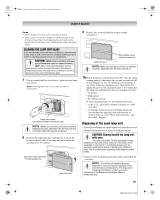
HM66_EN.book Page 48 Thursday, February 23, 2006 2:49 PM Chapter 8: Appendix How to replace the lamp unit WARNING: RISK OF ELECTRIC SHOCK! TO REDUCE THE RISK OF ELECTRIC SHOCK, NEVER REMOVE TV COVERS, EXCEPT AS SPECIFIED HEREIN. REFER ALL SERVICING NOT SPECIFIED IN THIS MANUAL TO QUALIFIED SERVICE PERSONNEL. Failure to follow this WARNING may result in death or serious injury. Required tools: • Manual screwdrivers (Phillips and slotted) • Soft, lint-free gloves 1 Turn off the TV and unplug the power cord. WARNING: Eye damage may result from directly viewing the light produced by this lamp. Always turn off the TV and unplug the power cord before opening the lamp unit door. 2 STOP! Allow the lamp to cool for at least one (1) hour before replacing it. 4 Using a manual Phillips screwdriver, loosen the two screws on the lamp unit. Lamp unit screws WARNING: RISK OF ELECTRIC SHOCK! The lamp unit door is provided with an interlock to reduce the risk of electric shock and excessive ultraviolet radiation. Never defeat its purpose or attempt to service without removing the lamp unit door completely. Failure to follow this WARNING may result in death or serious injury. 5 Grasp the lamp unit handle and gently pull the lamp unit straight out of the TV. Set the old lamp unit aside (- "Disposing of the used lamp unit" on page 49). [ 3 On the lamp unit door on the back of the TV, loosen the screw by using manual screwdriver, and then remove the lamp unit door. TV back Lamp unit door detail Loosen screw using manual screwdriver NOTE: Wear soft, lint-free gloves when replacing the lamp unit. 6 Carefully insert the new lamp unit straight into the TV until it is fully seated. 48 HM66 (E/F) Web 213:276
-
 1
1 -
2
-
3
-
4
-
5
-
6
-
7
-
8
-
9
-
10
-
11
-
12
-
13
-
14
-
15
-
16
-
17
-
18
-
19
-
20
-
21
-
22
-
23
-
24
-
25
-
26
-
27
-
28
-
29
-
30
-
31
-
32
-
33
-
34
-
35
-
36
-
37
-
38
-
39
-
40
-
41
-
42
-
 43
43 -
 44
44 -
 45
45 -
 46
46 -
 47
47 -
 48
48 -
 49
49 -
 50
50 -
 51
51 -
 52
52 -
 53
53 -
54
-
55
-
56
 |
 |