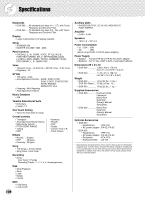
Yamaha DGX-500 Owner's Manual - Page 107
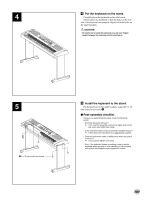
Put the keyboard on the stand., Post-assembly checklist, Fix the keyboard to the angle brackets
 |
View all Yamaha DGX-500 manuals
Add to My Manuals
Save this manual to your list of manuals |
Page 107 highlights
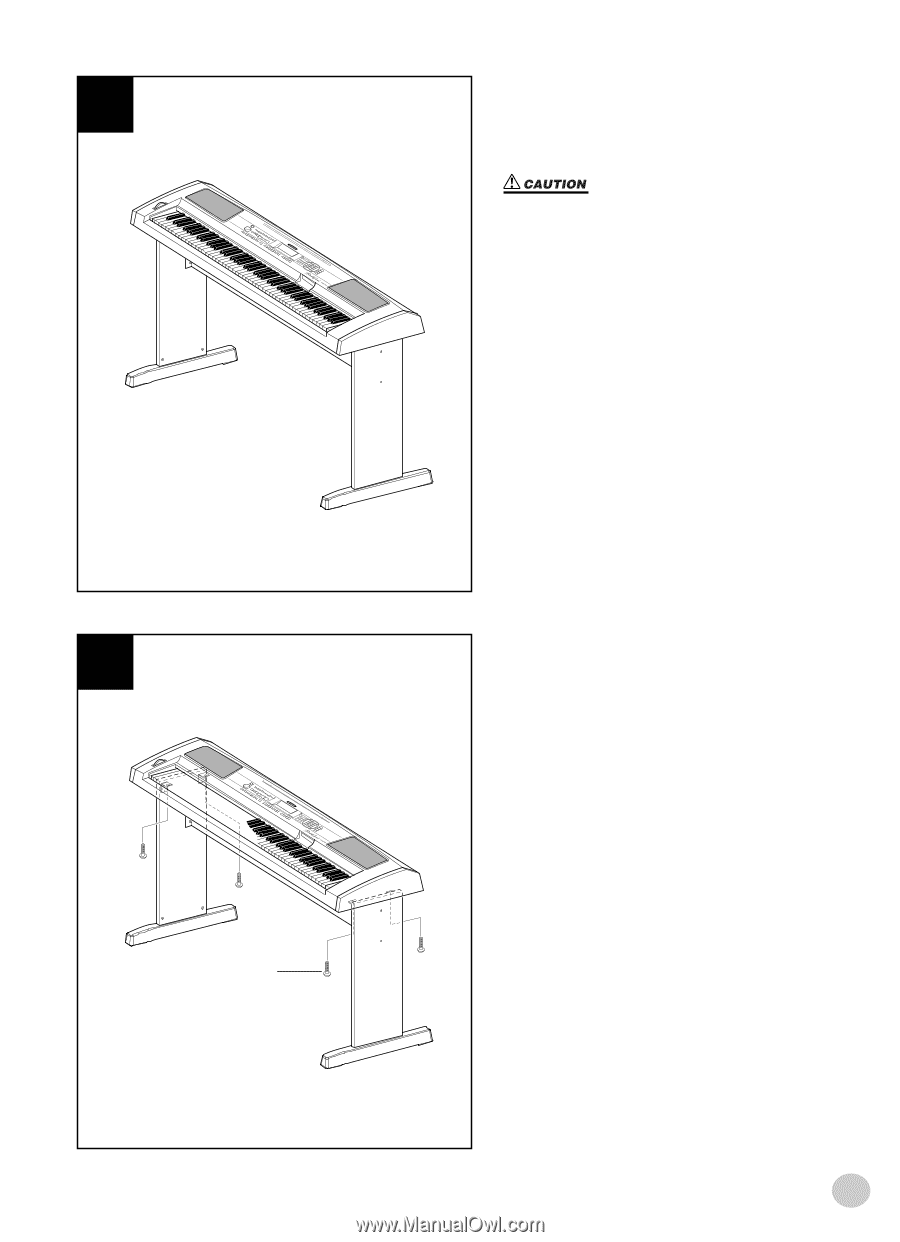
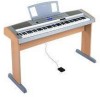
4 V Put the keyboard on the stand. Carefully place the keyboard on the side boards. Slowly move the keyboard so that the holes on the bot- tom of the keyboard are properly aligned with the holes on the angle brackets. • Be careful not to drop the keyboard or to get your fingers caught between the keyboard and the stand parts. 5 t 5 x 16 mm round head screws B Install the keyboard to the stand. Fix the keyboard to the angle brackets, using the 5 x 16 mm round head screws t. I Post-assembly checklist Once you've assembled the stand, check the following points: • Are there any parts left over? ➔ If so, read the assembly instructions again and correct any errors you might have made. • Is the instrument clear of doors and other movable fixtures? ➔ If not, move the instrument to an appropriate location. • Does the instrument make a rattling noise when you play it or move it? ➔ If so, properly tighten all screws. • Also, if the keyboard makes a creaking noise or seems unsteady when you play it, refer carefully to the assembly instructions and diagrams and retighten all screws. 107
-
 1
1 -
2
-
3
-
4
-
5
-
6
-
7
-
8
-
9
-
10
-
11
-
12
-
13
-
14
-
15
-
16
-
17
-
18
-
19
-
20
-
21
-
22
-
23
-
24
-
25
-
26
-
27
-
28
-
29
-
30
-
31
-
32
-
33
-
34
-
35
-
36
-
37
-
38
-
39
-
40
-
41
-
42
-
43
-
44
-
45
-
46
-
47
-
48
-
49
-
50
-
51
-
52
-
53
-
54
-
55
-
56
-
57
-
58
-
59
-
60
-
61
-
62
-
63
-
64
-
65
-
66
-
67
-
68
-
69
-
70
-
71
-
72
-
73
-
74
-
75
-
76
-
77
-
78
-
79
-
80
-
81
-
82
-
83
-
84
-
85
-
86
-
87
-
88
-
89
-
90
-
91
-
92
-
93
-
94
-
95
-
96
-
97
-
98
-
99
-
100
-
101
-
 102
102 -
 103
103 -
 104
104 -
 105
105 -
 106
106 -
 107
107 -
 108
108 -
 109
109 -
 110
110 -
 111
111 -
 112
112
 |
 |